Canon FAXPHONE L170 Basic Guide - Page 118
Reserve Copy
 |
UPC - 013803038477
View all Canon FAXPHONE L170 manuals
Add to My Manuals
Save this manual to your list of manuals |
Page 118 highlights
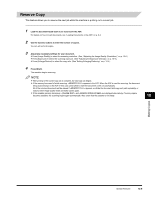
Reserve Copy This feature allows you to reserve the next job while the machine is printing out a current job. 1 Load the document faced down to be reserved in the ADF. For details on how to load documents, see "Loading Documents in the ADF," on p. 6-3. 2 Use the numeric buttons to enter the number of copies. You can set up to 99 copies. 3 Adjust any necessary settings for your document. • Press [Image Quality] to select the scanning resolution. (See, "Adjusting the Image Quality (Resolution)," on p. 10-6.) • Press [Exposure] to select the scanning exposure. (See "Adjusting the Exposure (Density)," on p. 10-6.) • Press [Enlarge/Reduce] to select the copy ratio. (See "Setting Enlarging/Reducing," on p. 10-4.) 4 Press [Start]. The machine begins scanning. NOTE • After printing of the current copy job is complete, the next copy job begins. • If the memory becomes full while scanning, appears in the LCD. When the ADF is used for scanning, the document being scanned stops in the ADF. In this case, press [Set] to make the document come out automatically. All of the scanned documents will be erased if appears, so divide the document and copy each part separately, or select a lower image quality mode and make copies again. • If the available memory decreases, and are displayed alternatively. If memory space becomes available, the scanning begins again automatically. Also, check that the cassette is not empty. 10 Making Copies Special Features 10-9
-
 1
1 -
2
-
3
-
4
-
5
-
6
-
7
-
8
-
9
-
10
-
11
-
12
-
13
-
14
-
15
-
16
-
17
-
18
-
19
-
20
-
21
-
22
-
23
-
24
-
25
-
26
-
27
-
28
-
29
-
30
-
31
-
32
-
33
-
34
-
35
-
36
-
37
-
38
-
39
-
40
-
41
-
42
-
43
-
44
-
45
-
46
-
47
-
48
-
49
-
50
-
51
-
52
-
53
-
54
-
55
-
56
-
57
-
58
-
59
-
60
-
61
-
62
-
63
-
64
-
65
-
66
-
67
-
68
-
69
-
70
-
71
-
72
-
73
-
74
-
75
-
76
-
77
-
78
-
79
-
80
-
81
-
82
-
83
-
84
-
85
-
86
-
87
-
88
-
89
-
90
-
91
-
92
-
93
-
94
-
95
-
96
-
97
-
98
-
99
-
100
-
101
-
102
-
103
-
104
-
105
-
106
-
107
-
108
-
109
-
110
-
111
-
112
-
 113
113 -
 114
114 -
 115
115 -
 116
116 -
 117
117 -
 118
118 -
 119
119 -
 120
120 -
 121
121 -
 122
122 -
 123
123 -
124
-
125
-
126
-
127
-
128
-
129
-
130
-
131
-
132
-
133
-
134
-
135
-
136
-
137
-
138
-
139
-
140
-
141
-
142
-
143
-
144
-
145
-
146
-
147
-
148
-
149
-
150
-
151
-
152
-
153
-
154
-
155
-
156
-
157
-
158
-
159
-
160
-
161
-
162
-
163
-
164
-
165
-
166
-
167
-
168
-
169
-
170
-
171
-
172
-
173
-
174
-
175
-
176
-
177
-
178
-
179
-
180
-
181
-
182
-
183
-
184
-
185
-
186
-
187
-
188
-
189
-
190
-
191
-
192
-
193
-
194
-
195
 |
 |
