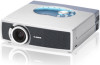
Canon LV-X2 Owners Manual
Canon LV-X2 Manual
 |
View all Canon LV-X2 manuals
Add to My Manuals
Save this manual to your list of manuals |
Canon LV-X2 manual content summary:
- Canon LV-X2 | Owners Manual - Page 1
Multimedia Projector LV-X2 Owner's Manual E English - Canon LV-X2 | Owners Manual - Page 2
, check operations and cable connections and try the solutions in the "TROUBLESHOOTING" section in the end at this manual. If the problem still persists, contact the sales dealer where you purchased the projector or the service center. SAFETY PRECAUTIONS WARNING : TO REDUCE THE RISK OF FIRE OR - Canon LV-X2 | Owners Manual - Page 3
conditions: a. When the power cord or plug is damaged or frayed. b. If liquid has been spilled into the projector. c. If the projector has been exposed to rain or water. d. If the projector does not operate normally by following the operating instructions. Adjust only those controls that are covered - Canon LV-X2 | Owners Manual - Page 4
Communication Commission Notice Multimedia Projector, Model : LV-X2U, LV-X2E This device complies with POWER CORD REQUIREMENT The AC Power Cord supplied with this projector meets the requirement for use in the country you purchased it. AC Power Cord for the United States and Canada : AC Power Cord - Canon LV-X2 | Owners Manual - Page 5
OPERATING RANGE 15 REMOTE CONTROL UNIT BATTERY INSTALLATION 15 SETTING MENU 35 TOP CONTROLS AND INDICATORS 16 OPERATING THE ON-SCREEN MENU 17 HOW TO OPERATE THE ON-SCREEN MENU 17 APPENDIX 37 FLOW OF ON-SCREEN MENU OPERATION 17 MENU BAR 18 LAMP REPLACEMENT 37 LAMP REPLACE 37 BASIC - Canon LV-X2 | Owners Manual - Page 6
of your computer is higher than 1280 x 1024, reset a computer output for lower resolution. N Multi-Scan System This projector has a Multi-Scan System to conform to recognition of almost all computer output signals allowing quick. Making manual adjustment of frequency and other settings unnecessary - Canon LV-X2 | Owners Manual - Page 7
NOMENCHTOR FRONT INFRARED REMOTE RECEIVER PROJECTION LENS FOCUS RING SPEAKER ZOOM LEVER LENS COVER BACK TOP CONTROLS AND INDICATORS EXHAUST VENTS POWER CORD CONNECTOR HOT AIR EXHAUSTED ! Air blown from Exhaust Vents is hot. When using or installing the projector, the following precautions - Canon LV-X2 | Owners Manual - Page 8
ON THE POWER CORD AC Power Cord must meet requirements of the country where the projector is used. Confirm an AC plug type with the chart below and proper AC Power Cord must be used. If the supplied AC Power Cord does not match your AC outlet, contact your sales dealer. Projector side AC Outlet - Canon LV-X2 | Owners Manual - Page 9
is designed to project on a flat projection surface. G The projector can be focused from 3.6'(1.1m) ~ 26.2'(8m). G Refer to the figure below to adjust a screen size. ROOM LIGHT The brightness of a room has a great impact - Canon LV-X2 | Owners Manual - Page 10
time, attach the Lens Cover. Before attaching the Lens Cover, be sure to turn the projector off and disconnect the AC Power cord from the AC outlet. 1 Secure the Strap for the Lens Cover through the hole. 2 Turn the projector upside down and secure the Strap for the Lens Cover to the bottom of - Canon LV-X2 | Owners Manual - Page 11
port of the computer to this connector. The Remote Control Unit supplied with the projector can not control a computer. Consult your dealer for details. (Refer to P12.) RESET BUTTON The projector uses a micro processor for control and occasionally, need to be reset. This can be done by pressing the - Canon LV-X2 | Owners Manual - Page 12
the computer with the optional Wireless Remote Control Unit. RGB IN VIDEO IN RESET Y -- Pb / Cb -- Pr / Cr COMPUTER AUDIO IN CONTROL AV AUDIO IN S-VIDEO IN AUDIO OUT RGB IN NOTE : When connecting the cable, the power cords of both the projector and the external equipment should be - Canon LV-X2 | Owners Manual - Page 13
over S-VIDEO jack. VIDEO IN RESET Y -- Pb / Cb -- Pr / Cr COMPUTER AUDIO IN CONTROL AV AUDIO IN S-VIDEO IN AUDIO OUT RGB IN Terminals of the Projector Audio Input External Audio Equipment Audio Amplifier Audio Speaker (stereo) NOTE : When connecting the cable, the power cords of both - Canon LV-X2 | Owners Manual - Page 14
SET MENU NO SHOW FREEZE AUTO PC ADJ. IMAGE P-TIMER POWER ON-OFF BUTTON Used to turn the projector on or off. (P19) D.ZOOM BUTTONS Used to select observe the following precautions : G Do not bend, drop Remote Control Unit, or expose Remote Control Unit to moisture or heat. G For cleaning, use - Canon LV-X2 | Owners Manual - Page 15
) whenever pressing any button. Maximum operating range for Remote Control Unit is about 16.4' (5m) and 60° in front of the projector. 16.4' (5 m) 30° 30° REMOTE CONTROL UNIT BATTERY INSTALLATION 1 Pull out Battery Holder. 2 Replace with new battery. Install with battery (+),(-) marks properly - Canon LV-X2 | Owners Manual - Page 16
is ready to be turned on. And it flashes green in Power Management mode. (P36) LAMP REPLACE INDICATOR Turns to yellow when the life of the projection lamp draws to an end. (P37) LAMP INDICATOR Becomes dim when the projector is turned on. And bright when the projector is in stand-by mode. 16 - Canon LV-X2 | Owners Manual - Page 17
HOW TO OPERATE THE ON-SCREEN MENU You can control and adjust this projector through the ON-SCREEN MENU. Refer to the following see below) or adjust the value of item by pressing POINT button(s) on Top Control or on Remote Control Unit. ✽ Pointer is the icon on ON-SCREEN MENU to select the item. - Canon LV-X2 | Owners Manual - Page 18
the MENU BUTTON while connected to the PC input source. GUIDE WINDOW Shows selected item of ONSCREEN MENU. PC SYSTEM MENU MENU Used to change settings of projector or reset Lamp Replace Counter. (Refer to P35, 36) INPUT MENU Used to select input source either Computer or Video. (Refer to P22) PC - Canon LV-X2 | Owners Manual - Page 19
11~13 for connecting the equipment.) 2 Connect the projector's AC Power Cord into an AC outlet. LAMP Indicator lights red, and READY Indicator lights green. 3 Press POWER ON-OFF button on Top Control or on Remote Control Unit to ON. LAMP Indicator dims, and Cooling Fans start to operate. Preparation - Canon LV-X2 | Owners Manual - Page 20
L button or POINT UP button. Reduce the lower width with KEYSTONE M button or POINT DOWN button. PICTURE FREEZE FUNCTION Press the FREEZE button on the Remote Control Unit to freeze the picture on-screen. To cancel the FREEZE function, press the FREEZE button again or press any other button. 20 - Canon LV-X2 | Owners Manual - Page 21
press the NO SHOW button again or press any other button. No show Message disappears after 4 seconds. P-TIMER FUNCTION Press the P-TIMER button on the Remote Control Unit. The timer display "00 : 00" appears on the screen and the timer starts to count time (00 : 00 ~ 59 : 59). To stop the P-TIMER - Canon LV-X2 | Owners Manual - Page 22
OPERATION Choose Computer by pressing the INPUT button on Top Control or on Remote Control Unit. If the projector cannot reproduce a proper image, select correct input source through the MENU OPERATION (see below). INPUT button Computer Video MENU OPERATION 1 Press the MENU button and the ON - Canon LV-X2 | Owners Manual - Page 23
COMPUTER INPUT COMPATIBLE COMPUTER SPECIFICATIONS This projector can accept the signal from all computers with the V, H-Frequency below mentioned and less than 140 MHz of Dot Clock. ON-SCREEN DISPLAY RESOLUTION VGA 1 640 x 480 VGA 2 720 x 400 VGA 3 640 x 400 VGA 4 640 x 480 VGA 5 640 x 480 - Canon LV-X2 | Owners Manual - Page 24
. button on the Remote Control Unit. Store adjustment parameters. Adjustment parameters from Auto PC Adjustment can be memorized in this projector. Once parameters are memorized, setting can be done just by selecting Mode in PC SYSTEM Menu (P22). Refer to step 3 of MANUAL PC ADJUSTMENT section (P26 - Canon LV-X2 | Owners Manual - Page 25
cannot reproduce a proper image and the image may be displayed as a flickering picture, a non-synchronized picture, a non-centered picture or a skewed picture. This projector has Manual PC Adjustment to enable you to precisely adjust several parameters to match those special signal formats. This - Canon LV-X2 | Owners Manual - Page 26
area displayed with this projector. Press the POINT LEFT/RIGHT button(s) to decrease/increase value to match the resolution of image. Press clear and then press the SET button. Other icons operate as follows. Reset Reset all adjustment parameters on the adjustment dialog box to the previous figure. - Canon LV-X2 | Owners Manual - Page 27
Custom by pressing the IMAGE button on the Remote Control Unit. Standard Normal picture adjustment preset on this projector. IMAGE button Standard High contrast High contrast the SET button. The level being selected. Custom User preset picture adjustment in the IMAGE ADJUST Menu (P28, 29). 27 - Canon LV-X2 | Owners Manual - Page 28
COMPUTER INPUT IMAGE LEVEL ADJUSTMENT 1 Press the MENU button and the ON-SCREEN MENU will appear. Press the POINT LEFT/RIGHT buttons to move the red frame to the IMAGE ADJUST Menu icon. 2 Press the POINT DOWN button to move the red frame to the item that you want to adjust. and then press the SET - Canon LV-X2 | Owners Manual - Page 29
also expanded by pressing D.ZOOM W (Wide) button on Remote Control Unit. Digital zoom - When Digital zoom - is selected, projector cannot display any resolution higher than 1280 X 1024. If your computer's screen resolution is higher than 1280 X 1024, lower the resolution before connecting projector - Canon LV-X2 | Owners Manual - Page 30
by pressing the INPUT button on the Top Control or on the Remote Control Unit. If the projector cannot reproduce a proper video source, select correct input source through the MENU OPERATION (see below). INPUT button Video Computer MENU OPERATION 1 Press the MENU button and the ON-SCREEN MENU - Canon LV-X2 | Owners Manual - Page 31
, and then adjusts itself to optimize its performance. AV SYSTEM MENU (COMPONENT VIDEO) COMPONENT VIDEO SIGNAL FORMAT If the projector cannot reproduce a proper video image, it is necessary to select a specific component video signal format among 480i, 575i, 480p, 575p, 720p, 1035i and 1080i. AV - Canon LV-X2 | Owners Manual - Page 32
, Cinema, and Custom by pressing the IMAGE button on Remote Control Unit. IMAGE button Standard Standard Normal picture adjustment preset on this projector. Cinema Picture level adjusted for the picture with fine tone. Custom User preset picture adjustment in IMAGE ADJUST Menu (P33,34). Cinema - Canon LV-X2 | Owners Manual - Page 33
When this function is "ON", it automatically enhances the contrast of the bright and dark part of image. NOTE : Tint cannot be adjusted when the video system is PAL, SECAM, PAL-M or PAL-N. Auto fleshtone When this function is "ON", it produces a more vivid image according to the image condition - Canon LV-X2 | Owners Manual - Page 34
manual adjustment. To set this manual adjustment, select Custom by pressing the IMAGE button or through the IMAGE SELECT MENU (refer to P32). Other icons operate as follows. Reset Reset and press the SET button. Provides image at a normal video aspect ratio of 4 : 3. Wide Provides image at a - Canon LV-X2 | Owners Manual - Page 35
Off ···· sets On-Screen Displays disappeared except; G ON-SCREEN MENU G "Power off?" message (P19) G P-TIMER G "No signal" message (P36) G "Wait a moment!" message Logo When this function is "On," the projector displays the Canon logo when starting up. Ceiling When this function is "On," the picture - Canon LV-X2 | Owners Manual - Page 36
NOTE : When the battery of Remote Control Unit is replaced, the remote control code automatically returns to the normal code (Code 1). Lamp counter reset This function is used to reset the Lamp Replace Counter. When replacing the Projection Lamp, reset the Lamp Replace Counter by using this function - Canon LV-X2 | Owners Manual - Page 37
SCREW LAMP COVER HANDLE LAMP ASSEMBLY SCREW ORDER REPLACEMENT LAMP The Replacement Lamp can be ordered through your dealer. When ordering a Projection Lamp, give the following information to the dealer. G Model No. of your projector : G Replacement Lamp Type No. : LV-X2 LV-LP15 (Service Parts - Canon LV-X2 | Owners Manual - Page 38
should be replaced, i.e., if the LAMP REPLACE INDICATOR lights up, replace the lamp with a new one IMMEDIATELY after the projector has cooled down. ( Follow carefully the instructions in the LAMP REPLACEMENT section of this manual. ) Continuous use of the lamp with the LAMP REPLACE INDICATOR lighted - Canon LV-X2 | Owners Manual - Page 39
service personnel from an authorized dealer or a service power cord from the AC outlet. AIR FILTER(Small) 2 Turn the projector upside down and remove the two Air Filters (Large and Small) by pulling the latches upward. 3 Clean the Air Filters with a brush or wash out dust and particles. 4 Replace - Canon LV-X2 | Owners Manual - Page 40
or service center for assistance, check the following: 1. Make sure you have connected a projector to your computer or video equipment as described in the section "CONNECTING THE PROJECTOR" on pages 11 ~ 13. 2. Check cable connection. Verify that all computer, video and power cord are properly - Canon LV-X2 | Owners Manual - Page 41
of the Remote Control Unit is set to conform to the projector. (See "SETTING" section on page 35, 36.) WARNING : High voltages are used to operate this projector. Do not attempt to open the cabinet. If the problem still persists after following all operating instructions, contact the sales dealer - Canon LV-X2 | Owners Manual - Page 42
Owner's Manual AC Power Cord Remote Control Unit and Battery VGA Cable Carrying Bag Lens Cover G The specifications are subject to change without notice. OPTIONAL PARTS The parts listed below are optionally supplied. When ordering those parts, give name and Type No. of it to the sales dealer - Canon LV-X2 | Owners Manual - Page 43
. 6 Ground (Red) 14 Vert. sync. 7 Ground (Green) 15 Reserved 8 Ground (Blue) CONTROL PORT CONNECTOR Terminal : Mini DIN 8-PIN Connect control port (PS/2, Serial or ADB port) on your computer to this connector with Control Cable (not supplied). Pin Configuration 876 5 43 21 PS/2 Serial ADB - Canon LV-X2 | Owners Manual - Page 44
. 9/F, The Hong Kong Club Building, 3A Chater Road, Central, Hong Kong CANON SINGPORE PTE. LTD. 79 Anson Road #09-01/06, Singapore 079906 CANON AUSTRALIA PTY. LTD. 1 Thomas Holt Drive, North Ryde, Sydney, N.S.W.2113, Australia CANON NEW ZEALAND LTD. Suite 4, 2nd Floor, Asda Plaza, Fred Thomas Drive
-
 1
1 -
 2
2 -
 3
3 -
 4
4 -
 5
5 -
 6
6 -
 7
7 -
8
-
9
-
10
-
11
-
12
-
13
-
14
-
15
-
16
-
17
-
18
-
19
-
20
-
21
-
22
-
23
-
24
-
25
-
26
-
27
-
28
-
29
-
30
-
31
-
32
-
33
-
34
-
35
-
36
-
37
-
38
-
39
-
40
-
41
-
42
-
43
-
44
 |
 |

E
English
Multimedia Projector
Owner’s Manual
LV-X2