Canon PowerShot A50 PowerShot A50 Hardware Guide
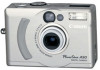
Canon PowerShot A50 Manual
 |
View all Canon PowerShot A50 manuals
Add to My Manuals
Save this manual to your list of manuals |
Canon PowerShot A50 manual content summary:
- Canon PowerShot A50 | PowerShot A50 Hardware Guide - Page 1
Read this guide first if you are new to this camera. It describes the camera functions, setup and operating procedures. - Canon PowerShot A50 | PowerShot A50 Hardware Guide - Page 2
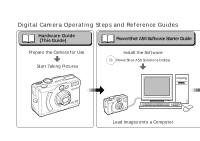
Digital Camera Operating Steps and Reference Guides Hardware Guide (This Guide) PowerShot A50 Software Starter Guide Prepare the Camera for Use Start Taking Pictures Install the Software PowerShot A50 Solutions Disk(s) Load Images onto a Computer - Canon PowerShot A50 | PowerShot A50 Hardware Guide - Page 3
[ software name ] " On-screen Guide or PowerShot A50 Software Stater Guide On-screen "Help" Processing Images with the Software Read This First Camera Setup Quick Start Basic Functions Buttons Mode Dial Functions Stitch Assist Mode Menu Features Other Functions Appendices Customer Support 3 - Canon PowerShot A50 | PowerShot A50 Hardware Guide - Page 4
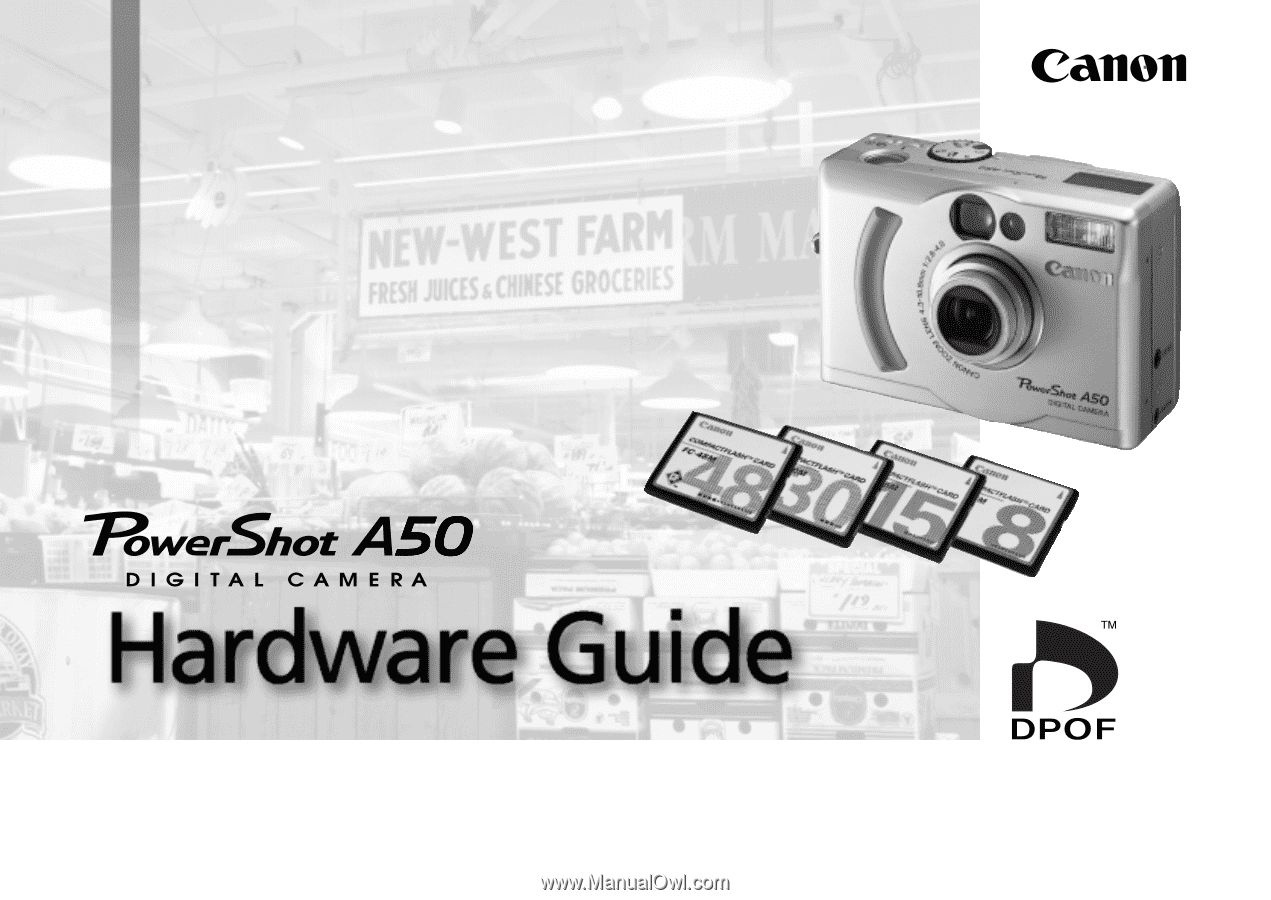
you for purchasing a Canon PowerShot A50, the easy-to-use digital camera with a wide-angle zoom lens and a large range of built-in functions incorporated into a compact, completely flat body. Carefully read this guide and the accompanying PowerShot A50 Software Starter Guide to ensure you obtain - Canon PowerShot A50 | PowerShot A50 Hardware Guide - Page 5
Digital Camera, Model PS1026 This device complies with Part the user is manual. If such changes or modifications should be made, you could be required to stop operation of the equipment. Canon U.S.A. Inc. One Canon Plaza, Lake Success, NY 11042, U.S.A. Tel No. (516) 328-5600 THIS CLASS B DIGITAL - Canon PowerShot A50 | PowerShot A50 Hardware Guide - Page 6
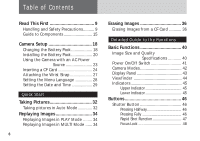
Images in MULTI Mode ...... 34 6 Erasing Images 36 Erasing Images from a CF Card 36 Detailed Guide to the Functions Basic Functions 40 Image Size and Quality Specifications 40 Power On/Off Switch 41 Camera Modes 42 Display Panel 43 Viewfinder 44 Indicators 45 Upper Indicator 45 Lower - Canon PowerShot A50 | PowerShot A50 Hardware Guide - Page 7
Zoom Buttons 49 Continuous/Self-Timer/+ Button ......... 49 Flash/- Button 51 MACRO/JUMP Button 52 LCD/VIDEO Button 54 MENU Button Info 75 Erase 76 Protect 77 Rotate 77 Slide Show 78 Print Order 81 Setup 85 LCD 85 Beep 85 Power Save 85 Date/Time 86 Review 86 File No. Reset 87 7 - Canon PowerShot A50 | PowerShot A50 Hardware Guide - Page 8
88 Language 89 Other Functions 90 Connecting to a TV 90 Changing the Button Battery 91 Changing the Recording Format ........ 94 Appendices 95 Camera Maintenance 95 Troubleshooting 96 List of Message Codes 100 List of Messages 101 Specifications 102 Index 105 Customer Support 107 8 - Canon PowerShot A50 | PowerShot A50 Hardware Guide - Page 9
that you are operating the camera correctly. Please note that Canon Inc., its subsidiaries and affiliates, and distributors of its digital cameras are not liable for any consequential damages arising from any malfunction of a PowerShot camera or CompactFlash™ card (CF card) that results in the - Canon PowerShot A50 | PowerShot A50 Hardware Guide - Page 10
instruct you in the safe and correct operation of the camera and its accessories to prevent injuries or damage to yourself, other persons and equipment. • In the next few pages, the term "equipment" refers primarily to the camera and its power supply accessories to the camera or batteries by a child - Canon PowerShot A50 | PowerShot A50 Hardware Guide - Page 11
: turn the Mode Dial to the L (Lock) position and remove the camera battery or unplug the compact power adapter from the electrical outlet. Please consult your camera distributor or the closest Canon Customer Support Help Desk. • Prevent the equipment from contact with, or immersion in, water and - Canon PowerShot A50 | PowerShot A50 Hardware Guide - Page 12
or other hazards. Use only the recommended compact power adapter and accessories. • Power down the computer and unplug the power adapter cord before attempting to connect the interface cable to avoid the risk of electrical shock. • Do not place the batteries near a heat source or expose it to direct - Canon PowerShot A50 | PowerShot A50 Hardware Guide - Page 13
periods of time may cause it to overheat, distort or catch fire. • The camera terminal of the compact power adapter cord is designed for exclusive use with the PowerShot A50. Do not use it with other products or batteries. There is risk of fire and other hazards. Caution • Avoid using, placing or - Canon PowerShot A50 | PowerShot A50 Hardware Guide - Page 14
it from the bag. If Condensation Forms Inside the Camera Stop using the camera immediately if you detect condensation. Continued use may damage the equipment. Remove the CF card, battery and compact power adapter (if connected) from the camera and wait until the moisture evaporates completely before - Canon PowerShot A50 | PowerShot A50 Hardware Guide - Page 15
Guide to Components Front View • Lens • Viewfinder (p. 44) • Autofocus (AF) Auxiliary Light Emitter • Flash (p. 51) • Red-Eye Reduction Lamp (p. 51) • VIDEO Terminal (p. 90) • DIGITAL Terminal (see Software Starter Guide) 15 Read This First - Canon PowerShot A50 | PowerShot A50 Hardware Guide - Page 16
27) • LCD Panel* • DC Coupler Cable Cover (p. 23) • Battery Cover (p. 20) • Battery Cover Lock (p. 20) • Tripod Socket *The LCD panel is produced with extremely highprecision manufacturing techniques, with more than 99.99% of the pixels operating to specification. Less than 0.01% of the pixels may - Canon PowerShot A50 | PowerShot A50 Hardware Guide - Page 17
• (p. 45) • Mode Dial (p. 56) • Shutter Button (p. 46) • Flash/- Button (p. 51) • Continuous/Self-Timer/+ Button (p. 49) SET Button • (pp. 55, 69) MENU Button • (pp. 54, 69) • Zoom Buttons (p. 49) • LCD/VIDEO Button (p. 54) • MACRO/JUMP Button (p. 52) 17 - Canon PowerShot A50 | PowerShot A50 Hardware Guide - Page 18
contents, see the back of the System Map packaged with your camera. Charging the Battery Pack Follow the instructions below to charge Battery Pack NB-5H before installing it in the camera. 1. Attach the AC power cord to Compact Power Adapter CA-PS100/100E and plug it into an electrical outlet - Canon PowerShot A50 | PowerShot A50 Hardware Guide - Page 19
when charging is complete or the compact power adapter is not in use. • Do not charge batteries other than Battery Pack NB-5H with the compact power adapter. • The battery pack continues to discharge a minute amount while it is left in the camera, even if the camera is not used. Since continual - Canon PowerShot A50 | PowerShot A50 Hardware Guide - Page 20
The following describes how to insert Battery Pack NB-5H or 2CR5 lithium battery into the camera. Fully charge Battery Pack NB-5H before using it for the first time. 1. Ensure that the Mode Dial is turned to the L (Lock) position (power off). 2. Slide the battery cover lock to the release position - Canon PowerShot A50 | PowerShot A50 Hardware Guide - Page 21
at low temperatures will severely limit their performance. Even new batteries may only provide power for a few shots. You can obtain more shots if you warm the battery in your pocket immediately prior to use. When operating the camera at close to 32˚F (0˚C) , keep the LCD panel off and compose - Canon PowerShot A50 | PowerShot A50 Hardware Guide - Page 22
Setup • You are advised to use a power kit (sold separately in some regions), a charged battery pack or an AC adapter if you will be using the camera frequently at low temperatures, loading images onto a computer or performing other tasks that require extended operation. • Replace the supplied - Canon PowerShot A50 | PowerShot A50 Hardware Guide - Page 23
as a DC power source for the camera. DC Coupler DR-100A Compact Power Adapter CA-PS100/100E Cable Cover DC Indicator DC Terminal • Please note that the compact power adapter will not charge a battery pack while in use as a DC power source for the camera. • Unplug the compact power adapter cord - Canon PowerShot A50 | PowerShot A50 Hardware Guide - Page 24
the procedures below to insert a CF card into the camera. • Please note that using CF cards in this camera that have been used in other manufacturers' cameras or edited with other application software may cause malfunctions. 1. Slide the lock for the CF card slot cover to the open position and - Canon PowerShot A50 | PowerShot A50 Hardware Guide - Page 25
. Actual totals may differ according to the shooting conditions, • Do not remove the battery or remove a CF card while the camera is writing to a CF card, erasing images or reading from a CF card. • A CF card is a high-precision electronic component. Do not bend, apply force to, or subject - Canon PowerShot A50 | PowerShot A50 Hardware Guide - Page 26
Camera Setup Precautions with CF Cards Please note that the PC card icon may take a moment (about 1 minute) to appear on the Taskbar of certain computers after insertion in a PC card slot. If this occurs, you should delete the Windows® standard driver and install the SanDisk ATA FlashDisk device - Canon PowerShot A50 | PowerShot A50 Hardware Guide - Page 27
Strap A wrist strap is supplied with this camera. Follow the procedures below to attach it. 1. Insert the thin part of the wrist strap through the strap holder. 3. Pull the wrist strap through the loop of the thin part until the loop slips over the plastic part of the strap. Strap holder 2. Insert - Canon PowerShot A50 | PowerShot A50 Hardware Guide - Page 28
Setup Setting the Menu Language You can change the language in which messages are displayed. The Language menu may appear differently on cameras in some regions. SET Button MACRO/JUMP Button +/- Buttons 1. Turn the Mode Dial to the PLAY position. 2. Press and hold the SET button, then press - Canon PowerShot A50 | PowerShot A50 Hardware Guide - Page 29
Camera Setup Setting the Date and Time Set the correct date and time with the following procedures. SET Button MENU Button +/- Buttons 1. Turn the Mode Dial to the (Auto) position. 2. Press the MENU button to display the Rec. menu. LCD Panel Mode Dial 29 - Canon PowerShot A50 | PowerShot A50 Hardware Guide - Page 30
Camera Setup 3. Press the +/- buttons to select [Setup]. Then press the SET button to display the Setup menu. 5. Press the SET button to move between your satisfaction, press the MENU button to save your selection and exit. 7. Turn the Mode Dial to the L (Lock) position to shut off the power. 30 - Canon PowerShot A50 | PowerShot A50 Hardware Guide - Page 31
Quick Start Now that you have the camera set up, lets jump right into picture taking. This section explains the most basic procedures for taking, reviewing and deleting images. Since any images you record can be readily deleted, try actually taking some shots as you read through this section. 31 - Canon PowerShot A50 | PowerShot A50 Hardware Guide - Page 32
Taking Pictures Taking Pictures in Auto Mode Viewfinder Menu Button Mode Dial Shutter Button Zoom Buttons LCD/VIDEO Button LCD Panel About Power Save • The lens cover will close and the camera will automatically power down if left for 3 minutes. Turn the Mode Dial or press any button to - Canon PowerShot A50 | PowerShot A50 Hardware Guide - Page 33
-Stage Shutter Button The camera features a two-stage shutter battery cover or CF card slot cover while this indicator is flashing. However, the next shot can usually be taken while the green light is flashing (p.47). Other Shooting Features Using the LCD Panel to Compose a Shot .. p. 54 Reviewing - Canon PowerShot A50 | PowerShot A50 Hardware Guide - Page 34
Replaying Images Replaying Images in PLAY Mode Replays images one at a time on the LCD panel. Replaying Images in MULTI Mode Replays sets of up to 9 images on the LCD panel. Replaying Images Mode Dial +/- Buttons LCD Panel 1. Turn the Mode Dial to the PLAY position. 2. Press the + button to - Canon PowerShot A50 | PowerShot A50 Hardware Guide - Page 35
Replaying Images 2. Select image (green frame) by pressing the +/- buttons. • Display the selected image at full size by turning the Mode Dial to the PLAY position. • Display the next or previous nine images by pressing the MACRO/JUMP button and +/- buttons. To select an image, press the MACRO/JUMP - Canon PowerShot A50 | PowerShot A50 Hardware Guide - Page 36
Erasing Images Erasing Images Erasing Images from a CF Card Follow the procedures below to erase an image. 1. Turn the Mode Dial to the PLAY or MULTI position. SET Button Menu Button +/- Buttons Mode Dial 2. - Canon PowerShot A50 | PowerShot A50 Hardware Guide - Page 37
Erasing Images • To delete all the images at once, select [All] in Step 5. • If you want to stop the erase procedure, select [Cancel]. • To display the previous menu, press the MENU button. Shortcut In Play mode, you can erase the currently displayed image by pressing and holding the SET button and - Canon PowerShot A50 | PowerShot A50 Hardware Guide - Page 38
- Canon PowerShot A50 | PowerShot A50 Hardware Guide - Page 39
Detailed Guide to the Functions This section provides individual explanations of each camera function. Read it to find out more detail about each function or for instructions on using the advanced modes, such as the Stitch Assist mode and Menu settings. - Canon PowerShot A50 | PowerShot A50 Hardware Guide - Page 40
Basic Functions Image Size and Quality Specifications The PowerShot A50 can take pictures with the following screen sizes and qualities. Size/Quality Large/ ) • Figures noted herein reflect standard shooting conditions established by Canon. Actual file sizes will vary among photographic subjects. - Canon PowerShot A50 | PowerShot A50 Hardware Guide - Page 41
displayed on the computer monitor if you do not use a camera function for approximately five minutes. If you do not use a camera function for an additional minute, the camera automatically powers down. • To reactivate the camera after it is powered down, turn the Mode Dial or press any button. • You - Canon PowerShot A50 | PowerShot A50 Hardware Guide - Page 42
the camera. (The exposure can be finetuned manually with the Exposure Compensation function.) : Stitch Assist Mode Taking pictures in this mode is helpful if you intend to merge several images into a single high-quality panoramic image. 42 Merging images is easy if you use the PhotoStitch software - Canon PowerShot A50 | PowerShot A50 Hardware Guide - Page 43
the camera top shows the status of camera settings, battery levels and the approximate number of images that can be stored in the CF card at images that can be stored in the CF card. • Message codes on the Display panel will indicate errors or the camera status. (p. 100) Single Mode Continuous Mode - Canon PowerShot A50 | PowerShot A50 Hardware Guide - Page 44
field of the viewfinder will change as the Zoom button is pressed. • In Macro mode (subject 6.7 to 20in. (17 to 50cm) from the lens), the actual area shot by the lens is slightly lower than the area shown in the viewfinder. The closer the camera is to the subject, the larger the - Canon PowerShot A50 | PowerShot A50 Hardware Guide - Page 45
viewfinder. These lights shine or flash to confirm various actions and camera modes when you press the shutter button. Upper Indicator Lower Indicator or print information is being written to the CF card. Never open the battery cover or CF card slot cover while the indicator is flashing. Opening - Canon PowerShot A50 | PowerShot A50 Hardware Guide - Page 46
in the bottom of the LCD panel. This is a warning that hand tremors or camera movement may blur the image. 46 • In the Macro mode, the lower indicator will shine all the way down captures an image and stores the data on the CF card. • When an image is captured, a single beep will sound and the upper - Canon PowerShot A50 | PowerShot A50 Hardware Guide - Page 47
• If the LCD panel is turned off and the Review function is set to On, a preview of the the data is temporarily stored in the camera's on-board memory until it can be written to the CF card. As long as there is adequate free capacity in the on-board memory, a second shot can be taken immediately - Canon PowerShot A50 | PowerShot A50 Hardware Guide - Page 48
the shutter button halfway, two beeps will sound and a green or red indicator will light, indicating a focus lock. You are now free to reorient the camera knowing that your target subject is in focus. • If you release the shutter button only to the halfway point after taking a picture, you can take - Canon PowerShot A50 | PowerShot A50 Hardware Guide - Page 49
), to telephoto, 10.8 mm (35 mm film equivalent: 70 mm). Press the right side of the button to zoom in (telephoto) and the left side to zoom out (wide angle). Telephoto Wide Angle • The zoom setting can not be changed while a menu is displayed or after the first shot has been taken in - Canon PowerShot A50 | PowerShot A50 Hardware Guide - Page 50
• The icon indicates the Continuous mode. If the shutter button is pressed continuously, up to 15 frames will be shot continuously until the internal memory is full. The image size is automatically set to Small. • The icon indicates the Self-Timer mode. The shutter will automatically activate 10 - Canon PowerShot A50 | PowerShot A50 Hardware Guide - Page 51
Flash Off functions. • The absence of a flash icon indicates the Auto mode. The flash will automatically respond to the light level detected by the camera. • The icon indicates the Red-Eye Reduction mode. When the flash is required, the Red-Eye Reduction Lamp will light when you press the shutter - Canon PowerShot A50 | PowerShot A50 Hardware Guide - Page 52
button halfway. • In Macro mode, the actual area shot by the lens is slightly lower than the area shown in the viewfinder. The closer the camera is to the photographic subject, the larger the difference between these areas. - Canon PowerShot A50 | PowerShot A50 Hardware Guide - Page 53
• In Macro mode, the subject can be shot within a range of 6.7 to 20in. (17 to 50cm) and remain in focus. • When shooting in Macro mode, check the LCD panel to confirm that the focus and scope of the image are correct. Play Mode and Multi Mode: This button turns the Jump mode on or off. Jump Mode: - Canon PowerShot A50 | PowerShot A50 Hardware Guide - Page 54
turned on. • The Video Output does not function while shooting is in progress. • If the LCD panel is left on for a long period, the camera may become warm. This is normal and does not constitute a breakdown 54 MENU Button Auto Mode, Program Mode and Stitch Assist Mode: This button displays - Canon PowerShot A50 | PowerShot A50 Hardware Guide - Page 55
Buttons Play Mode and Multi Mode: This button displays the Play menu. (p.68) SET Button This button selects the current menu option shown on the LCD panel. Image Quality and Size Settings • When a menu is already displayed on the LCD panel, pressing the MENU button restores the previous screen. - Canon PowerShot A50 | PowerShot A50 Hardware Guide - Page 56
PowerShot A50. Lock Auto Mode The Mode Dial should be set to the L (Lock) position when the camera is not in use. In this mode the lens cover will close and the camera power will shut off. • Ensure that you turn the Mode Dial to the L (Lock) position before you change a battery, eject a CF card - Canon PowerShot A50 | PowerShot A50 Hardware Guide - Page 57
function (no compression) for shooting. Buttons Available in Program Mode Flash Button The Flash On, Flash Off and Red-Eye Reduction functions can be manually set with this button. The icon indicates that the Red-Eye Reduction mode is selected. The icon indicates the Flash On mode is selected. The - Canon PowerShot A50 | PowerShot A50 Hardware Guide - Page 58
is Stitch Assist? The Stitch Assist mode is designed to make it easier to merge separate panoramic images into a single, seamless image using a software program on a computer. You can shoot a photographic subject that won't fit into a single frame, such as a landscape, and stitch it together later - Canon PowerShot A50 | PowerShot A50 Hardware Guide - Page 59
at time on the LCD panel. Multi Mode In Multi mode, you can display images from the CF card in groups of nine on the LCD panel. Mode Dial Functions • Press the + or - button to display the next or previous recorded image. • You can - Canon PowerShot A50 | PowerShot A50 Hardware Guide - Page 60
computer. • The camera may cease to respond when the Mode Dial is turned from the PC position to another setting. Turn the Mode Dial to the L (Lock) position and back again, or press any button to resume normal operation. • Please refer to the PowerShot A50 Software Starter Guide for further details - Canon PowerShot A50 | PowerShot A50 Hardware Guide - Page 61
panoramic scene. In Stitch Assist mode, images can be shot in horizontal, vertical or 2x2 (matrix) sequences. The merged image cannot be viewed in the camera's LCD panel. Buttons Available in Stitch Assist Mode FLASH Button • The Auto, Red-Eye Reduction, Flash On and Flash Off modes can be set with - Canon PowerShot A50 | PowerShot A50 Hardware Guide - Page 62
the camera contains the PhotoStitch Shooting Guide, an On-screen Guide introducing shooting hints and techniques for improved results with PhotoStitch. Please read this guide before shooting.(In some regions, the PhotoStitch Shooting Guide is included in print, in the PowerShot A50 Software Starter - Canon PowerShot A50 | PowerShot A50 Hardware Guide - Page 63
Procedures for Shooting Horizontal/Vertical Sequences Horizontal Sequence ... 4 3 2 1 ... 1. Turn the Mode Dial to the (Stitch Assist) position. Vertical Sequence 1 2 3 4 ... ... 2. Select [Horizontal] or [Vertical] with the +/- buttons and press the SET button. Horizontal Sequence To change - Canon PowerShot A50 | PowerShot A50 Hardware Guide - Page 64
Stitch Assist Mode 4. Orient the camera so that the second frame overlaps a small portion of in the sequence. • Do not worry about minor discrepancies in the overlapped areas because the computer software can compensate for them when the images are merged. • You can check through a sequence by - Canon PowerShot A50 | PowerShot A50 Hardware Guide - Page 65
Procedures for Shooting 2x2 (Matrix) Sequences 4 1 2. Select [2x2] with the +/- buttons and press the SET button. 3 2 1. Turn the Mode Dial to the (Stitch Assist) position. 3. Shoot the first image. After the indicator stops flashing green, the recorded image will display in the upper right, - Canon PowerShot A50 | PowerShot A50 Hardware Guide - Page 66
display in the lower right, and a preview of the new photographic subject captured by the lens will appear in the lower left. 66 5. Orient the camera so that the third image will correctly overlap a portion of the second image and take the shot. After the indicator stops flashing green, the third - Canon PowerShot A50 | PowerShot A50 Hardware Guide - Page 67
6. Orient the camera so that the fourth image will correctly overlap a portion of of the first image. • Do not worry about minor discrepancies in the overlapped areas because the computer software can compensate for them when the images are merged. • You can check through the sequence by pressing - Canon PowerShot A50 | PowerShot A50 Hardware Guide - Page 68
option (Play menu), and to select date, time and other camera settings, such as the LCD panel brightness (Setup menu). Record 73 • Slow Shutter p. 74 • Setup p. 85 LCD p. 85 Beep p. 85 Power Save p. 85 Date/Time p. 86 Review p. 86 68 File No. Reset p. 87 • Show/Hide Info p. 75 • - Canon PowerShot A50 | PowerShot A50 Hardware Guide - Page 69
Basic Menu Operations Menu functions are operated by the MENU, +/- and SET buttons. MENU Button SET Button +/- Buttons next option and press the - button to display the previous option. The selected item is highlighted - Button + Button Menu Features MENU Button This button turns the menu - Canon PowerShot A50 | PowerShot A50 Hardware Guide - Page 70
Record Menu Pressing the MENU button in the Auto, Program or Stitch Assist mode displays the Record menu on the LCD panel. Program Mode Stitch Assist Mode Quality The Quality option is used to set the format in which the image will be recorded. Image quality can be set to [Normal], [Fine] or [CCD - Canon PowerShot A50 | PowerShot A50 Hardware Guide - Page 71
120 KB 65 KB 1560 KB • JPEG file sizes will vary between photographic subjects. • The file sizes given here reflect standard shooting conditions established by Canon. • The Small and CCD RAW sizes are not available in Auto mode. CCD RAW size is not available in Stitch Assist mode. • A second CCD - Canon PowerShot A50 | PowerShot A50 Hardware Guide - Page 72
simply by pressing the shutter button. Menu Features • The Exposure Compensation function cannot be activated in Auto Mode • To use this function, aim the camera at the photographic subject and watch the effect on the image in the LCD panel as you adjust the exposure with the +/buttons. Press the - Canon PowerShot A50 | PowerShot A50 Hardware Guide - Page 73
are available. Settings other than Auto will cause the respective icon to display in the lower left of the LCD panel. Icons Auto: Camera selects the setting automatically. Day Light: For shooting outdoors in bright daylight. Cloudy: For shooting in cloudy conditions or in twilight. Tungsten - Canon PowerShot A50 | PowerShot A50 Hardware Guide - Page 74
selects a setting automatically. Night Scene: For night scene. • In the [On] or [Night Scene] mode, hand tremors and camera movement may prevent a clear image from being shot. Affix the camera to a tripod to shoot, or take a test shot and examine it before shooting for real. • In the [On] or - Canon PowerShot A50 | PowerShot A50 Hardware Guide - Page 75
function displays the image number of the selected image and the total number of images. When the total number of images requires four or more digits, all image numbers are replaced by the number sign "#". Menu Features 75 - Canon PowerShot A50 | PowerShot A50 Hardware Guide - Page 76
Erase This function can be used to erase image files from a CF card. • When confirmation messages are displayed, select [OK] to erase, or [Cancel] to cancel, this single images for erasing. • Selecting the [All] option erases all the images on a CF card with the exception of protected images. 76 - Canon PowerShot A50 | PowerShot A50 Hardware Guide - Page 77
Protect The Protect function locks an image file to prevent accidental deletion from the CF card. This function is also used to unlock image files. Rotate The Rotate function can be used to rotate a recorded image 90˚ clockwise or counterclockwise for - Canon PowerShot A50 | PowerShot A50 Hardware Guide - Page 78
data. Slide Show This function automatically scrolls through the images on a CF card displaying each in turn as in a slide show. You can set the length option. The All Images option displays the complete set of images on a CF card. Select Show 1, 2 or 3, then use the Mark function to select the - Canon PowerShot A50 | PowerShot A50 Hardware Guide - Page 79
Mark/Unmark This function is used to mark or unmark images for replay in a slide show. You can save marked images in shows 1 to 3. A checkmark appears beside slide shows in which marked images have already been registered. • CCD RAW images can be maked and selected for Slide Show playback, but they - Canon PowerShot A50 | PowerShot A50 Hardware Guide - Page 80
all marked data contained in shows 1 to 3. Play Time The length of time an image is displayed on the LCD panel can be set to [+/- Manual] or to the [3 sec.], [5 sec.] or [10 sec.] settings. Menu Features • Selecting [OK] deletes the marks. Selecting [Cancel] returns the LCD panel to the Slide - Canon PowerShot A50 | PowerShot A50 Hardware Guide - Page 81
(date and file no.) settings can be specified. The print specifications for the PowerShot A50 conform to the Digital Print Order Format (DPOF) standard, allowing your prints to be output at the specified parameters on compatible digital printers or at developing service outlets. 81 Menu Features - Canon PowerShot A50 | PowerShot A50 Hardware Guide - Page 82
• Some printers or developing services may not be able to output the images as specified. • Print specifications created on a CF card used in another DPOF compliant camera may be overwritten by the PowerShot A50 and lost when you mark images. Please note that a warning [!] icon will appear in the - Canon PowerShot A50 | PowerShot A50 Hardware Guide - Page 83
a double underline indicates numbers 20 to 29. • A CCD RAW image cannot be marked. • All Images This setting adds print marks to all images on a CF card except for CCD RAW images. The number of print copies is automatically set to 1. Menu Features 83 - Canon PowerShot A50 | PowerShot A50 Hardware Guide - Page 84
which prints both the date and file number. • The date is printed in the format set with the [Date Style] function. (p. 86) • The first three digits of the file number represent the folder name and the last four the individual frame number (e.g. 100-0001). However, the file numbers of images taken - Canon PowerShot A50 | PowerShot A50 Hardware Guide - Page 85
displays the Setup submenu. Record Menu Settings Play Menu Settings • The [Review] and [File No. Reset] options do not appear in the Setup submenu with this function. Power Save This option turns the Power Save function on or off. If turned on, the camera will automatically power down if left unused - Canon PowerShot A50 | PowerShot A50 Hardware Guide - Page 86
setting to adjust the camera's date and time settings and display formats. The factory default date style may differ between regions. Review The Review function displays the picture on the LCD panel if you continue to press the shutter after taking a shot. The Review function will still display - Canon PowerShot A50 | PowerShot A50 Hardware Guide - Page 87
method by which the camera assigns file numbers can be selected. The file no. reset [On] setting resets the starting file number to 1 (100-0001) each time a new CF card is inserted. On cards with existing files, the numbers cannot contain 99 in the last two digits. 200 0001 0002 0099 0100 87 - Canon PowerShot A50 | PowerShot A50 Hardware Guide - Page 88
to be contained in a single folder. • Whenever the battery is removed from the camera, the last used folder is closed and subsequent images are format a CF card for use with the camera. If the camera ceases to operate correctly, a corrupted CF card may be the cause. Solve the problem by selecting - Canon PowerShot A50 | PowerShot A50 Hardware Guide - Page 89
other than Canon, reformatting it may solve the problem. If it doesn't, consult the outlet from which you purchased the card. Language Use the Language option to change the language in which messages on the LCD panel are displayed. The Language menu may appear differently on cameras in some - Canon PowerShot A50 | PowerShot A50 Hardware Guide - Page 90
to display the images you have recorded by following the procedures below. 1. Turn the camera's Mode Dial to the L (Lock) position and ensure that the TV power switch is off. 2. Insert one end of the video cable shipped with the camera into the VIDEO Terminal and the other end into the TV's Video In - Canon PowerShot A50 | PowerShot A50 Hardware Guide - Page 91
turn the camera Mode Dial to the L (Lock) position before disconnecting the cable from both battery and exchange it for the spent battery with the following procedures. • The button battery is pre-installed at the factory and may therefore expire earlier than its rated lifespan after the camera - Canon PowerShot A50 | PowerShot A50 Hardware Guide - Page 92
cover lock to the release position and slide the battery cover open. 3. Remove the battery pack. 2CR5 92 NB-5H 4. Take out the button battery holder and remove the spent battery. To remove the button battery holder from the battery chamber, insert a fingernail beneath the indent and gently pry - Canon PowerShot A50 | PowerShot A50 Hardware Guide - Page 93
it forward into place with your fingertip. 7. Replace the battery pack. 8. Close the battery cover and slide the lock to the locked position. • After closing the battery cover, check to make sure that the lock is in the locked position. The camera will not operate unless the lock is set. Other - Canon PowerShot A50 | PowerShot A50 Hardware Guide - Page 94
the Recording Format The PowerShot A50 records images in the "Design rule for Camera File system" industry standard +/buttons and press the SET button. The [Default] setting records in the "Design rule for Camera File system" format and the [CIFF] setting in the CIFF format. 5. Turn the Mode Dial - Canon PowerShot A50 | PowerShot A50 Hardware Guide - Page 95
the lens accumulates dirt that will not come off with a lens blower, contact your camera retailer or the closest Canon Customer Support Help Desk. Viewfinder Use a lens blower to remove dust and dirt from the viewfinder firmly on the LCD panel may damage it or lead to other problems. 95 Appendices - Canon PowerShot A50 | PowerShot A50 Hardware Guide - Page 96
Troubleshooting Problem Camera will not operate Camera will not shoot Cause(s) Battery cover lock not in lock position 2CR5 lithium battery is inserted the wrong way Insufficient battery power (Display panel flashes [Lb]) Incorrect battery type Poor contact between battery and camera terminals Mode - Canon PowerShot A50 | PowerShot A50 Hardware Guide - Page 97
consult the nearest Canon Customer Support Help Desk. Lens will not retract CF card slot cover was accessed • Close the CF card slot cover and reset immediately after Mode Dial was the Mode Dial to the L (Lock) position. turned to the L (Lock) position Appendices Battery cover lock was opened - Canon PowerShot A50 | PowerShot A50 Hardware Guide - Page 98
pack is seated firmly in the charger. • Check the AC power cord connection between the wall socket and the charger. Camera is drawing power from the AC power source • The battery pack won't charge when the camera is drawing power from the compact power adapter. Turn the camera's Mode Dial to the - Canon PowerShot A50 | PowerShot A50 Hardware Guide - Page 99
Problem Image is blurred or out of focus Images are too dark Images are too reflected onto camera from the photographic subject • Change the shooting angle. Camera is set to Flash On mode • Set the camera to the Auto or Flash Off mode. Camera is set to Flash Off mode • Set the camera to the Auto - Canon PowerShot A50 | PowerShot A50 Hardware Guide - Page 100
or replace battery. Battery cover lock is unlocked. Lock it. PC: Camera connected to a PC in PC mode Exx: (xx: number) Camera malfunction. Turn Mode Dial to L (Lock) position and retry shot or replay. Problem exists if error code reappears. Note the number and contact Canon Customer Support Help - Canon PowerShot A50 | PowerShot A50 Hardware Guide - Page 101
may appear on the LCD Panel. Busy: CF card full!: Cannot Record!: No Image.: Image too Large.: CF card error: Naming error!: Incompatible JPEG format: No CF card: Corrupted Data: Cannot rotate: No thumbnail: Unidentified Image: Image is recording on CF card. Or image data is being read for display - Canon PowerShot A50 | PowerShot A50 Hardware Guide - Page 102
Specifications PowerShot A50 Image Sensor: 1,310,000-pixel (total), 1/2.7-inch charge coupled device ( Data Storage: CompactFlash™ card File Format: Design rule for Camera File System/CIFF (Camera Image File Format) Image Compression: Images: JPEG and proprietary Canon format (CRW); Thumbnails: - Canon PowerShot A50 | PowerShot A50 Hardware Guide - Page 103
control: Through the lens (TTL) auto/manual Self-Timer: 10-second delay Interfaces: RS-232C, CF Slot, Video Out Power Supply: 2CR5 lithium battery Nickel-hydride Battery Pack NB-5H Compact Power Adapter CA-PS100/100E CR2016 lithium battery for Date / Clock backup Operating Temperatures - Canon PowerShot A50 | PowerShot A50 Hardware Guide - Page 104
Camera power supply: 18 to 20 VA (100 to 240 V) Operating Temperature: 32˚ to 104˚ F (0˚ to 40˚ C) Dimentions: 3.0 x 4.0 x 1.5 in. (75 x 102 x 39 mm) Weight: Approximately 6.3 oz. (180 g) Battery g) • All data is based on Canon's standard testing methods. Subject to change without notice. 104 - Canon PowerShot A50 | PowerShot A50 Hardware Guide - Page 105
16, 20 Battery Installation 20, 91 Battery Pack NB-5H 18 Beep 85 Button Battery 91 Button Battery holder 92 C Camera Modes 42 Cancel Order 84 CCD RAW 40, 70, 71 CF Card 24 CF Card Slot Cover 16, 24 CF Card Types 25 Clear Marks 79 Clock Not Set Icon 43, 91, 100 Compact Power Adapter CA-PS100 - Canon PowerShot A50 | PowerShot A50 Hardware Guide - Page 106
Shutter 64, 74 Stitch Assist Mode 58, 61 Strap Holder 16 T Television 90 Tripod Socket 16 2CR5 Lithium Battery 21 U Unmark 79 Upper Indicator 45 V Vertical Sequence (Stitch Assist Mode) 58, 63 Video Cable 90 VIDEO Terminal 15, 90 Viewfinder 16, 44 Viewfinder Frame Marks 44 W White Balance 64, 73 - Canon PowerShot A50 | PowerShot A50 Hardware Guide - Page 107
Hotline: (1) 41 99 70 70 Tél: (1) 41 99 77 77 Télécopie: (1) 41 99 79 51 Canon S.A.V. Photo Video France Hotline: (1) 49 04 01 00 Télécopie: (1) 49 04 01 01 Canon Deutschland GmbH Canon-Hotline-Service Customer-Support: 02151/349-555 Telefax: 02151/349-588 Info-Desk Tel: 02151/349-566 Info-Desk Fax - Canon PowerShot A50 | PowerShot A50 Hardware Guide - Page 108
Canon Hongkong Co., Ltd. Phone: 852-2739-0802 Fax: 852-2369-7701 Canon Marketing Services 2 Alexandra Road, #04-01A, Delta House, Singapore 159919 Phone: (65) 273 5311 Fax: (65)273 6786 Canon 49-46-23-46 Fax: +33-1-49-46-23-49 Internet: [email protected] BIT (UK) Limited Tel: +44-1420-83811 - Canon PowerShot A50 | PowerShot A50 Hardware Guide - Page 109
Art Direction: Design: Photography: Writing: English Writing: Yoshisuke Kuramoto, CDS Inc., Tokyo, Japan Sumio Koike, J-Cat Communications, Vancouver, Canada Hideyuki Igarashi, Yoshisuke Kuramoto, CDS Inc., Tokyo, Japan Yoshisuke Kuramoto, CDS Inc., Tokyo, Japan Christian Cowley, Concise - Canon PowerShot A50 | PowerShot A50 Hardware Guide - Page 110
H-IE-021-V1 0599Nixx © 1999 CANON INC. PRINTED IN JAPAN
-
 1
1 -
 2
2 -
 3
3 -
 4
4 -
 5
5 -
 6
6 -
 7
7 -
8
-
9
-
10
-
11
-
12
-
13
-
14
-
15
-
16
-
17
-
18
-
19
-
20
-
21
-
22
-
23
-
24
-
25
-
26
-
27
-
28
-
29
-
30
-
31
-
32
-
33
-
34
-
35
-
36
-
37
-
38
-
39
-
40
-
41
-
42
-
43
-
44
-
45
-
46
-
47
-
48
-
49
-
50
-
51
-
52
-
53
-
54
-
55
-
56
-
57
-
58
-
59
-
60
-
61
-
62
-
63
-
64
-
65
-
66
-
67
-
68
-
69
-
70
-
71
-
72
-
73
-
74
-
75
-
76
-
77
-
78
-
79
-
80
-
81
-
82
-
83
-
84
-
85
-
86
-
87
-
88
-
89
-
90
-
91
-
92
-
93
-
94
-
95
-
96
-
97
-
98
-
99
-
100
-
101
-
102
-
103
-
104
-
105
-
106
-
107
-
108
-
109
-
110
 |
 |
Read this guide first if you are new to this camera.
It describes the camera functions, setup and operating procedures.