Canon PowerShot A50 PowerShot A50 Hardware Guide - Page 67
button after all the images have been
 |
View all Canon PowerShot A50 manuals
Add to My Manuals
Save this manual to your list of manuals |
Page 67 highlights
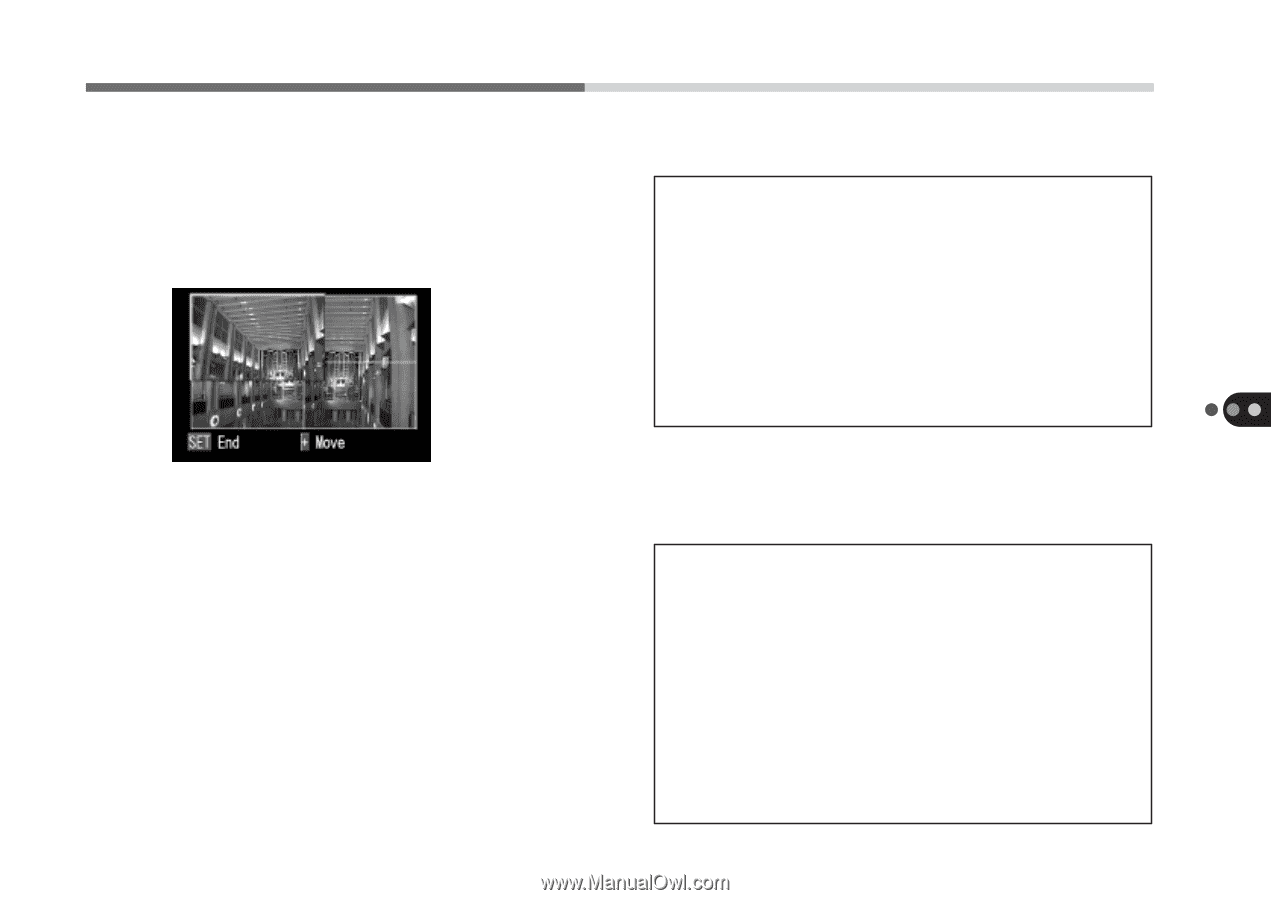
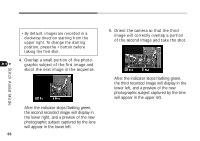
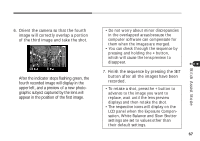
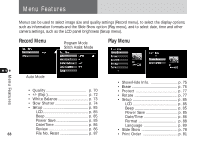
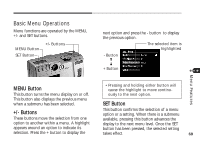
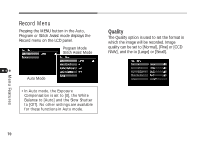
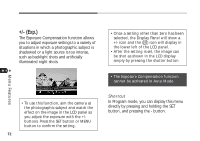
6. Orient the camera so that the fourth image will correctly overlap a portion of the third image and take the shot. After the indicator stops flashing green, the fourth recorded image will display in the upper left, and a preview of a new photographic subject captured by the lens will appear in the position of the first image. • Do not worry about minor discrepancies in the overlapped areas because the computer software can compensate for them when the images are merged. • You can check through the sequence by pressing and holding the + button, which will cause the lens preview to disappear. 7. Finish the sequence by pressing the SET button after all the images have been recorded. • To retake a shot, press the + button to advance to the image you want to replace, wait until the lens preview displays and then retake the shot. • The respective icons will display on the LCD panel when the Exposure Compensation, White Balance and Slow Shutter settings are set to values other than their default settings. 67 Stitch Assist Mode
-
 1
1 -
2
-
3
-
4
-
5
-
6
-
7
-
8
-
9
-
10
-
11
-
12
-
13
-
14
-
15
-
16
-
17
-
18
-
19
-
20
-
21
-
22
-
23
-
24
-
25
-
26
-
27
-
28
-
29
-
30
-
31
-
32
-
33
-
34
-
35
-
36
-
37
-
38
-
39
-
40
-
41
-
42
-
43
-
44
-
45
-
46
-
47
-
48
-
49
-
50
-
51
-
52
-
53
-
54
-
55
-
56
-
57
-
58
-
59
-
60
-
61
-
 62
62 -
 63
63 -
 64
64 -
 65
65 -
 66
66 -
 67
67 -
 68
68 -
 69
69 -
 70
70 -
 71
71 -
 72
72 -
73
-
74
-
75
-
76
-
77
-
78
-
79
-
80
-
81
-
82
-
83
-
84
-
85
-
86
-
87
-
88
-
89
-
90
-
91
-
92
-
93
-
94
-
95
-
96
-
97
-
98
-
99
-
100
-
101
-
102
-
103
-
104
-
105
-
106
-
107
-
108
-
109
-
110
 |
 |