Canon PowerShot SD4500 IS PowerShot SD4500 IS / IXUS 1000 HS Camera User Guide - Page 123
Organizing Images by Category, My Category
 |
View all Canon PowerShot SD4500 IS manuals
Add to My Manuals
Save this manual to your list of manuals |
Page 123 highlights
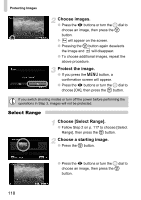
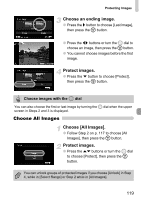
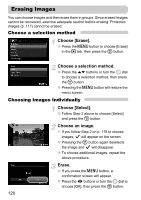
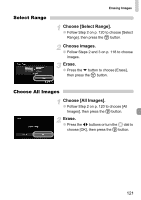
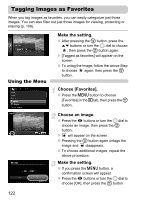
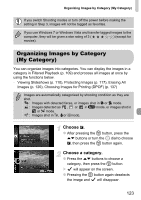
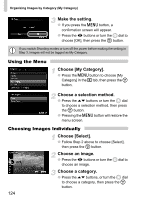
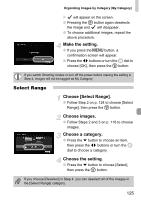
Organizing Images by Category (My Category) If you switch Shooting modes or turn off the power before making the setting in Step 3, images will not be tagged as favorites. If you use Windows 7 or Windows Vista and transfer tagged images to the computer, they will be given a star rating of 3 ( ) (except for movies). Organizing Images by Category (My Category) You can organize images into categories. You can display the images in a category in Filtered Playback (p. 109) and process all images at once by using the functions below. • Viewing Slideshows (p. 110), Protecting Images (p. 117), Erasing All Images (p. 120), Choosing Images for Printing (DPOF) (p. 137) Images are automatically categorized by shooting condition as they are shot. : Images with detected faces, or images shot in I or V mode. : Images detected as , or in A mode, or images shot in or O mode. : Images shot in w, Por tmode. Choose ;. ● After pressing the m button, press the op buttons or turn the  dial to choose ;, then press the m button again. Choose a category. ● Press the op buttons to choose a category, then press the m button. X will appear on the screen. ● Pressing the m button again deselects the image and will disappear. 123
-
 1
1 -
2
-
3
-
4
-
5
-
6
-
7
-
8
-
9
-
10
-
11
-
12
-
13
-
14
-
15
-
16
-
17
-
18
-
19
-
20
-
21
-
22
-
23
-
24
-
25
-
26
-
27
-
28
-
29
-
30
-
31
-
32
-
33
-
34
-
35
-
36
-
37
-
38
-
39
-
40
-
41
-
42
-
43
-
44
-
45
-
46
-
47
-
48
-
49
-
50
-
51
-
52
-
53
-
54
-
55
-
56
-
57
-
58
-
59
-
60
-
61
-
62
-
63
-
64
-
65
-
66
-
67
-
68
-
69
-
70
-
71
-
72
-
73
-
74
-
75
-
76
-
77
-
78
-
79
-
80
-
81
-
82
-
83
-
84
-
85
-
86
-
87
-
88
-
89
-
90
-
91
-
92
-
93
-
94
-
95
-
96
-
97
-
98
-
99
-
100
-
101
-
102
-
103
-
104
-
105
-
106
-
107
-
108
-
109
-
110
-
111
-
112
-
113
-
114
-
115
-
116
-
117
-
 118
118 -
 119
119 -
 120
120 -
 121
121 -
 122
122 -
 123
123 -
 124
124 -
 125
125 -
 126
126 -
 127
127 -
 128
128 -
129
-
130
-
131
-
132
-
133
-
134
-
135
-
136
-
137
-
138
-
139
-
140
-
141
-
142
-
143
-
144
-
145
-
146
-
147
-
148
-
149
-
150
-
151
-
152
-
153
-
154
-
155
-
156
-
157
-
158
-
159
-
160
-
161
-
162
-
163
-
164
-
165
-
166
-
167
-
168
-
169
-
170
-
171
-
172
-
173
-
174
-
175
-
176
-
177
-
178
-
179
-
180
 |
 |