Canon PowerShot SD500 ZoomBrowser EX 5.1 Software User Guide - Page 42
Setting up Slide Shows on the Camera
 |
View all Canon PowerShot SD500 manuals
Add to My Manuals
Save this manual to your list of manuals |
Page 42 highlights
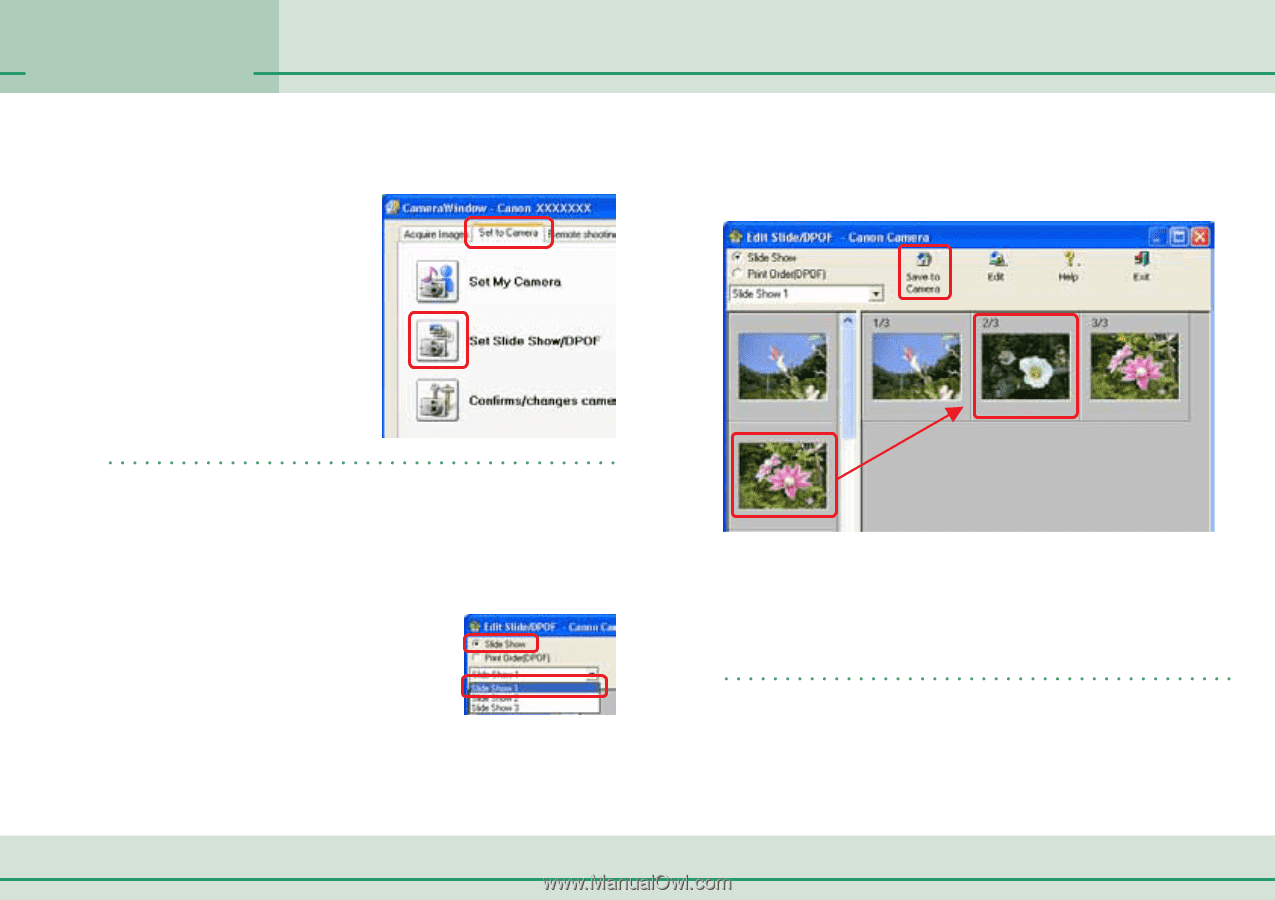
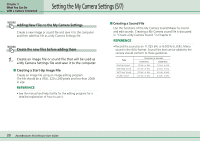
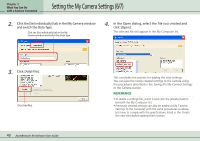
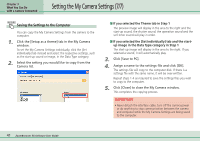
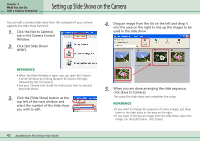
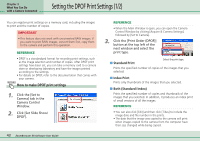
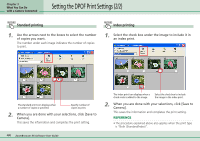
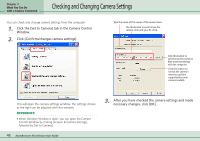
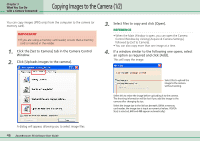
Chapter 3 What You Can Do with a Camera Connected Setting up Slide Shows on the Camera You can edit a camera slide show from the computer (if your camera supports the slide show function). 1. Click the [Set to Camera] tab in the Camera Control Window. 2. Click [Set Slide Show/ DPOF]. 4. Drag an image from the list on the left and drop it into the area on the right to line up the images to be used in the slide show. REFERENCE • When the Main Window is open, you can open the Camera Control Window by clicking [Acquire & Camera Settings], followed by [Set to Camera]. • See your Camera User Guide for instructions how to use and play slide shows. 3. Click the [Slide Show] button at the top left of the next window and select the number of the slide show you wish to edit. 5. When you are done arranging the slide sequence, click [Save to Camera]. This saves the slide show and completes the setup. REFERENCE • If you want to change the sequence of some images, just drag them to the right place in the area on the right. • If you want to remove an image from the slide show, select the image. On the [Edit] menu, click [Clear]. 42 ZoomBrowser EX Software User Guide
-
 1
1 -
2
-
3
-
4
-
5
-
6
-
7
-
8
-
9
-
10
-
11
-
12
-
13
-
14
-
15
-
16
-
17
-
18
-
19
-
20
-
21
-
22
-
23
-
24
-
25
-
26
-
27
-
28
-
29
-
30
-
31
-
32
-
33
-
34
-
35
-
36
-
 37
37 -
 38
38 -
 39
39 -
 40
40 -
 41
41 -
 42
42 -
 43
43 -
 44
44 -
 45
45 -
 46
46 -
 47
47 -
48
-
49
-
50
-
51
-
52
-
53
-
54
-
55
-
56
-
57
-
58
-
59
-
60
-
61
-
62
-
63
-
64
-
65
-
66
-
67
-
68
-
69
-
70
-
71
-
72
-
73
-
74
-
75
-
76
-
77
-
78
-
79
-
80
-
81
-
82
-
83
-
84
-
85
-
86
-
87
-
88
-
89
-
90
-
91
-
92
-
93
-
94
-
95
-
96
-
97
-
98
-
99
-
100
-
101
-
102
-
103
-
104
-
105
-
106
-
107
-
108
-
109
-
110
-
111
-
112
-
113
-
114
-
115
-
116
-
117
-
118
-
119
-
120
-
121
-
122
-
123
-
124
-
125
-
126
-
127
-
128
-
129
-
130
-
131
-
132
-
133
 |
 |