Canon VIXIA HF M400 VIXIA HF M40 / HF M41 / HF M400 Instruction Manual - Page 158
Output Onscreen Displays], LCD Brightness], LCD Screen Dimmer], LCD Mirror Image], Notification
 |
View all Canon VIXIA HF M400 manuals
Add to My Manuals
Save this manual to your list of manuals |
Page 158 highlights
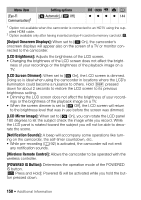
Menu item [Eye-Fi Communication]2 Setting options [O Automatic], [B Off] y CINEMA 1 2 0 z z z z 144 1 Option not available when the camcorder is connected to an HDTV using the supplied HDMI cable. 2 Option available only after having inserted an Eye-Fi card into memory card slot Y. [Output Onscreen Displays]: When set to [A On], the camcorder's onscreen displays will appear also on the screen of a TV or monitor connected to the camcorder. [LCD Brightness]: Adjusts the brightness of the LCD screen. • Changing the brightness of the LCD screen does not affect the bright- ness of your recordings or the brightness of the playback image on a TV. [LCD Screen Dimmer]: When set to [A On], the LCD screen is dimmed. Doing so is ideal when using the camcorder in locations where the LCD's illumination could become a nuisance to others. Hold h pressed down for about 2 seconds to restore the LCD screen to its previous brightness setting. • Dimming the LCD screen does not affect the brightness of your record- ings or the brightness of the playback image on a TV. • When the screen dimmer is set to [B Off], the LCD screen will return to the brightness level that was in use before the screen was dimmed. [LCD Mirror Image]: When set to [A On], you can rotate the LCD panel 180 degrees to let the subject check the image while you record. While the LCD panel is rotated toward the subject you will not be able to decorate the scene. [Notification Sounds]: A beep will accompany some operations like turn- ing on the camcorder, the self-timer countdown, etc. • While pre-recording (0 92) is activated, the camcorder will not emit any notification sounds. [Wireless Remote Control]: Allows the camcorder to be operated with the wireless controller. [POWERED IS Button]: Determines the operation mode of the POWERED IS button. [x Press and Hold]: Powered IS will be activated while you hold the button pressed down. 158 Š Additional Information
-
 1
1 -
2
-
3
-
4
-
5
-
6
-
7
-
8
-
9
-
10
-
11
-
12
-
13
-
14
-
15
-
16
-
17
-
18
-
19
-
20
-
21
-
22
-
23
-
24
-
25
-
26
-
27
-
28
-
29
-
30
-
31
-
32
-
33
-
34
-
35
-
36
-
37
-
38
-
39
-
40
-
41
-
42
-
43
-
44
-
45
-
46
-
47
-
48
-
49
-
50
-
51
-
52
-
53
-
54
-
55
-
56
-
57
-
58
-
59
-
60
-
61
-
62
-
63
-
64
-
65
-
66
-
67
-
68
-
69
-
70
-
71
-
72
-
73
-
74
-
75
-
76
-
77
-
78
-
79
-
80
-
81
-
82
-
83
-
84
-
85
-
86
-
87
-
88
-
89
-
90
-
91
-
92
-
93
-
94
-
95
-
96
-
97
-
98
-
99
-
100
-
101
-
102
-
103
-
104
-
105
-
106
-
107
-
108
-
109
-
110
-
111
-
112
-
113
-
114
-
115
-
116
-
117
-
118
-
119
-
120
-
121
-
122
-
123
-
124
-
125
-
126
-
127
-
128
-
129
-
130
-
131
-
132
-
133
-
134
-
135
-
136
-
137
-
138
-
139
-
140
-
141
-
142
-
143
-
144
-
145
-
146
-
147
-
148
-
149
-
150
-
151
-
152
-
 153
153 -
 154
154 -
 155
155 -
 156
156 -
 157
157 -
 158
158 -
 159
159 -
 160
160 -
 161
161 -
 162
162 -
 163
163 -
164
-
165
-
166
-
167
-
168
-
169
-
170
-
171
-
172
-
173
-
174
-
175
-
176
-
177
-
178
-
179
-
180
-
181
-
182
-
183
-
184
-
185
-
186
-
187
-
188
-
189
-
190
-
191
-
192
-
193
-
194
-
195
-
196
-
197
-
198
-
199
-
200
-
201
-
202
-
203
-
204
 |
 |
