Canon VIXIA HF R300 VIXIA HF R30 / HF R32 / HF R300 Instruction Manual - Page 141
In Standard Definition
 |
View all Canon VIXIA HF R300 manuals
Add to My Manuals
Save this manual to your list of manuals |
Page 141 highlights
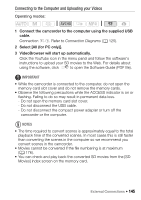
In Standard Definition You can copy your movies by connecting the camcorder to a VCR or a digital video recorder with analog audio/video inputs. Video output will be in standard definition, although the original scenes are in high definition. Connecting Connect the camcorder to the VCR using Connection ". Refer to Connection Diagrams (A 125). Recording 1 External recorder: Load a blank cassette or disc and set the recorder to record pause mode. 2 Turn on the camcorder and set it to mode. • We recommend powering the camcorder using the compact power adapter. • Verify that q > [AV/Headphones] is set to [Ò AV]. 3 Camcorder: Locate the scene or story you wish to copy and pause the playback shortly just before the desired scene. 4 Camcorder: Resume playback. By default, onscreen displays will be embedded in the output video signal. You can change this using the q > [Output Onscreen Displays] setting. 5 External recorder: Start recording when the scene you wish to copy appears; stop recording when it ends. 6 Camcorder: Stop playback. External Connections Š 141
-
 1
1 -
2
-
3
-
4
-
5
-
6
-
7
-
8
-
9
-
10
-
11
-
12
-
13
-
14
-
15
-
16
-
17
-
18
-
19
-
20
-
21
-
22
-
23
-
24
-
25
-
26
-
27
-
28
-
29
-
30
-
31
-
32
-
33
-
34
-
35
-
36
-
37
-
38
-
39
-
40
-
41
-
42
-
43
-
44
-
45
-
46
-
47
-
48
-
49
-
50
-
51
-
52
-
53
-
54
-
55
-
56
-
57
-
58
-
59
-
60
-
61
-
62
-
63
-
64
-
65
-
66
-
67
-
68
-
69
-
70
-
71
-
72
-
73
-
74
-
75
-
76
-
77
-
78
-
79
-
80
-
81
-
82
-
83
-
84
-
85
-
86
-
87
-
88
-
89
-
90
-
91
-
92
-
93
-
94
-
95
-
96
-
97
-
98
-
99
-
100
-
101
-
102
-
103
-
104
-
105
-
106
-
107
-
108
-
109
-
110
-
111
-
112
-
113
-
114
-
115
-
116
-
117
-
118
-
119
-
120
-
121
-
122
-
123
-
124
-
125
-
126
-
127
-
128
-
129
-
130
-
131
-
132
-
133
-
134
-
135
-
 136
136 -
 137
137 -
 138
138 -
 139
139 -
 140
140 -
 141
141 -
 142
142 -
 143
143 -
 144
144 -
 145
145 -
 146
146 -
147
-
148
-
149
-
150
-
151
-
152
-
153
-
154
-
155
-
156
-
157
-
158
-
159
-
160
-
161
-
162
-
163
-
164
-
165
-
166
-
167
-
168
-
169
-
170
-
171
-
172
-
173
-
174
-
175
-
176
-
177
-
178
-
179
-
180
-
181
-
182
-
183
-
184
-
185
-
186
-
187
-
188
-
189
-
190
-
191
-
192
-
193
-
194
-
195
-
196
-
197
-
198
-
199
-
200
-
201
-
202
-
203
-
204
-
205
-
206
-
207
-
208
-
209
-
210
-
211
-
212
-
213
-
214
-
215
-
216
-
217
-
218
-
219
-
220
-
221
-
222
-
223
-
224
-
225
-
226
 |
 |
