Canon XF305 XF300 / XF305 Instruction Manual - Page 120
Noise Reduction, Skin Detail
 |
View all Canon XF305 manuals
Add to My Manuals
Save this manual to your list of manuals |
Page 120 highlights
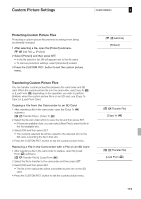
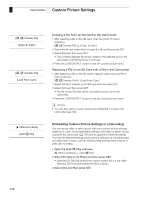
4 Customization Custom Picture Settings 120 [Select]: In addition to the sharpness set by [Level], [Select] sets the sharpness for areas with higher frequencies. Higher values apply more sharpness to areas with higher frequencies. Use this for subjects in which normal sharpening is not effective. This setting is not available when the resolution is 720P. This setting can be adjusted from 0 to 15. (Default: 0) [Knee Aperture]: Allows you to set the sharpness of only the areas above the knee point by adjusting the gain and slope. This is not available when [Gamma] is set to [Cine 1] or [Cine 2]. [Gain]: Sets the amount of sharpness. This setting can be adjusted from 0 to 9. (Default: 0) [Slope]: Sets the slope of the sharpness. This setting can be adjusted from 0 to 3, with 0 having no slope, 1 having a steep slope and 3 having a gradual slope. (Default: 1) [Level Depend]: Lowers the amount of sharpness applied to dark areas of the image. [Level]: Sets the brightness of the dark areas of the image that will be affected. This setting can be adjusted from 0 to 50. (Default: 0) [Slope]: Determines the slope of the area between the upper and lower parts of the gamma curve. This setting can be adjusted from 0 to 3, with 0 having no slope, 1 having a steep slope and 3 having a gradual slope. (Default: 0) [Offset]: Adjusts the sharpness level of dark areas in the image. Setting higher values will lower the sharpness level. This setting can be adjusted from 0 to 50. (Default: 0) Noise Reduction Reduces the amount of noise that appears in the image. Select [Automatic] to have the camcorder adjust the noise automatically. Otherwise, select a level from 1 (lowest level) to 8 (highest level), or select [Off] to turn the noise reduction off. (Default: [Automatic]) Skin Detail The camcorder applies a softening filter to areas in the picture with skin tones to give a more pleasant appearance. By changing these settings, you can determine what areas will be detected as skin tones. A zebra pattern will appear over areas on the screen that are detected as having skin tones. [Effect Level]: Adjusts the level of the filter. The available options are [Off], [Low], [Middle] and [High]. (Default: [Off]) [Hue]: Adjusts the hue for detection of skin tones. This setting can be adjusted from -16 to 16. (Default: 0) [Chroma]: Adjusts the color saturation for detection of skin tones. This setting can be adjusted from 0 to 31. (Default: 16) [Area]: Adjusts the color range for detection of skin tones. This setting can be adjusted from 0 to 31. (Default: 16)
-
 1
1 -
2
-
3
-
4
-
5
-
6
-
7
-
8
-
9
-
10
-
11
-
12
-
13
-
14
-
15
-
16
-
17
-
18
-
19
-
20
-
21
-
22
-
23
-
24
-
25
-
26
-
27
-
28
-
29
-
30
-
31
-
32
-
33
-
34
-
35
-
36
-
37
-
38
-
39
-
40
-
41
-
42
-
43
-
44
-
45
-
46
-
47
-
48
-
49
-
50
-
51
-
52
-
53
-
54
-
55
-
56
-
57
-
58
-
59
-
60
-
61
-
62
-
63
-
64
-
65
-
66
-
67
-
68
-
69
-
70
-
71
-
72
-
73
-
74
-
75
-
76
-
77
-
78
-
79
-
80
-
81
-
82
-
83
-
84
-
85
-
86
-
87
-
88
-
89
-
90
-
91
-
92
-
93
-
94
-
95
-
96
-
97
-
98
-
99
-
100
-
101
-
102
-
103
-
104
-
105
-
106
-
107
-
108
-
109
-
110
-
111
-
112
-
113
-
114
-
 115
115 -
 116
116 -
 117
117 -
 118
118 -
 119
119 -
 120
120 -
 121
121 -
 122
122 -
 123
123 -
 124
124 -
 125
125 -
126
-
127
-
128
-
129
-
130
-
131
-
132
-
133
-
134
-
135
-
136
-
137
-
138
-
139
-
140
-
141
-
142
-
143
-
144
-
145
-
146
-
147
-
148
-
149
-
150
-
151
-
152
-
153
-
154
-
155
-
156
-
157
-
158
-
159
-
160
-
161
-
162
-
163
-
164
-
165
-
166
-
167
-
168
-
169
-
170
-
171
-
172
-
173
-
174
-
175
-
176
-
177
-
178
-
179
-
180
-
181
-
182
-
183
-
184
-
185
-
186
-
187
-
188
-
189
-
190
-
191
-
192
-
193
-
194
-
195
-
196
-
197
-
198
-
199
-
200
-
201
-
202
-
203
-
204
-
205
-
206
-
207
-
208
 |
 |
