Canon XL-H1 Console Software Operations Manual - Page 7
Installing the AV/C Camera Storage, Subunit-WIA Driver
 |
UPC - 086753092998
View all Canon XL-H1 manuals
Add to My Manuals
Save this manual to your list of manuals |
Page 7 highlights
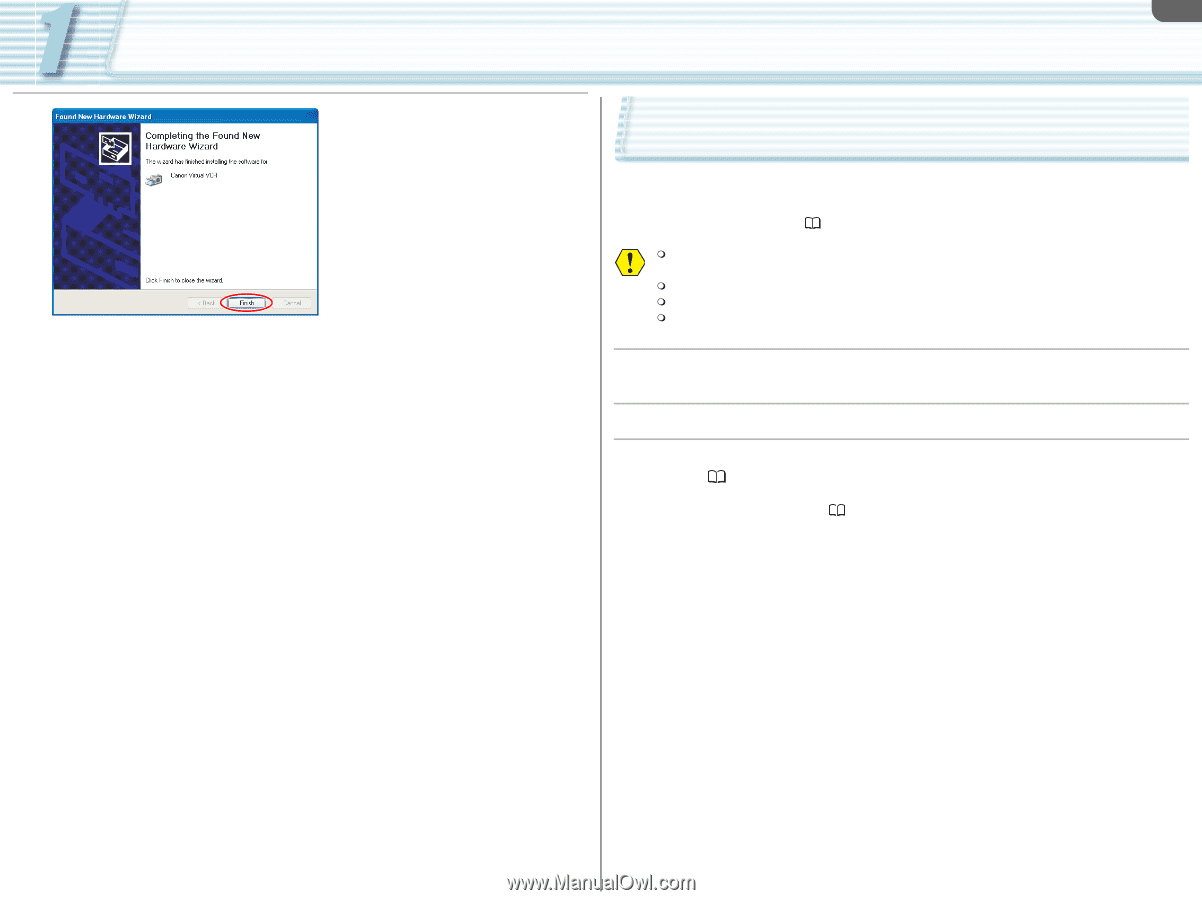
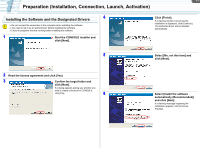
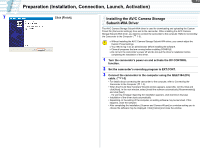
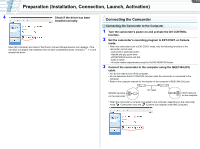
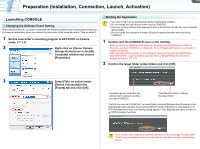
1-2 Preparation (Installation, Connection, Launch, Activation) 7 Click [Finish]. Installing the AV/C Camera Storage Subunit-WIA Driver The AV/C Camera Storage Subunit-WIA driver is used for downloading and uploading the Custom Preset file (Camcorder settings) from and to the camcorder. When installing the AV/C Camera Storage Subunit-WIA driver, you need to connect the camcorder to the computer. Refer to Connecting the Camcorder to the Computer ( 1-3). Without Installing the AV/C Camera Storage Subunit-WIA driver, you cannot adjust the Custom Preset settings. You need to log in as an administrator before installing the software. Close all programs that are running before installing CONSOLE. Do not turn the camcorder's power off and do not quit the driver's installation before completing the installation of the driver. 1 Turn the camcorder's power on and activate the DV CONTROL function. 2 Set the camcorder's recording program to EXT.CONT. 3 Connect the camcorder to the computer using the IEEE1394 (DV) cable. ( 1-3) • For details about connecting the camcorder to the computer, refer to Connecting the Camcorder to the Computer ( 1-3). • When the [Found New Hardware Wizard] window appears, select [No, not this time] and click [Next]. In the next window, select [Install the software automatically (Recommended)] and click [Next]. - If a warning message regarding the installation appears, click [Continue Anyway]. • Installation of the driver starts automatically. • Depending on the setting of the computer, an editing software may be launched. If this happens, close the software. • After completing the installation, [Scanner and Camera Wizard] or a window asking you to choose the software may be displayed. Click [Cancel] and close the window.
-
 1
1 -
 2
2 -
 3
3 -
 4
4 -
 5
5 -
 6
6 -
 7
7 -
 8
8 -
 9
9 -
 10
10 -
 11
11 -
 12
12 -
13
-
14
-
15
-
16
-
17
-
18
-
19
-
20
-
21
-
22
-
23
-
24
-
25
-
26
-
27
-
28
-
29
-
30
-
31
-
32
-
33
-
34
-
35
-
36
-
37
-
38
-
39
-
40
-
41
-
42
-
43
-
44
-
45
-
46
-
47
-
48
-
49
-
50
-
51
-
52
-
53
 |
 |