Casio EX-Z200RD User Guide - Page 82
Displaying Images in the Calendar Screen, Viewing Snapshots and Movies on a TV Screen
 |
UPC - 079767623524
View all Casio EX-Z200RD manuals
Add to My Manuals
Save this manual to your list of manuals |
Page 82 highlights
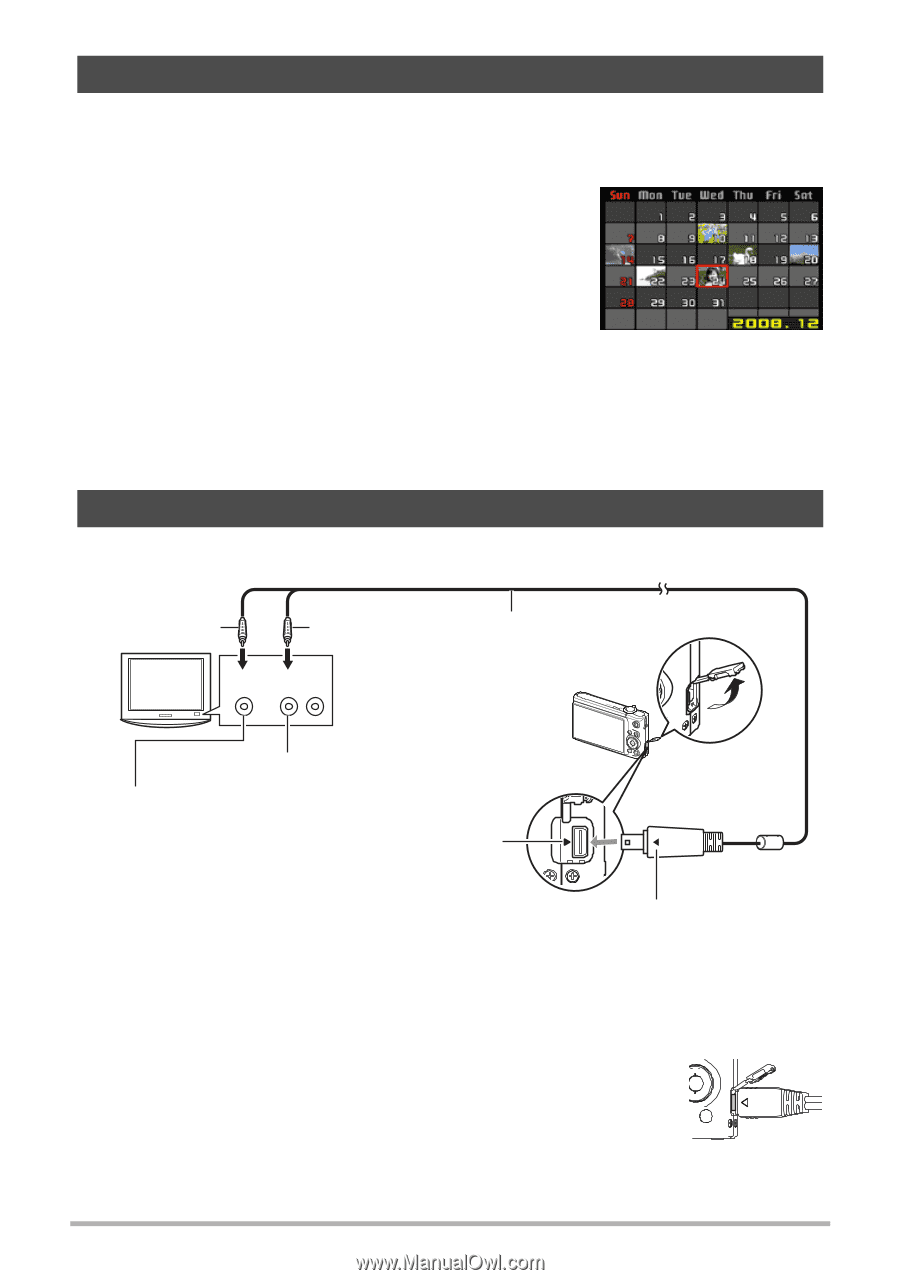
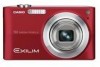
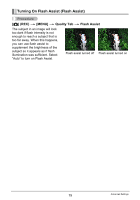
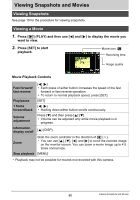
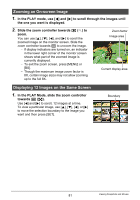
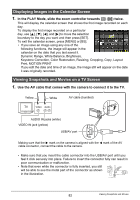
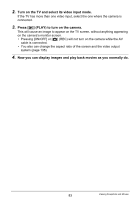
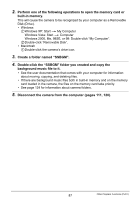
Displaying Images in the Calendar Screen 1. In the PLAY Mode, slide the zoom controller towards w (]) twice. This will display the calendar screen that shows the first image recorded on each day. To display the first image recorded on a particular day, use [8], [2], [4], and [6] to move the selection boundary to the day you want and then press [SET]. To exit the calendar screen, press [MENU] or [BS]. • If you save an image using any one of the following functions, the image will appear in the calendar on the date that you last saved it. Dynamic Range, White Balance, Brightness, Keystone Correction, Color Restoration, Resizing, Cropping, Copy, Layout Print, MOTION PRINT If you edit the date and time of an image, the image still will appear on the date it was originally recorded. Viewing Snapshots and Movies on a TV Screen 1. Use the AV cable that comes with the camera to connect it to the TV. Yellow White TV Video Audio AV cable (bundled) AUDIO IN jacks (white) VIDEO IN jack (yellow) USB/AV port Making sure that the 6 mark on the camera is aligned with the 4 mark of the AV cable connector, connect the cable to the camera. • Make sure that you insert the cable connector into the USB/AV port until you feel it click securely into place. Failure to insert the connector fully can result in poor communication or malfunction. • Note that even while the connector is fully inserted, you still will be able to see the metal part of the connector as shown in the illustration. 82 Viewing Snapshots and Movies
-
 1
1 -
2
-
3
-
4
-
5
-
6
-
7
-
8
-
9
-
10
-
11
-
12
-
13
-
14
-
15
-
16
-
17
-
18
-
19
-
20
-
21
-
22
-
23
-
24
-
25
-
26
-
27
-
28
-
29
-
30
-
31
-
32
-
33
-
34
-
35
-
36
-
37
-
38
-
39
-
40
-
41
-
42
-
43
-
44
-
45
-
46
-
47
-
48
-
49
-
50
-
51
-
52
-
53
-
54
-
55
-
56
-
57
-
58
-
59
-
60
-
61
-
62
-
63
-
64
-
65
-
66
-
67
-
68
-
69
-
70
-
71
-
72
-
73
-
74
-
75
-
76
-
 77
77 -
 78
78 -
 79
79 -
 80
80 -
 81
81 -
 82
82 -
 83
83 -
 84
84 -
 85
85 -
 86
86 -
 87
87 -
88
-
89
-
90
-
91
-
92
-
93
-
94
-
95
-
96
-
97
-
98
-
99
-
100
-
101
-
102
-
103
-
104
-
105
-
106
-
107
-
108
-
109
-
110
-
111
-
112
-
113
-
114
-
115
-
116
-
117
-
118
-
119
-
120
-
121
-
122
-
123
-
124
-
125
-
126
-
127
-
128
-
129
-
130
-
131
-
132
-
133
-
134
-
135
-
136
-
137
-
138
-
139
-
140
-
141
-
142
-
143
-
144
-
145
-
146
-
147
-
148
-
149
-
150
-
151
-
152
-
153
-
154
-
155
-
156
-
157
-
158
-
159
-
160
-
161
-
162
-
163
-
164
-
165
-
166
-
167
-
168
-
169
-
170
-
171
 |
 |