Cisco 5508 Installation Guide - Page 24
Using the Startup Wizard - features
 |
UPC - 882658250057
View all Cisco 5508 manuals
Add to My Manuals
Save this manual to your list of manuals |
Page 24 highlights
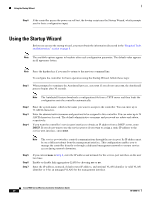
Using the Startup Wizard Step 6 If the controller passes the power-on self test, the bootup script runs the Startup Wizard, which prompts you for basic configuration input. Using the Startup Wizard Before you can use the startup wizard, you must obtain the information discussed in the "Required Tools and Information" section on page 8. Note The available options appear in brackets after each configuration parameter. The default value appears in all uppercase letters. Note Press the hyphen key if you need to return to the previous command line. To configure the controller for basic operation using the Startup Wizard, follow these steps: Step 1 When prompted to terminate the AutoInstall process, enter yes. If you do not enter yes, the AutoInstall process begins after 30 seconds. Note The AutoInstall feature downloads a configuration file from a TFTP server and then loads the configuration onto the controller automatically. Step 2 Step 3 Step 4 Enter the system name, which is the name you want to assign to the controller. You can enter up to 32 ASCII characters. Enter the administrative username and password to be assigned to this controller. You can enter up to 24 ASCII characters for each. The default administrative username and password are admin and admin, respectively. If you want the controller's service-port interface to obtain an IP address from a DHCP server, enter DHCP. If you do not want to use the service port or if you want to assign a static IP address to the service-port interface, enter none. Note The service-port interface controls communications through the service port. Its IP address must be on a different subnet from the management interface. This configuration enables you to manage the controller directly or through a dedicated management network to ensure service access during network downtime. Step 5 Step 6 Step 7 If you entered none in Step 4, enter the IP address and netmask for the service-port interface on the next two lines. Enable or disable link aggregation (LAG) by choosing yes or no. Enter the IP address, netmask, default router IP address, and optional VLAN identifier (a valid VLAN identifier or 0 for an untagged VLAN) for the management interface. Cisco 5500 Series Wireless Controller Installation Guide 24 78-18998-01
-
 1
1 -
2
-
3
-
4
-
5
-
6
-
7
-
8
-
9
-
10
-
11
-
12
-
13
-
14
-
15
-
16
-
17
-
18
-
 19
19 -
 20
20 -
 21
21 -
 22
22 -
 23
23 -
 24
24 -
 25
25 -
 26
26 -
 27
27 -
 28
28 -
 29
29 -
30
-
31
-
32
-
33
-
34
 |
 |