Cisco CP-7962G Administration Guide - Page 227
Performing Final End User Configuration Steps
 |
View all Cisco CP-7962G manuals
Add to My Manuals
Save this manual to your list of manuals |
Page 227 highlights
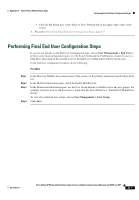
Appendix E Basic Phone Administration Steps Performing Final End User Configuration Steps - Click the Go button next to the "Back to User" Related link in the upper-right corner of the screen. l. Proceed to Performing Final End User Configuration Steps, page E-7. Performing Final End User Configuration Steps If you are not already on the End User Configuration page, choose User Management > End User to perform some final configuration tasks. Use the Search fields and the Find button to locate the user (i.e. John Doe), then click on the user ID to get to the End User Configuration window for the user. In the End User configuration window, do the following: Procedure Step 1 Step 2 Step 3 Step 4 In the Directory Number Associations pane of the screen, set the primary extension from the drop-down list. In the Mobility Information pane, check the Enable Mobility box. In the Permissions Information pane, use the User Group buttons to add this user to any user groups. For example, you may want to add the user to a group that has been defined as a "Standard CCM End User Group." To view all configured user groups, choose User Management > User Group. Click Save. OL-21011-01 Cisco Unified IP Phone Administration Guide for Cisco Unified Communications Manager 8.0 (SCCP and SIP) E-7
-
 1
1 -
2
-
3
-
4
-
5
-
6
-
7
-
8
-
9
-
10
-
11
-
12
-
13
-
14
-
15
-
16
-
17
-
18
-
19
-
20
-
21
-
22
-
23
-
24
-
25
-
26
-
27
-
28
-
29
-
30
-
31
-
32
-
33
-
34
-
35
-
36
-
37
-
38
-
39
-
40
-
41
-
42
-
43
-
44
-
45
-
46
-
47
-
48
-
49
-
50
-
51
-
52
-
53
-
54
-
55
-
56
-
57
-
58
-
59
-
60
-
61
-
62
-
63
-
64
-
65
-
66
-
67
-
68
-
69
-
70
-
71
-
72
-
73
-
74
-
75
-
76
-
77
-
78
-
79
-
80
-
81
-
82
-
83
-
84
-
85
-
86
-
87
-
88
-
89
-
90
-
91
-
92
-
93
-
94
-
95
-
96
-
97
-
98
-
99
-
100
-
101
-
102
-
103
-
104
-
105
-
106
-
107
-
108
-
109
-
110
-
111
-
112
-
113
-
114
-
115
-
116
-
117
-
118
-
119
-
120
-
121
-
122
-
123
-
124
-
125
-
126
-
127
-
128
-
129
-
130
-
131
-
132
-
133
-
134
-
135
-
136
-
137
-
138
-
139
-
140
-
141
-
142
-
143
-
144
-
145
-
146
-
147
-
148
-
149
-
150
-
151
-
152
-
153
-
154
-
155
-
156
-
157
-
158
-
159
-
160
-
161
-
162
-
163
-
164
-
165
-
166
-
167
-
168
-
169
-
170
-
171
-
172
-
173
-
174
-
175
-
176
-
177
-
178
-
179
-
180
-
181
-
182
-
183
-
184
-
185
-
186
-
187
-
188
-
189
-
190
-
191
-
192
-
193
-
194
-
195
-
196
-
197
-
198
-
199
-
200
-
201
-
202
-
203
-
204
-
205
-
206
-
207
-
208
-
209
-
210
-
211
-
212
-
213
-
214
-
215
-
216
-
217
-
218
-
219
-
220
-
221
-
 222
222 -
 223
223 -
 224
224 -
 225
225 -
 226
226 -
 227
227 -
 228
228 -
 229
229 -
 230
230 -
 231
231 -
 232
232 -
233
-
234
-
235
-
236
-
237
-
238
-
239
-
240
-
241
 |
 |
