Craftsman 79193 Operation Manual - Page 4
RANTY, This warranty, workmanship., Sears will, THE D-HANDLE, INSTALL LINE TRIMMER, LINE TRIMMER - parts
 |
View all Craftsman 79193 manuals
Add to My Manuals
Save this manual to your list of manuals |
Page 4 highlights
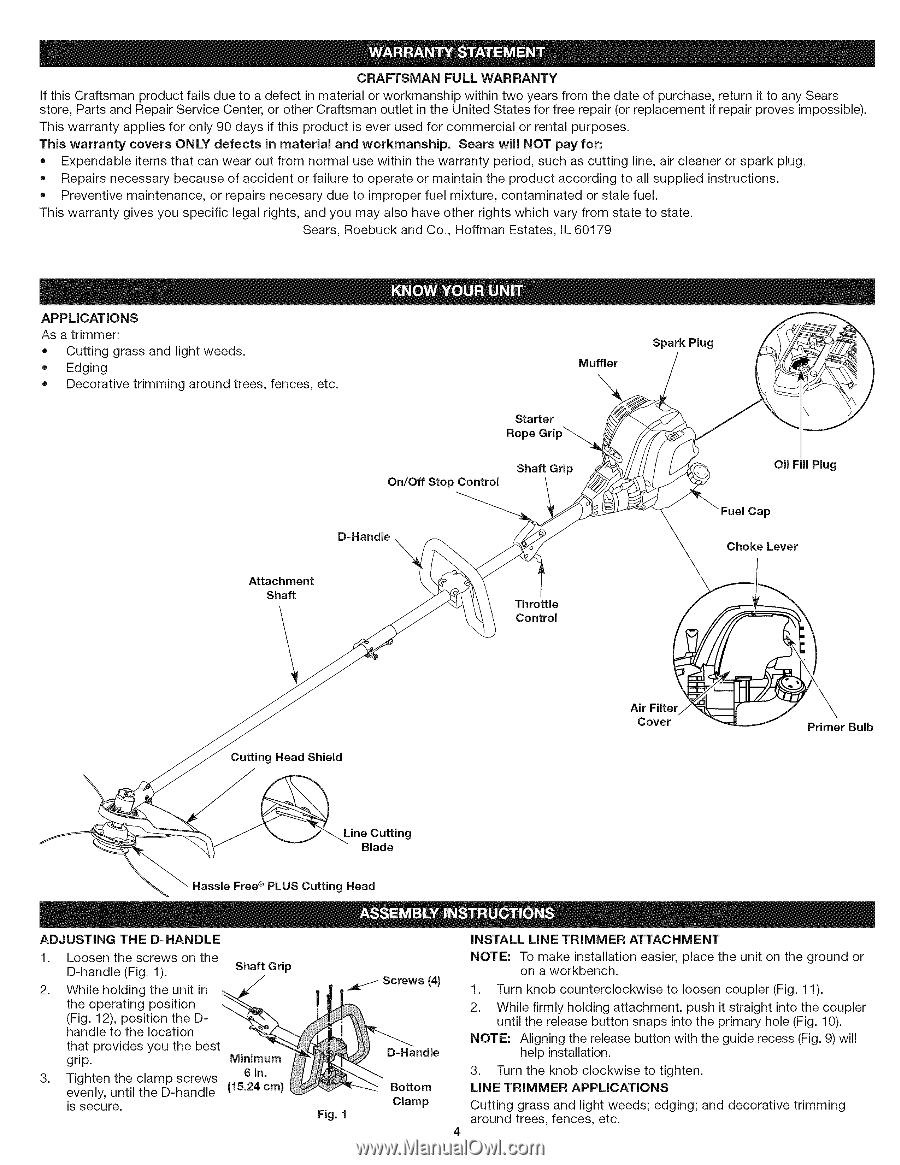
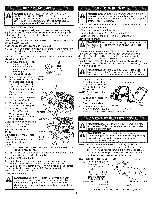
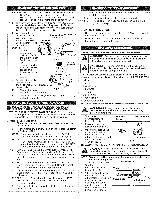
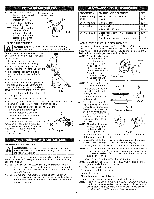
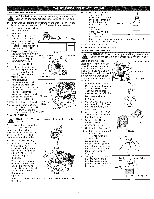
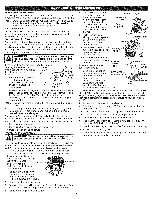
CRAFTSMAN FU LL WAR RANTY If this Craftsman product fails due to a defect in material or workmanship within two years from the date of purchase, return it to any Sears store, Parts and Repair Service Center, or other Craftsman outlet in the United States for free repair (or replacement if repair proves impossible). This warranty applies for only 90 days if this product is ever used for commercial or rental purposes. This warranty covers ONLY defects in material and workmanship. Sears will NOT pay for: • Expendable items that can wear out from normal use within the warranty period, such as cutting line, air cleaner or spark plug. • Repairs necessary because of accident or failure to operate or maintain the product according to all supplied instructions. • Preventive maintenance, or repairs necesary due to improper fuel mixture, contaminated or stale fuel. This warranty gives you specific legal rights, and you may also have other rights which vary from state to state. Sears, Roebuck and Co., Hoffman Estates, IL 60179 APPLICATIONS As a trimmer: • Cutting grass and light weeds. • Edging Decorative trimming around trees, fences, etc. Muffler Starter Rope Grip_ On/Off Stop Control Shaft Grip D=Handle Attachment Shaft Throttle Control Spark Plug Fuel Cap Choke Lever Cutting Head Shield Air Filter Cover Primer Bulb Line Cutting Blade Hassle Free®RPLUS Cutting Head ADJUSTING THE D-HANDLE 1. Loosen the screws on the D-handle (Fig. 1). Shaft Grip 2. While holding the unit in _-.,_TJ the operating position (Fig. 12), position the Dhandle to the location that provides you the best 3. gTrigiph.ten the clamp screws ,v,,;,,in.U,,, _ evenly, until the D-handle is secure. Screws (4) I_mndle Fig. 1 Bottom Clamp INSTALL LINE TRIMMER ATTACHMENT NOTE: To make installation easier, place the unit on the ground or on a workbench. 1. Turn knob counterclockwise to loosen coupler (Fig. 11). 2. While firmly holding attachment, push it straight into the coupler until the release button snaps into the primary hole (Fig. 10). NOTE: Aligning the release button with the guide recess (Fig. 9) will help installation. 3. Turn the knob clockwise to tighten. LINE TRIMMER APPLICATIONS Cutting grass and light weeds; edging; and decorative trimming around trees, fences, etc.
-
 1
1 -
 2
2 -
 3
3 -
 4
4 -
 5
5 -
 6
6 -
 7
7 -
 8
8 -
 9
9 -
 10
10 -
11
-
12
-
13
-
14
-
15
-
16
-
17
-
18
-
19
-
20
-
21
-
22
-
23
-
24
-
25
-
26
-
27
-
28
-
29
-
30
-
31
-
32
 |
 |