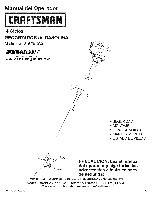
Craftsman 79193 Operation Manual - Page 8

THE OIL LEVEL, innermost, CHANGING, THE OIL, Fill Line, AIR FILTER MAINTENANCE, Cleaning, Filter,

Page 8 highlights

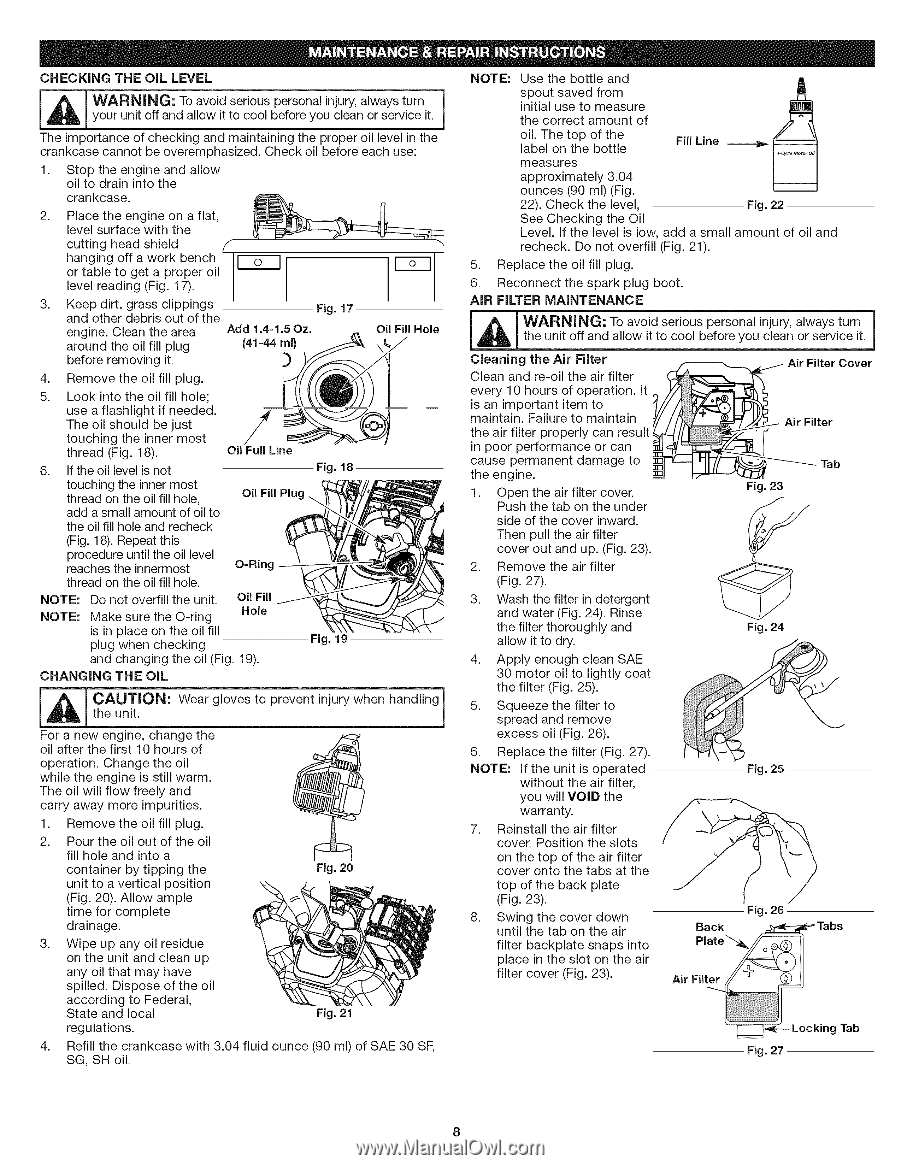
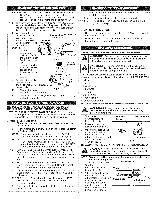
CHECKING THE OIL LEVEL --[_ i WyouArRuNnIitNoGff: andToallaovwoidit tsoerciooouls bpeefrosroenayl ouincjuleryan, alowr asyesrvitcuernit. The importance of checking and maintaining the proper oil level in the crankcase cannot be overemphasized. Check oil before each use: 1. Stop the engine and allow oil to drain into the crankcase. 2. Place the engine on a flat, level surface with the cutting head shield f hanging off a work bench or table to get a proper oil level reading (Fig. 17). 3. Keep dirt, grass clippings Fig. 17 and other debris out of the engine. Clean the area Add 1.4=1.5Oz. around the oil fill plug before removing it. Oil Fill Hole 4. Remove the oil fill plug. 5. Look into the oil fill hole; use a flashlight if needed. The oil should be just touching the inner most thread (Fig. 18). Oil Full Line 6. If the oil level is not Fig. 18 touching the inner most thread on the oil fill hole, add a small amount of oil to the oil fill hole and recheck Oil Fill Plug (Fig. 18). Repeat this procedure until the oil level reaches the innermost O=Ring thread on the oil fill hole. NOTE: Do not overfill the unit. Oil Fill NOTE: Make sure the O-ring Hole is in place on the oil fill plug when checking and changing the oil (Fig. 19). Fig. 19 CHANGING THE OIL --L_ theAUunTitI.ON: j Wear gloves to prevent injury when handling For a new engine, change the oil after the first 10 hours of operation. Change the oil while the engine is still warm. The oil will flow freely and carry away more impurities. ?

  • 1
  • 2
  • 3
  • 4
  • 5
  • 6
  • 7
  • 8
  • 9
  • 10
  • 11
  • 12
  • 13
  • 14
  • 15
  • 16
  • 17
  • 18
  • 19
  • 20
  • 21
  • 22
  • 23
  • 24
  • 25
  • 26
  • 27
  • 28
  • 29
  • 30
  • 31
  • 32

CHECKING
THE OIL LEVEL
--
i
[_
WARNING:
To avoid serious
personal
injury, always
turn
your
unit off and
allow it to cool
before
you clean or service
it.
The importance
of checking
and
maintaining
the
proper
oil level in the
crankcase
cannot
be overemphasized.
Check
oil before
each
use:
1.
Stop
the
engine
and
allow
oil to drain
into the
crankcase.
2.
Place the engine on a flat,
level surface with
the
cutting
head shield
f
hanging
off a work bench
or table to get a proper
oil
level reading (Fig. 17).
3.
Keep dirt, grass clippings
and other debris out of the
engine. Clean the area
around the oil fill plug
before removing
it.
4.
Remove the oil fill plug.
5.
Look into the oil fill hole;
use a flashlight
if needed.
The oil should
be just
touching
the inner most
thread (Fig. 18).
6.
If the oil level is not
touching the inner most
thread on the oil fill hole,
add a small amount of oil to
the oil fill hole and recheck
(Fig. 18). Repeat this
procedure until the oil level
reaches the
innermost
O=Ring
thread on the oil fill hole.
NOTE:
Do not overfill the unit.
Oil
Fill
NOTE:
Make sure the O-ring
Hole
is in place on the oil fill
plug when checking
and changing
the oil (Fig. 19).
CHANGING
THE OIL
Fig.
17
Add
1.4=1.5Oz.
Oil Fill Hole
Oil Full
Line
Fig.
18
Oil
Fill Plug
Fig.
19
--
j
L_
AUTION:
Wear gloves
to prevent injury when handling
the unit.
For a new engine, change the
?<:Z
oil after the first 10 hours
of
operation.
Change
the oil
while the engine
is still warm.
The oil will flow freely and
carry away more impurities.
1.
Remove the oil fill plug.
2.
Pour the oil out of the oil
fill hole and into a
container
by tipping
the
Fig. 20
unit to a vertical
position
(Fig. 20). Allow
ample
time for complete
drainage.
3.
Wipe up any oil residue
on the unit and clean up
any oil that may have
spilled.
Dispose
of the oil
according
to Federal,
State and local
Fig. 21
regulations.
4,
Refill the crankcase
with 3.04 fluid ounce (90 ml) of SAE 30 SF,
SG, SH oil.
NOTE:
Use the bottle and
spout saved from
initial use to measure
the correct
amount
of
oil. The top of the
Fill Line
label on the bottle
measures
approximately
3.04
ounces
(90 ml) (Fig.
22). Check the level,
Fig. 22
See Checking
the Oil
Level. If the level is low, add a small amount
of oil and
recheck.
Do not overfill (Fig. 21).
5.
Replace the oil fill plug.
6.
Reconnect
the spark
plug boot.
AIR FILTER MAINTENANCE
_
WARNING:
To avoid serious personal injury, always turn
the unit off and allow it to cool before you clean or service it.
Cleaning
the Air
Filter
Air Filter Cover
Clean and re-oil the air filter
every 10 hours of operation.
It
is an important
item to
maintain.
Failure to maintain
the air filter properly
can result
in poor performance
or can
cause permanent
damage
to
the engine.
1.
Open the air filter cover.
Push the tab on the under
side of the cover inward.
Then pull the air filter
cover out and up. (Fig. 23).
2.
Remove the air filter
(Fig. 27).
3.
Wash the filter in detergent
and water (Fig. 24). Rinse
the filter thoroughly
and
allow it to dry.
4.
Apply
enough
clean SAE
30 motor oil to lightly coat
the filter (Fig. 25).
5.
Squeeze
the filter to
spread
and remove
excess
oil (Fig. 26).
6.
Replace the filter (Fig. 27).
NOTE:
If the unit is operated
without
the air filter,
you will VOID the
warranty.
7.
Reinstall the air filter
cover. Position
the slots
on the top of the air filter
cover onto the tabs at the
top of the back plate
(Fig. 23).
8.
Swing
the cover down
until the tab on the air
filter
backplate
snaps into
place in the slot on the air
filter cover (Fig. 23).
Fig.
23
Air
Filter
Tab
Fig.
24
Fig. 25
Fig.
26
Fig. 27