D-Link DGS-1100-08V2 User Manual 1.00 WW - Page 13
Getting Started, Management Options, Using the Web-based Management Interface
 |
View all D-Link DGS-1100-08V2 manuals
Add to My Manuals
Save this manual to your list of manuals |
Page 13 highlights
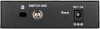
3 Getting Started D-Link Smart Managed Switch User Manual 3 Getting Started This chapter introduces the management interface of D-Link Smart Managed Switch. Management Options The D-Link Smart Managed Switch can be managed through any port on the device by using the web-based management interface, or the D-Link Network Assistant (DNA). Each switch must be assigned its own IP address, which is used for communication with the web-based management interface or a SNMP network manager. The PC should have an IP address in the same range as the Switch. Each Switch allows up to four users to access the web-based management interface concurrently. However, if you want to manage multiple D-Link Smart Managed Switches, the D-Link Network Assistant (DNA) is a more convenient choice. By using the D-Link Network Assistant (DNA), you do not need to change the IP address of your PC, making it easier to simultaneously initialize multiple D-Link Managed Switches. Please refer to the following installation instructions for the Web interface and the D-Link Network Assistant (DNA). Using the Web-based Management Interface After successfully installing the Switch, you can configure and monitor the Switch through the web-based management tool using any compatible web browser such as Internet Explorer, Google Chrome, Firefox, Opera, or Safari. Connecting to the Switch The access the web interface you will need the following equipment: 1. A PC with a RJ45 Ethernet port. 2. A standard Ethernet cable Connect on end of the Ethernet cable to any of the ports on the front panel of the Switch and connect the other end of Ethernet cable to the Ethernet port on the PC. Figure 3.1 - Connected Ethernet cable Accessing the Web-based Management Interface In order to access the management interface, the PC must have an IP address in the same subnet as the Switch. For example, if the Switch has an IP address of 10.90.90.90, the PC should have an IP address of 10.x.y.z (where x/y is a number between 0 ~ 254 and z is a number between 1 ~ 254), and a subnet mask of 255.0.0.0. To launch the web interface, simply open any compatible web browser and enter 10.90.90.90 (the factory-default IP address) in the address bar. Then press . 10
-
 1
1 -
2
-
3
-
4
-
5
-
6
-
7
-
 8
8 -
 9
9 -
 10
10 -
 11
11 -
 12
12 -
 13
13 -
 14
14 -
 15
15 -
 16
16 -
 17
17 -
 18
18 -
19
-
20
-
21
-
22
-
23
-
24
-
25
-
26
-
27
-
28
-
29
-
30
-
31
-
32
-
33
-
34
-
35
-
36
-
37
-
38
-
39
-
40
-
41
-
42
-
43
-
44
-
45
-
46
-
47
-
48
-
49
-
50
-
51
-
52
-
53
-
54
-
55
-
56
 |
 |
