Dell 5100MP User Guide - Page 29
Management Menu, OSD Lock - ceiling mount
 |
UPC - 884116003892
View all Dell 5100MP manuals
Add to My Manuals
Save this manual to your list of manuals |
Page 29 highlights
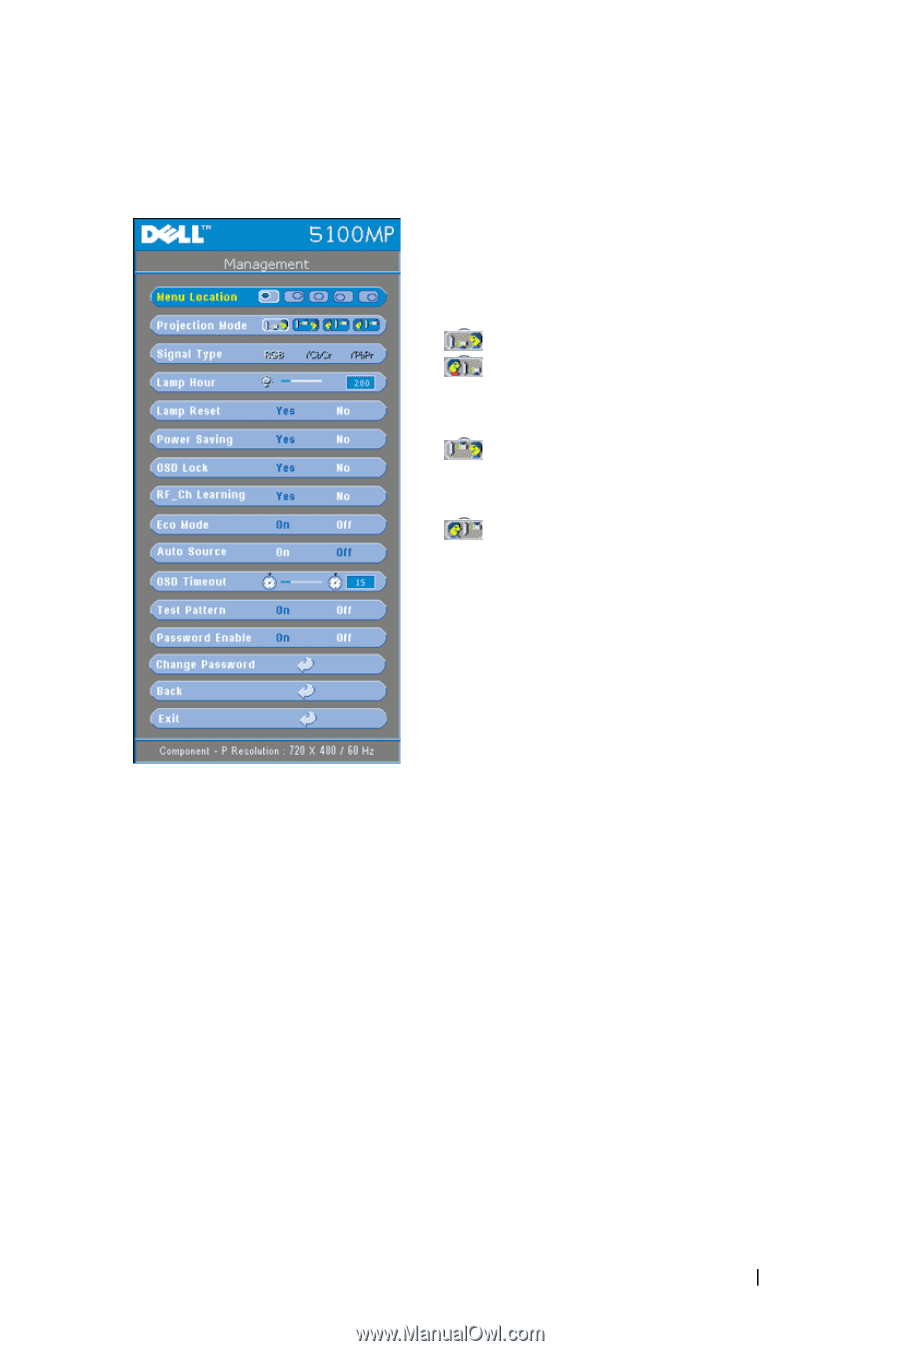
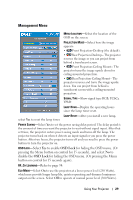
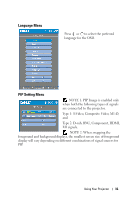
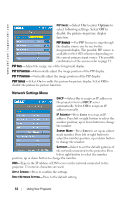
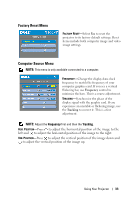
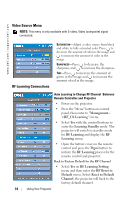
Management Menu MENU LOCATION-Select the location of the OSD on the screen. PROJECTION MODE-Select how the image appears: • Front Projection-Desktop (the default). • Rear Projection-Desktop-- The projector reverses the image so you can project from behind a translucent screen. • Front Projection-Ceiling Mount-- The projector turns the image upside down for ceiling-mounted projection. • Rear Projection-Ceiling Mount-- The projector reverses and turns the image upside down. You can project from behind a translucent screen with a ceiling-mounted projection. SIGNAL TYPE-Show signal type RGB, YCbCr, YPbPr. LAMP HOUR-Display the operating hours since the lamp timer reset. LAMP RESET-After you install a new lamp, select Yes to reset the lamp timer. POWER SAVING-Select Yes to set the power saving delay period. The delay period is the amount of time you want the projector to wait without signal input. After that set time, the projector enters power saving mode and turns off the lamp. The projector turns back on when it detects an input signal or you press the power button. After two hours, the projector turns off and you need to press the power button to turn the projector on. OSD LOCK-Select Yes to enable OSD Lock for hiding the OSD menu. (Or pressing the Menu button on control for 15 seconds), and select No to disable the OSD Lock for hiding the OSD menu. (Or pressing the Menu button on control for 15 seconds again). RF_CH LEARNING-Refer to page 34. ECO MODE-Select On to use the projector at a lower power level (250 Watts), which may provide longer lamp life, quieter operating and dimmer luminance output on the screen. Select Off to operate at normal power level (300 Watts). Using Your Projector 29
-
 1
1 -
2
-
3
-
4
-
5
-
6
-
7
-
8
-
9
-
10
-
11
-
12
-
13
-
14
-
15
-
16
-
17
-
18
-
19
-
20
-
21
-
22
-
23
-
 24
24 -
 25
25 -
 26
26 -
 27
27 -
 28
28 -
 29
29 -
 30
30 -
 31
31 -
 32
32 -
 33
33 -
 34
34 -
35
-
36
-
37
-
38
-
39
-
40
-
41
-
42
-
43
-
44
-
45
-
46
-
47
-
48
-
49
-
50
-
51
-
52
-
53
-
54
-
55
-
56
-
57
-
58
-
59
-
60
-
61
 |
 |