Dell Alienware M17x Service Manual - Page 101
Removing the Battery Latch Assembly, Replacing the Battery Latch Assembly
 |
UPC - 074450000071
View all Dell Alienware M17x manuals
Add to My Manuals
Save this manual to your list of manuals |
Page 101 highlights
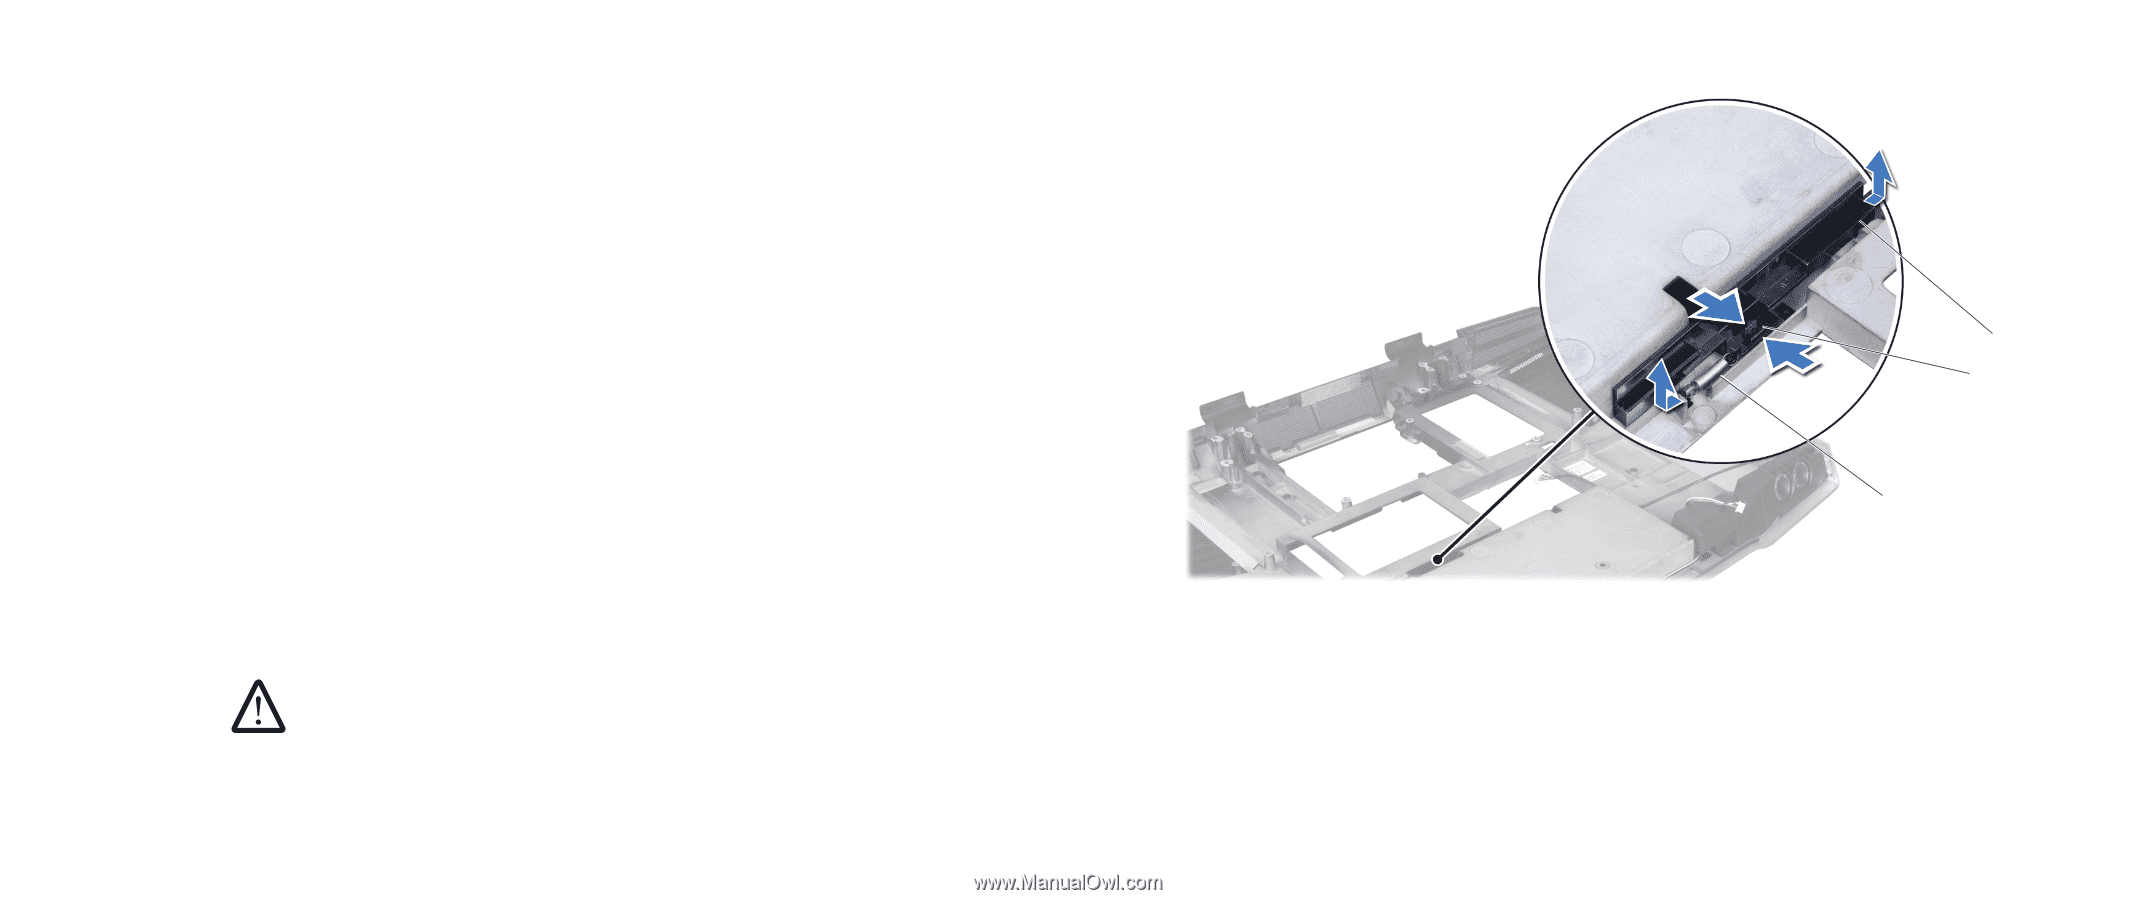
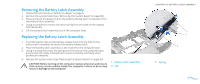
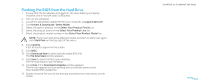
Removing the Battery Latch Assembly 1. Follow the instructions in "Before You Begin" on page 6. 2. Remove the system board (see "Removing the System Board" on page 90). 3. Press and push the plastic clip on the battery release latch to release it from the battery latch assembly. 4. Using a screwdriver, remove the latch spring from the hook on the battery latch assembly. 5. Lift the battery latch assembly out of the computer base. Replacing the Battery Latch Assembly 1. Push the plastic clips on the battery release latch into the hole on the battery latch assembly to secure the battery release latch. 2. Place the battery latch assembly in the channel in the computer base. 3. Using a screwdriver, place the spring over the hook on the computer base. Ensure that the newly installed latch moves smoothly and freely when pushed and released. 4. Replace the system board (see "Replacing the System Board" on page 92). CAUTION: Before turning on the computer, replace all screws and ensure that no stray screws remain inside the computer. Failure to do so may result in damage to the computer. 1 battery latch assembly 2 clip CHAPTER 24: BATTERY LATCH ASSEMBLY 1 2 3 3 spring 0101 /0101
-
 1
1 -
2
-
3
-
4
-
5
-
6
-
7
-
8
-
9
-
10
-
11
-
12
-
13
-
14
-
15
-
16
-
17
-
18
-
19
-
20
-
21
-
22
-
23
-
24
-
25
-
26
-
27
-
28
-
29
-
30
-
31
-
32
-
33
-
34
-
35
-
36
-
37
-
38
-
39
-
40
-
41
-
42
-
43
-
44
-
45
-
46
-
47
-
48
-
49
-
50
-
51
-
52
-
53
-
54
-
55
-
56
-
57
-
58
-
59
-
60
-
61
-
62
-
63
-
64
-
65
-
66
-
67
-
68
-
69
-
70
-
71
-
72
-
73
-
74
-
75
-
76
-
77
-
78
-
79
-
80
-
81
-
82
-
83
-
84
-
85
-
86
-
87
-
88
-
89
-
90
-
91
-
92
-
93
-
94
-
95
-
 96
96 -
 97
97 -
 98
98 -
 99
99 -
 100
100 -
 101
101 -
 102
102 -
 103
103 -
 104
104
 |
 |