Dell Force10 C300 C300 Hardware Installation Guide - Page 44
Removing and Replacing Power Supply Units, Fan Tray Left, WARNING
 |
View all Dell Force10 C300 manuals
Add to My Manuals
Save this manual to your list of manuals |
Page 44 highlights
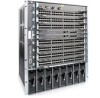
www.dell.com | support.dell.com Figure 10-1. Fan Tray (Left) Connector Fan Blades fnC0004mp To remove and replace the fan tray: Step 1 2 3 4 Task Unscrew the retaining screws at the top and bottom of the fan tray. Use the handle to pull the fan tray out approximately two inches from the chassis. Wait 30 seconds, until the fan blades stop rotating, then completely remove the fan tray. Insert the new fan tray into the chassis. Guide the tray firmly into the slot until it stops and the handle end is flush with the chassis. Secure the fan tray into place by tightening the screws at the top and bottom of the fan tray using a #2 Phillips screwdriver. Removing and Replacing Power Supply Units WARNING: Do not remove a panel blank unless you are ready to install a power supply into that slot. After removing a power supply, immediately place a panel blank in the empty slot. Blanks are required to control airflow and electromagnetic interference. A power supply failure is recognized by a red LED, a lit RPM alarm LED, and, if configured, an SNMP trap. If you are operating your C300 chassis with a redundant power supply, you can install, remove, or replace a power supply without affecting system operation. If you are operating your C300 system with only two power supplies (the minimum), you must completely turn off the system to replace a power supply. NOTE: If a power supply fails, the entire unit must be replaced. There are no field serviceable parts inside the unit. 44 | Removing and Replacing Components
-
 1
1 -
2
-
3
-
4
-
5
-
6
-
7
-
8
-
9
-
10
-
11
-
12
-
13
-
14
-
15
-
16
-
17
-
18
-
19
-
20
-
21
-
22
-
23
-
24
-
25
-
26
-
27
-
28
-
29
-
30
-
31
-
32
-
33
-
34
-
35
-
36
-
37
-
38
-
 39
39 -
 40
40 -
 41
41 -
 42
42 -
 43
43 -
 44
44 -
 45
45 -
 46
46 -
 47
47 -
 48
48 -
 49
49 -
50
-
51
-
52
-
53
-
54
-
55
-
56
-
57
-
58
-
59
-
60
-
61
-
62
-
63
-
64
-
65
-
66
-
67
-
68
-
69
-
70
-
71
-
72
-
73
-
74
 |
 |
