Dell Inspiron X200 Service Manual - Page 12
Hard Drive
 |
View all Dell Inspiron X200 manuals
Add to My Manuals
Save this manual to your list of manuals |
Page 12 highlights
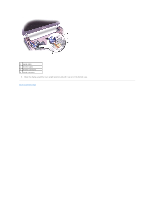
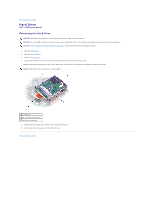
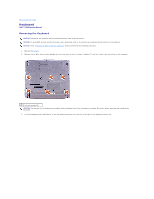
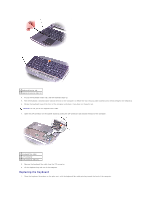
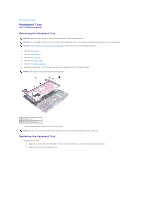
Back to Contents Page Hard Drive Dell™ X200 Service Manual Removing the Hard Drive NOTICE: Disconnect the computer and any attached devices from electrical outlets. NOTICE: To avoid ESD, ground yourself by using a wrist grounding strap or by touching an unpainted metal surface on the computer. NOTICE: Read "Preparing to Work Inside the Computer" before performing the following procedure. 1. Remove the battery. 2. Remove the keyboard. 3. Remove the palm rest. 4. Loosen the three M2 x 5.5-mm screws that secure the hard drive to the bottom case. Rubber grommets secure each screw to the hard drive so that you do not need to completely remove the screws. NOTE: Each hard drive screw has an arrow beside it. 1 hard drive 2 M2 x 5.5-mm screws (3) 3 hard drive connector 5. Disconnect the hard drive connector from the system board. 6. Lift the hard drive up and out of the bottom case. Back to Contents Page
-
 1
1 -
2
-
3
-
4
-
5
-
6
-
 7
7 -
 8
8 -
 9
9 -
 10
10 -
 11
11 -
 12
12 -
 13
13 -
 14
14 -
 15
15 -
 16
16 -
 17
17 -
18
-
19
-
20
-
21
-
22
-
23
-
24
-
25
-
26
-
27
-
28
-
29
-
30
-
31
-
32
-
33
-
34
 |
 |
