Dell Inspiron X200 Service Manual - Page 13
Keyboard
 |
View all Dell Inspiron X200 manuals
Add to My Manuals
Save this manual to your list of manuals |
Page 13 highlights
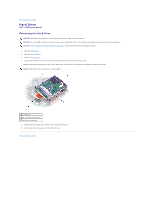
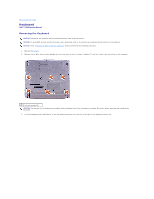
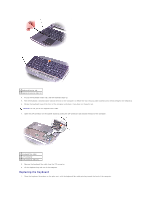
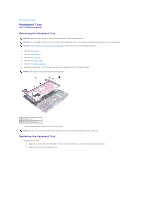
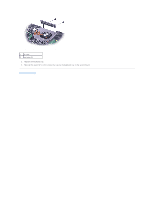
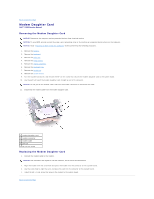
Back to Contents Page Keyboard Dell™ X200 Service Manual Removing the Keyboard NOTICE: Disconnect the computer and any attached devices from electrical outlets. NOTICE: To avoid ESD, ground yourself by using a wrist grounding strap or by touching an unpainted metal surface on the computer. NOTICE: Read "Preparing to Work Inside the Computer" before performing the following procedure. 1. Remove the battery. 2. Remove the six M2 x 4-mm screws labeled with an arrow (one of the six screws is labeled "K" with an arrow) from the bottom of the computer. 1 M2 x 4-mm screws (6) NOTICE: The keycaps on the keyboard are fragile, easily dislodged, and time- consuming to replace. Be careful when removing and handling the keyboard. 3. Turn the computer over, and insert a ¼-inch flat-blade screwdriver into the slot to the right of the keyboard locator tab.
-
 1
1 -
2
-
3
-
4
-
5
-
6
-
7
-
 8
8 -
 9
9 -
 10
10 -
 11
11 -
 12
12 -
 13
13 -
 14
14 -
 15
15 -
 16
16 -
 17
17 -
 18
18 -
19
-
20
-
21
-
22
-
23
-
24
-
25
-
26
-
27
-
28
-
29
-
30
-
31
-
32
-
33
-
34
 |
 |
