Dell Inspiron X200 Service Manual - Page 14
Replacing the Keyboard
 |
View all Dell Inspiron X200 manuals
Add to My Manuals
Save this manual to your list of manuals |
Page 14 highlights
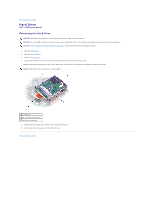
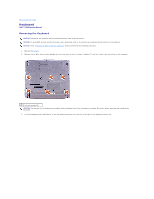
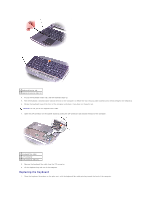
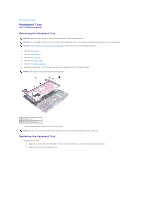
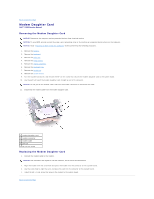
1 keyboard locator tab 2 keyboard securing tabs (4) 4. Pry up the keyboard locator tab, and the keyboard pops up. 5. Pull the keyboard a small distance toward the front of the computer to release the four securing tabs located across the back edge of the keyboard. 6. Rotate the keyboard toward the front of the computer and place it face-down on the palm rest. NOTICE: Do not pull on the keyboard flex cable. 7. Open the ZIF connector on the system board by pulling the ZIF connector tabs toward the back of the computer. 1 keyboard flex cable 2 ZIF connector 3 ZIF connector tabs (2) 8. Remove the keyboard flex cable from the ZIF connector. 9. Lift the keyboard up and out of the computer. Replacing the Keyboard 1. Place the keyboard face-down on the palm rest, with the keyboard flex cable pointing toward the back of the computer.
-
 1
1 -
2
-
3
-
4
-
5
-
6
-
7
-
8
-
 9
9 -
 10
10 -
 11
11 -
 12
12 -
 13
13 -
 14
14 -
 15
15 -
 16
16 -
 17
17 -
 18
18 -
 19
19 -
20
-
21
-
22
-
23
-
24
-
25
-
26
-
27
-
28
-
29
-
30
-
31
-
32
-
33
-
34
 |
 |
