Dell Inspiron X200 Service Manual - Page 8
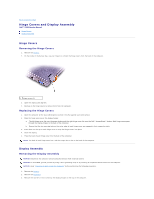
Hinge Covers and Display Assembly
 |
View all Dell Inspiron X200 manuals
Add to My Manuals
Save this manual to your list of manuals |
Page 8 highlights
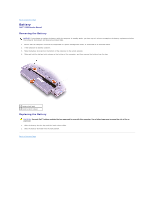
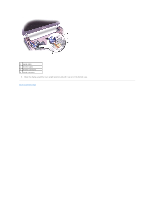
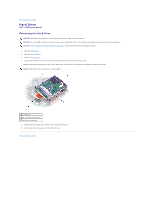
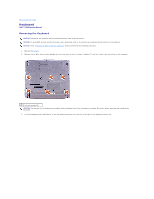
Back to Contents Page Hinge Covers and Display Assembly Dell™ X200 Service Manual Hinge Covers Display Assembly Hinge Covers Removing the Hinge Covers 1. Remove the battery. 2. On the inside of the battery bay, use your fingers to unhook the hinge covers from the back of the computer. 1 hinge covers (2) 3. Open the display 180 degrees. 4. Push up on the hinge covers to remove them from the computer. Replacing the Hinge Covers 1. Open the computer all the way (180 degrees) so that it lies flat against your work surface. 2. Place the hinge covers over the display hinges: a. The left hinge cover fits over the power button and the right hinge cover fits over the Dell™ AccessDirect™ button. Both hinge covers pass through the display hinges to the back of the computer. b. Ensure that the two securing tabs on the outer edge of each hinge cover are engaged in their respective slots. 3. Press down on the top of each hinge cover to snap the hinge covers into place. 4. Close the display. 5. Press the back of each hinge cover into the back of the computer. NOTE: The back of each hinge cover has a tab that snaps into a slot on the back of the computer. Display Assembly Removing the Display Assembly NOTICE: Disconnect the computer and any attached devices from electrical outlets. NOTICE: To avoid ESD, ground yourself by using a wrist grounding strap or by touching an unpainted metal surface on the computer. NOTICE: Read "Preparing to Work Inside the Computer" before performing the following procedure. 1. Remove the battery. 2. Remove the keyboard. 3. Remove the two M2 x 6-mm screws by the display hinges on the top of the computer.
-
 1
1 -
2
-
 3
3 -
 4
4 -
 5
5 -
 6
6 -
 7
7 -
 8
8 -
 9
9 -
 10
10 -
 11
11 -
 12
12 -
 13
13 -
14
-
15
-
16
-
17
-
18
-
19
-
20
-
21
-
22
-
23
-
24
-
25
-
26
-
27
-
28
-
29
-
30
-
31
-
32
-
33
-
34
 |
 |
