Dell PowerEdge M610 Web Tools Administrator’s Guide - Page 179
Opening the FC Routing module, Brocade 5100 and 5300 switches
 |
View all Dell PowerEdge M610 manuals
Add to My Manuals
Save this manual to your list of manuals |
Page 179 highlights
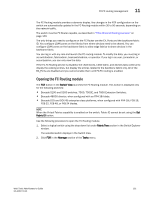
DRAFT: BROCADE CONFIDENTIAL FC-FC routing management 11 The FC Routing module provides a dynamic display. Any changes in the FCR configuration on the switch are automatically updated in the FC Routing module within 30 to 90 seconds, depending on the network traffic. The switch must be FC Router-capable, as described in "Fibre Channel Routing overview" on page 149. The only things you need to configure on the FC Router are the EX_Ports and the backbone fabric ID. You configure LSAN zones on the fabrics from where devices need to be shared. You can configure LSAN zones on the backbone fabric to allow edge fabrics to share devices in the backbone fabric. You can log in with any role and launch the FC routing module. To modify the data, you must log in as switchadmin, fabricadmin, basicswitchadmin, or operator. If you log in as user, zoneadmin, or securityadmin, you can only view the data. If the FC-FC Routing service is disabled, the LSAN zones, LSAN fabric, and devices tabs continue to display the existing entries, but display the entries related to the backbone fabric only. All of the EX_Ports are disabled and you cannot enable them until FC-FC routing is enabled. Opening the FC Routing module The FCR button in the Switch View launches the FC Routing module. This button is displayed only for the following switches: • Brocade 5100 and 5300 switches, 7500, 7500E, and 7800 Extension Switches. • Brocade 48000 director, when configured with an FR4-18i blade. • Brocade DCX and DCX-4S enterprise-class platforms, when configured with FR4-18i, FC8-16, FC8-32, FC8-48, or FX8-24 blades. NOTE When the Virtual Fabrics capability is enabled on the switch, Fabric ID cannot be set using the Set Fabric ID button. Use the following procedure to open the FC Routing module. 1. Select a logical switch using the drop-down list under Fabric Tree section in the Switch Explorer window. The selected switch displays in the Switch View. 2. Click FCR in the Manage section of the Tasks menu. Web Tools Administrator's Guide 151 53-1001772-01
-
 1
1 -
2
-
3
-
4
-
5
-
6
-
7
-
8
-
9
-
10
-
11
-
12
-
13
-
14
-
15
-
16
-
17
-
18
-
19
-
20
-
21
-
22
-
23
-
24
-
25
-
26
-
27
-
28
-
29
-
30
-
31
-
32
-
33
-
34
-
35
-
36
-
37
-
38
-
39
-
40
-
41
-
42
-
43
-
44
-
45
-
46
-
47
-
48
-
49
-
50
-
51
-
52
-
53
-
54
-
55
-
56
-
57
-
58
-
59
-
60
-
61
-
62
-
63
-
64
-
65
-
66
-
67
-
68
-
69
-
70
-
71
-
72
-
73
-
74
-
75
-
76
-
77
-
78
-
79
-
80
-
81
-
82
-
83
-
84
-
85
-
86
-
87
-
88
-
89
-
90
-
91
-
92
-
93
-
94
-
95
-
96
-
97
-
98
-
99
-
100
-
101
-
102
-
103
-
104
-
105
-
106
-
107
-
108
-
109
-
110
-
111
-
112
-
113
-
114
-
115
-
116
-
117
-
118
-
119
-
120
-
121
-
122
-
123
-
124
-
125
-
126
-
127
-
128
-
129
-
130
-
131
-
132
-
133
-
134
-
135
-
136
-
137
-
138
-
139
-
140
-
141
-
142
-
143
-
144
-
145
-
146
-
147
-
148
-
149
-
150
-
151
-
152
-
153
-
154
-
155
-
156
-
157
-
158
-
159
-
160
-
161
-
162
-
163
-
164
-
165
-
166
-
167
-
168
-
169
-
170
-
171
-
172
-
173
-
 174
174 -
 175
175 -
 176
176 -
 177
177 -
 178
178 -
 179
179 -
 180
180 -
 181
181 -
 182
182 -
 183
183 -
 184
184 -
185
-
186
-
187
-
188
-
189
-
190
-
191
-
192
-
193
-
194
-
195
-
196
-
197
-
198
-
199
-
200
-
201
-
202
-
203
-
204
-
205
-
206
-
207
-
208
-
209
-
210
-
211
-
212
-
213
-
214
-
215
-
216
-
217
-
218
-
219
-
220
-
221
-
222
-
223
-
224
-
225
-
226
-
227
-
228
-
229
-
230
-
231
-
232
-
233
-
234
-
235
-
236
-
237
-
238
-
239
-
240
-
241
-
242
-
243
-
244
-
245
-
246
-
247
-
248
-
249
-
250
-
251
-
252
-
253
-
254
-
255
-
256
-
257
-
258
-
259
-
260
-
261
-
262
-
263
-
264
-
265
-
266
-
267
-
268
-
269
-
270
-
271
-
272
-
273
-
274
-
275
-
276
-
277
-
278
-
279
-
280
-
281
-
282
-
283
-
284
-
285
-
286
-
287
-
288
-
289
-
290
-
291
-
292
-
293
-
294
-
295
-
296
-
297
-
298
-
299
-
300
-
301
-
302
-
303
-
304
-
305
-
306
-
307
-
308
-
309
-
310
 |
 |