Dell PowerVault NX300 User Manual - Page 27
Using Your NAS System, Creating Server Message Block Shares - review
 |
View all Dell PowerVault NX300 manuals
Add to My Manuals
Save this manual to your list of manuals |
Page 27 highlights
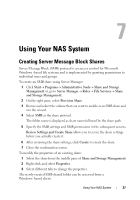
7 Using Your NAS System Creating Server Message Block Shares Server Message Block (SMB) protocol is an access control for Microsoft Windows -based file systems and is implemented by granting permissions to individual users and groups. To create an SMB share using Server Manager: 1 Click StartProgramsAdministrative Tools Share and Storage Management or, go to Server Manager Roles File Services Share and Storage Management. 2 On the right pane, select Provision Share. 3 Browse and select the volume that you want to enable as an SMB share and run the wizard. 4 Select SMB as the share protocol. The folder name is displayed as share name followed by the share path. 5 Specify the SMB settings and SMB permissions in the subsequent screens. Review Settings and Create Share allows you to revise the share settings before you actually create it. 6 After reviewing the share settings, click Create to create the share. 7 Close the confirmation screen. To modify the properties of an existing share: 1 Select the share from the middle pane of Share and Storage Management. 2 Right-click and select Properties. 3 Select different tabs to change the properties. The newly-created SMB shared folder can be accessed from a Windows- based client. Using Your NAS System 27
-
 1
1 -
2
-
3
-
4
-
5
-
6
-
7
-
8
-
9
-
10
-
11
-
12
-
13
-
14
-
15
-
16
-
17
-
18
-
19
-
20
-
21
-
 22
22 -
 23
23 -
 24
24 -
 25
25 -
 26
26 -
 27
27 -
 28
28 -
 29
29 -
 30
30 -
 31
31 -
 32
32 -
33
-
34
-
35
-
36
-
37
-
38
-
39
-
40
-
41
-
42
-
43
-
44
-
45
-
46
-
47
-
48
-
49
-
50
 |
 |