Dell Precision 330 Service Manual - Page 73
Removing a Hard Drive (Desktop Chassis), If the drive you installed is a hard drive
 |
View all Dell Precision 330 manuals
Add to My Manuals
Save this manual to your list of manuals |
Page 73 highlights
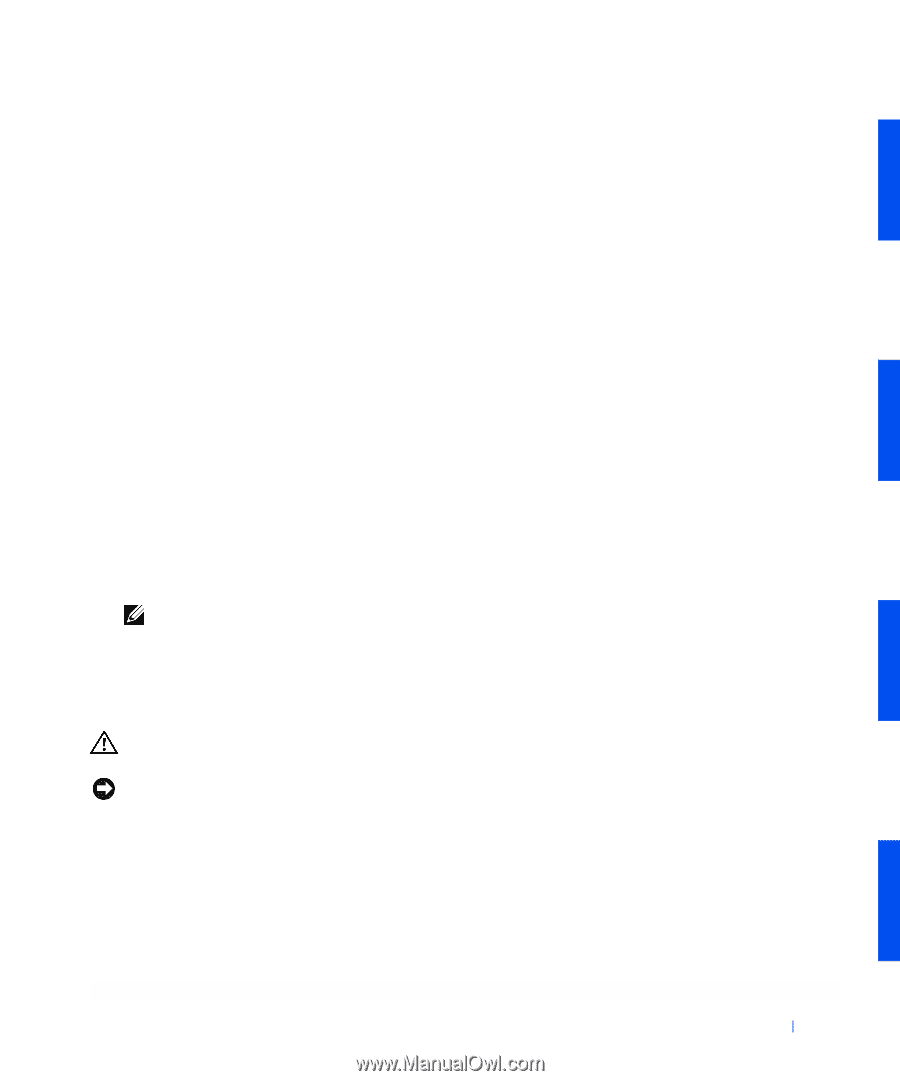
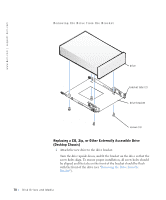
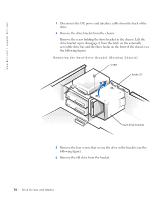
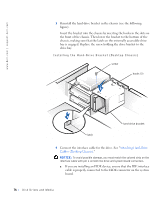
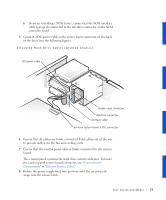
7 Rotate the power supply back into position until the securing tab snaps into the release latch. 8 Replace the computer cover and restart the system. 9 If the drive you installed is a hard drive, enter system setup, and update the drive settings. After you update the system settings, exit system setup and reboot the computer. 10 If the device you installed is a hard drive, partition and logically format the drive before proceeding to the next step. See the operating system's documentation for instructions. 11 Test the drive to verify that it is operating properly. • If the drive you installed is a hard drive, run the Dell Diagnostics to test the drive. • For other types of drives, see the drive's documentation for information on testing the drive. 12 If the drive you installed is the primary hard drive, install the operating system on the drive. See the operating system's documentation for instructions. NOTE: Tape drives sold by Dell come with their own operating software and documentation. After you install a tape drive, refer to the documentation that came with the drive for instructions on installing and using the tape drive software. Removing a Hard Drive (Desktop Chassis) CAUTION: Before you perform this procedure, see "Precautionary Measures." NOTICE: Before disconnecting a peripheral from the system or removing a component from the system board, verify that the standby power indicator on the system board has turned off. To locate this indicator, see "System Board Components" or "Interior Service Label." 1 Turn off the computer and peripherals, disconnect them from their electrical outlets, wait at least 5 seconds, and then remove the computer cover. 2 Rotate the power supply away from the system board. Disk Dri ves and Media 73
-
 1
1 -
2
-
3
-
4
-
5
-
6
-
7
-
8
-
9
-
10
-
11
-
12
-
13
-
14
-
15
-
16
-
17
-
18
-
19
-
20
-
21
-
22
-
23
-
24
-
25
-
26
-
27
-
28
-
29
-
30
-
31
-
32
-
33
-
34
-
35
-
36
-
37
-
38
-
39
-
40
-
41
-
42
-
43
-
44
-
45
-
46
-
47
-
48
-
49
-
50
-
51
-
52
-
53
-
54
-
55
-
56
-
57
-
58
-
59
-
60
-
61
-
62
-
63
-
64
-
65
-
66
-
67
-
 68
68 -
 69
69 -
 70
70 -
 71
71 -
 72
72 -
 73
73 -
 74
74 -
 75
75 -
 76
76 -
 77
77 -
 78
78 -
79
-
80
-
81
-
82
-
83
-
84
-
85
-
86
-
87
-
88
-
89
-
90
-
91
-
92
-
93
-
94
-
95
-
96
-
97
-
98
-
99
-
100
-
101
-
102
-
103
-
104
-
105
-
106
-
107
-
108
-
109
-
110
-
111
-
112
-
113
-
114
-
115
-
116
-
117
-
118
-
119
-
120
-
121
-
122
-
123
-
124
-
125
-
126
-
127
-
128
-
129
-
130
-
131
-
132
-
133
-
134
-
135
-
136
-
137
-
138
-
139
-
140
-
141
-
142
-
143
-
144
-
145
-
146
-
147
-
148
-
149
-
150
-
151
-
152
-
153
-
154
-
155
-
156
-
157
-
158
-
159
-
160
-
161
-
162
-
163
-
164
-
165
-
166
-
167
-
168
-
169
-
170
 |
 |