Dell Vostro 410 Service Manual - Page 32
Power Supply
 |
View all Dell Vostro 410 manuals
Add to My Manuals
Save this manual to your list of manuals |
Page 32 highlights
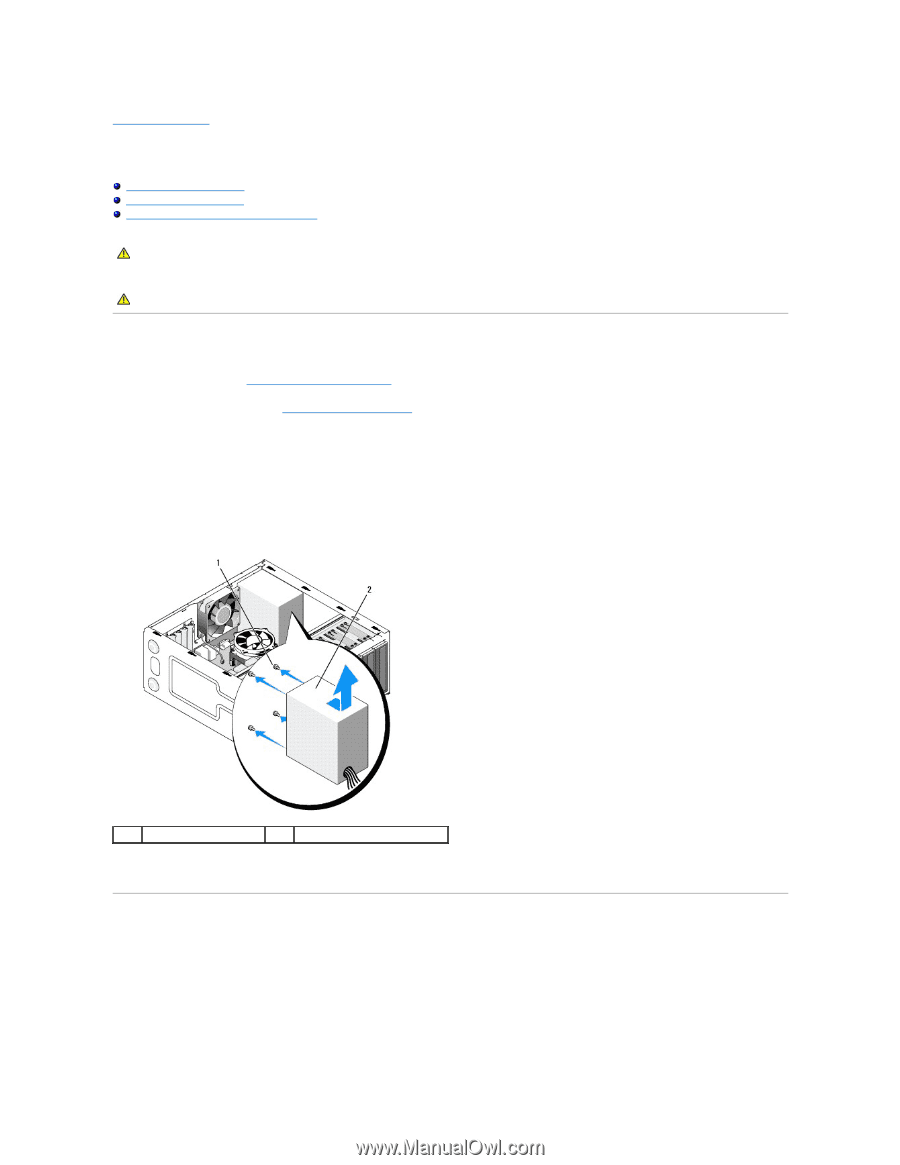
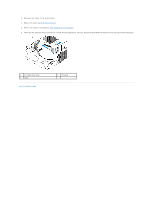
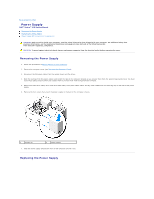
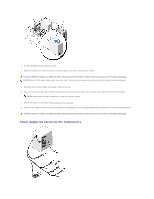
Back to Contents Page Power Supply Dell™ Vostro™ 410 Service Manual Removing the Power Supply Replacing the Power Supply Power Supply DC Connector Pin Assignments CAUTION: Before working inside your computer, read the safety information that shipped with your computer. For additional safety best practices information, see the Regulatory Compliance Homepage on www.dell.com at the following location: www.dell.com/regulatory_compliance. CAUTION: To guard against electrical shock, always unplug your computer from the electrical outlet before removing the cover. Removing the Power Supply 1. Follow the procedures in Before Working on Your Computer. 2. Remove the computer cover (see Removing the Computer Cover). 3. Disconnect the DC power cables from the system board and the drives. 4. Note the routing of the DC power cables underneath the tabs in the computer chassis as you remove them from the system board and drives. You must route these cables properly when you replace them to prevent them from being pinched or crimped. 5. Remove the hard drive cable, CD or DVD drive data cable, front panel ribbon cable, and any other cables from the securing clip on the side of the power supply. 6. Remove the four screws that attach the power supply to the back of the computer chassis. 1 screws (4) 2 power supply 7. Slide the power supply towards the front of the computer and lift it out. Replacing the Power Supply
-
 1
1 -
2
-
3
-
4
-
5
-
6
-
7
-
8
-
9
-
10
-
11
-
12
-
13
-
14
-
15
-
16
-
17
-
18
-
19
-
20
-
21
-
22
-
23
-
24
-
25
-
26
-
 27
27 -
 28
28 -
 29
29 -
 30
30 -
 31
31 -
 32
32 -
 33
33 -
 34
34 -
 35
35 -
 36
36 -
 37
37 -
38
-
39
-
40
-
41
-
42
-
43
-
44
-
45
-
46
-
47
-
48
-
49
-
50
-
51
-
52
-
53
-
54
-
55
-
56
-
57
-
58
-
59
-
60
-
61
-
62
 |
 |