Dell W-7205 Controller Installation Guide - Page 27
Connecting and Disconnecting the AC Power Cord, Connecting the AC Power Cord
 |
View all Dell W-7205 manuals
Add to My Manuals
Save this manual to your list of manuals |
Page 27 highlights
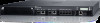
Figure 13 Wall-Mount Installation Connecting and Disconnecting the AC Power Cord Once the controller is installed, it is ready to be powered on. The W-7205 controller is not equipped with an On/Off switch. The controller will power On when the AC power cord is connected to the AC power connector and an AC power outlet. Connecting the AC Power Cord To connect the AC power cord to the W-7205 controller: 1. Lift the power cord retaining clip so that it is not blocking the AC power connector. 2. Insert the coupler end of the AC power cord into the AC power connector. 3. Lower the power cord retaining clip over the AC power cord. The W-7205 controller should now be receiving power. Dell Networking W-7205 Controller | Installation Guide Installation | 27
-
 1
1 -
2
-
3
-
4
-
5
-
6
-
7
-
8
-
9
-
10
-
11
-
12
-
13
-
14
-
15
-
16
-
17
-
18
-
19
-
20
-
21
-
 22
22 -
 23
23 -
 24
24 -
 25
25 -
 26
26 -
 27
27 -
 28
28 -
 29
29 -
 30
30 -
 31
31 -
 32
32 -
33
-
34
-
35
-
36
 |
 |
