Denon AVP-A1HDCI Owners Manual - English - Page 22
USB Port, XM Connector
 |
UPC - 883795000802
View all Denon AVP-A1HDCI manuals
Add to My Manuals
Save this manual to your list of manuals |
Page 22 highlights
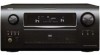
Getting Started Connections Setup Playback Remote Control Multi-Zone Information Troubleshooting Specifications USB Port n Front panel USB memory device n Rear panel USB memory device XM Connector • The AVP-A1HDCI is an XM Ready® receiver. You can receive XM® Satellite Radio by connecting to the XM Mini-Tuner and Home Dock (includes home antenna, each sold separately) and subscribing to the XM service. • Plug the XM Mini-Tuner and Home Dock into the XM connector on the rear panel. • Position the Home Dock antenna near a south-facing window to receive the best signal. For details, see "Listening to XM Satellite Radio Programs" (vpage 61). When making connections, also refer to the operating instructions of the XM Mini-Tuner and Home Dock. XM Mini-Tuner and Home Dock XM • In the initial status, USB memory devices can be used by connecting them to the USB port on the front panel. • To change the port to be used, see "USB Select" on page 49. • For instructions on playing the files on a USB memory device, see page 69, 70. NOTE • Set to the USB port you want to use. • The AVP-A1HDCI is equipped with two USB ports, one each on the front and rear panels. It is not possible to use the set with USB memory devices connected to both the ports at the same time. Select the USB port you want to use at the GUI menu "Source Select" - "NET/USB" - "Playback Mode" - "USB Select". • Do not use the extension cable for connecting the USB memory deveice to the AVP-A1HDCI's USB port. Use of the extension cable may cause harmful interference. NOTE Keep the power cord unplugged until the XM Mini-Tuner and Home Dock connection have been completed. • The XM name and related logo are registered trademarks of XM Satellite Radio Inc. All rights reserved. • XM Ready is a registered trademark of XM Satellite Radio Inc. All rights reserved. 19
-
 1
1 -
2
-
3
-
4
-
5
-
6
-
7
-
8
-
9
-
10
-
11
-
12
-
13
-
14
-
15
-
16
-
 17
17 -
 18
18 -
 19
19 -
 20
20 -
 21
21 -
 22
22 -
 23
23 -
 24
24 -
 25
25 -
 26
26 -
 27
27 -
28
-
29
-
30
-
31
-
32
-
33
-
34
-
35
-
36
-
37
-
38
-
39
-
40
-
41
-
42
-
43
-
44
-
45
-
46
-
47
-
48
-
49
-
50
-
51
-
52
-
53
-
54
-
55
-
56
-
57
-
58
-
59
-
60
-
61
-
62
-
63
-
64
-
65
-
66
-
67
-
68
-
69
-
70
-
71
-
72
-
73
-
74
-
75
-
76
-
77
-
78
-
79
-
80
-
81
-
82
-
83
-
84
-
85
-
86
-
87
-
88
-
89
-
90
-
91
-
92
-
93
-
94
-
95
-
96
-
97
-
98
-
99
-
100
-
101
-
102
-
103
-
104
-
105
-
106
-
107
-
108
-
109
-
110
-
111
-
112
-
113
-
114
-
115
-
116
-
117
-
118
-
119
-
120
-
121
-
122
-
123
-
124
-
125
-
126
-
127
-
128
 |
 |
