Epson BrightLink 450Wi Quick Guide - Page 14
Windows, Macintosh, Wait until you see a flashing green circle in the upper left corner of your - calibrate
 |
View all Epson BrightLink 450Wi manuals
Add to My Manuals
Save this manual to your list of manuals |
Page 14 highlights
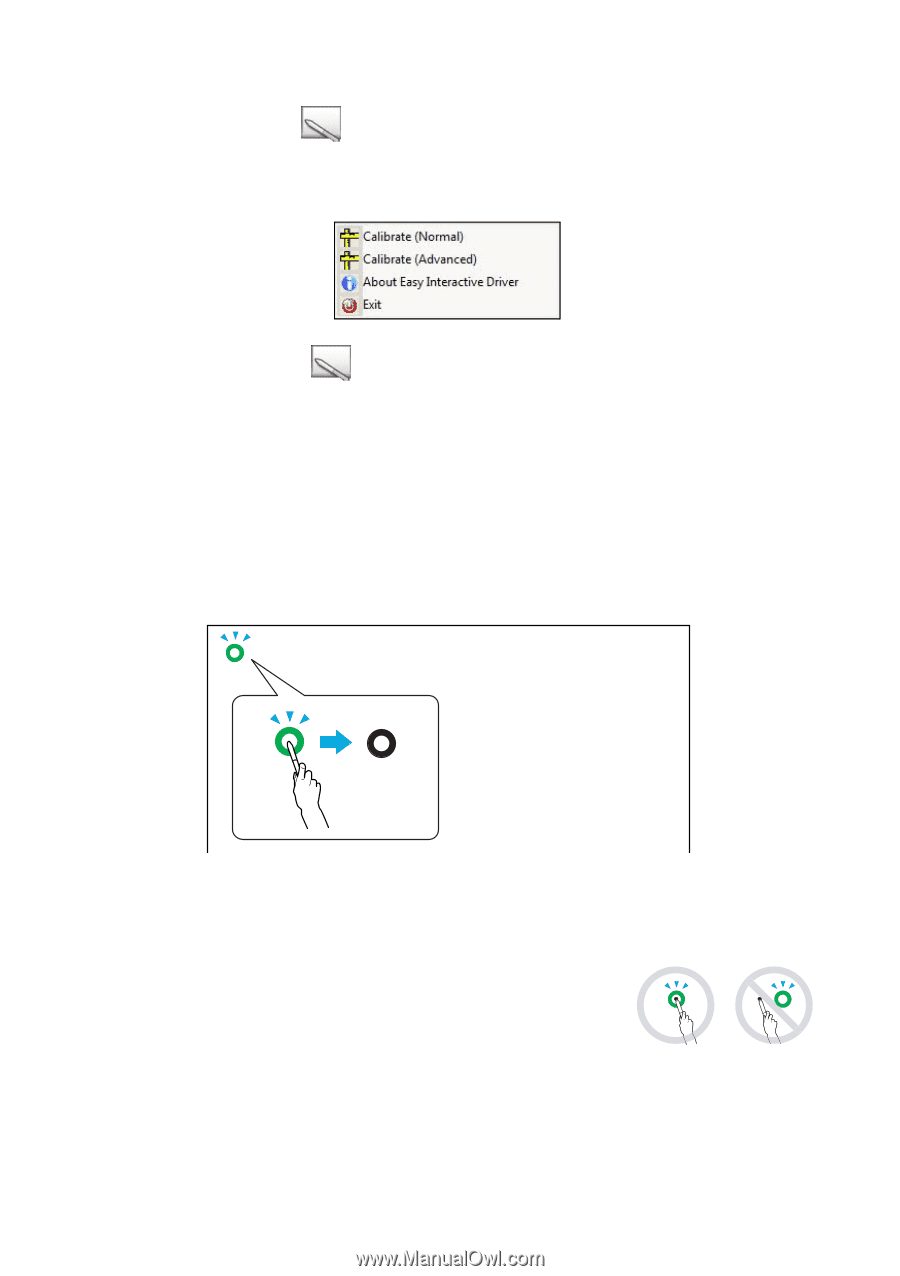
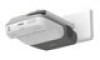
1. To start calibration, do one of the following: Windows: click the pen icon in the system tray on your taskbar (lower right corner of your screen), then select Calibrate (Normal) or Calibrate (Advanced). Macintosh: click the pen icon in the Dock, select Calibrate from the menu bar, then select Calibrate (Normal) or Calibrate (Advanced). 2. After you read the message about calibration, click OK. 3. Wait until you see a flashing green circle in the upper left corner of your projected image. 4. Touch the center of the circle with the tip of the pen. The circle stops flashing and turns black. You see another circle on the right. 5. Touch the center of the next circle, then repeat. When you get to the end of the row, the next circle appears at the left edge of a new row. Note: For the most accurate calibration, make sure you hold the pen at an angle to the projection surface and touch the center of the circle. Make sure you are not blocking the signal between the pen and the interactive receiver (next to the projection window) on the projector. Don't press the button on the side of the pen while calibrating. If you make a mistake or want to stop calibrating, press Esc on your computer keyboard. Then restart the calibration process as described above. 14 Getting Started
-
 1
1 -
2
-
3
-
4
-
5
-
6
-
7
-
8
-
 9
9 -
 10
10 -
 11
11 -
 12
12 -
 13
13 -
 14
14 -
 15
15 -
 16
16 -
 17
17 -
 18
18 -
 19
19 -
20
-
21
-
22
-
23
-
24
-
25
-
26
-
27
-
28
-
29
-
30
-
31
-
32
-
33
-
34
-
35
-
36
-
37
-
38
-
39
-
40
-
41
-
42
-
43
-
44
-
45
-
46
-
47
-
48
-
49
-
50
-
51
-
52
-
53
-
54
-
55
-
56
-
57
-
58
-
59
-
60
-
61
-
62
-
63
-
64
-
65
-
66
-
67
-
68
-
69
-
70
-
71
-
72
 |
 |