Epson C264011 Printer Basics - Page 19
PRINTING FROM START TO FINISH, Printing with Windows
 |
UPC - 010343816213
View all Epson C264011 manuals
Add to My Manuals
Save this manual to your list of manuals |
Page 19 highlights
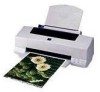
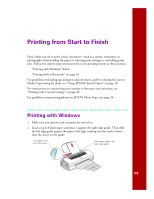
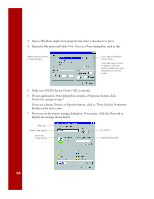
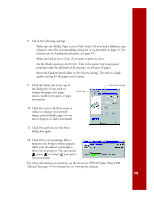
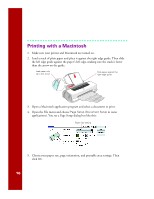
Printing from Start to Finish Here's what you do to print a basic document-such as a memo, newsletter, or photograph-from loading the paper to selecting print settings to controlling print jobs. Follow the step-by-step instructions for your operating system in these sections: s "Printing with Windows" below s "Printing with a Macintosh" on page 16 For guidelines on loading special papers and envelopes, and for selecting the correct Media Type setting for them, see "Using EPSON Special Papers" on page 18. For instructions on customizing your settings to fine-tune your printouts, see "Printing with Custom Settings" on page 22. For guidelines on preserving photos on EPSON Photo Paper, see page 26. Printing with Windows 1. Make sure your printer and computer are turned on. 2. Load a stack of plain paper and place it against the right edge guide. Then slide the left edge guide against the paper's left edge, making sure the stack is lower than the arrow on the guide. Load paper only up to this arrow Slide paper against the right edge guide 13
-
 1
1 -
2
-
3
-
4
-
5
-
6
-
7
-
8
-
9
-
10
-
11
-
12
-
13
-
 14
14 -
 15
15 -
 16
16 -
 17
17 -
 18
18 -
 19
19 -
 20
20 -
 21
21 -
 22
22 -
 23
23 -
 24
24 -
25
-
26
-
27
-
28
-
29
-
30
-
31
-
32
-
33
-
34
-
35
-
36
-
37
-
38
-
39
-
40
-
41
-
42
-
43
-
44
-
45
-
46
-
47
-
48
-
49
-
50
-
51
-
52
-
53
-
54
-
55
-
56
-
57
-
58
-
59
-
60
-
61
-
62
-
63
-
64
-
65
-
66
-
67
 |
 |
