Epson C264011 Printer Basics - Page 48
Problems Getting Good Print Quality, If you see horizontal banding ..
 |
UPC - 010343816213
View all Epson C264011 manuals
Add to My Manuals
Save this manual to your list of manuals |
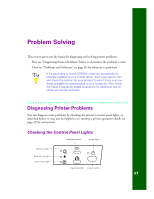
Page 48 highlights
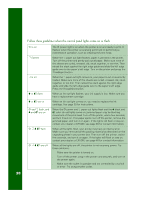
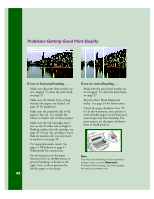
Problems Getting Good Print Quality If you see horizontal banding . . . If you see vertical banding . . . s Make sure the print head nozzles are not clogged. To clean the print head, see page 27. s Make sure the print head nozzles are not clogged. To clean the print head, see page 27. s Make sure the Media Type setting matches the paper you loaded. See page 20 for guidelines. s Make sure the printable side of the paper is face up. It is usually the whiter or shinier side of ink jet paper. s Make sure the ink cartridges aren't low on ink. If either ink out light is flashing, replace the ink cartridge; see page 30. If your ink cartridge is more than six months old, you may need to replace it; see page 33. s Run the Print Head Alignment utility. See page 35 for instructions. s Check the paper thickness lever. If it's in the + position, your printer is set for thicker paper or envelopes and your image may have banding. For most papers, set the paper thickness lever to the 0 position. s Try using Automatic mode. See page 15 (Windows) or page 17 (Macintosh) for instructions. s For most papers, set the paper thickness lever to the 0 position to prevent banding, as shown to the right. Set it to the + position for thicker paper or envelopes. 42 Note: You may see banding in the expanded margin if you use the Maximum Printable Area setting. Use this setting for text documents only.
-
 1
1 -
2
-
3
-
4
-
5
-
6
-
7
-
8
-
9
-
10
-
11
-
12
-
13
-
14
-
15
-
16
-
17
-
18
-
19
-
20
-
21
-
22
-
23
-
24
-
25
-
26
-
27
-
28
-
29
-
30
-
31
-
32
-
33
-
34
-
35
-
36
-
37
-
38
-
39
-
40
-
41
-
42
-
 43
43 -
 44
44 -
 45
45 -
 46
46 -
 47
47 -
 48
48 -
 49
49 -
 50
50 -
 51
51 -
 52
52 -
 53
53 -
54
-
55
-
56
-
57
-
58
-
59
-
60
-
61
-
62
-
63
-
64
-
65
-
66
-
67
 |
 |
