Epson Expression 10000XL - Photo Edition User Manual - Page 53
Continuous auto exposure, Continuous, auto exposure, Reset, Unsharp Mask, Grain Reduction, Color
 |
View all Epson Expression 10000XL - Photo Edition manuals
Add to My Manuals
Save this manual to your list of manuals |
Page 53 highlights
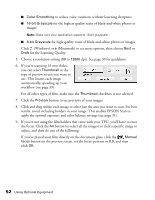
10. Use these Adjustment settings (on the main screen) to modify your images as necessary. Auto Adjust - If you've turned off Continuous auto exposure, click this button to apply your color management settings and have the software determine the best exposure and color balance for your scan. (If Continuous auto exposure is turned on, clicking this button has no effect; see page 31.) Histogram Adjustment - Click this button to adjust the highlight, shadow, and gamma input levels. Tone Correction - Click this button to choose a preset tone curve for specific effects or to change the tone curve manually. Image Adjustment - Click this button to adjust the color balance, saturation, brightness, and contrast settings. Color Palette - Click this button to fine-tune the colors in your image. For any of these settings, you can click Reset to go back to the default settings for an image. Click Help for more information about using these options. 11. To enhance the appearance of your images, select from the following options: ■ To sharpen an image, select Unsharp Mask. ■ To reduce the appearance of graininess in your film, select Grain Reduction. ■ To correct the color on faded photos, select Color Restoration. ■ To remove shadows on images that have too much background light, select Backlight Correction. ■ To digitally remove unwanted specks of dust, select Dust Removal. Click (Windows) or (Macintosh) next to each setting and then choose a Level to increase or decrease the effect. For more information about these options, see page 33. 12. Click Scan. Using Optional Equipment 53
-
 1
1 -
2
-
3
-
4
-
5
-
6
-
7
-
8
-
9
-
10
-
11
-
12
-
13
-
14
-
15
-
16
-
17
-
18
-
19
-
20
-
21
-
22
-
23
-
24
-
25
-
26
-
27
-
28
-
29
-
30
-
31
-
32
-
33
-
34
-
35
-
36
-
37
-
38
-
39
-
40
-
41
-
42
-
43
-
44
-
45
-
46
-
47
-
 48
48 -
 49
49 -
 50
50 -
 51
51 -
 52
52 -
 53
53 -
 54
54 -
 55
55 -
 56
56 -
 57
57 -
 58
58 -
59
-
60
-
61
-
62
-
63
-
64
-
65
-
66
-
67
-
68
-
69
-
70
-
71
-
72
-
73
-
74
-
75
-
76
-
77
-
78
-
79
-
80
-
81
-
82
-
83
-
84
-
85
-
86
-
87
-
88
-
89
-
90
-
91
-
92
-
93
-
94
-
95
-
96
 |
 |
