Epson P4000 User's Guide - Page 47
Creating Print Orders, album, use the 4-way ring to select it.
 |
UPC - 010343856622
View all Epson P4000 manuals
Add to My Manuals
Save this manual to your list of manuals |
Page 47 highlights
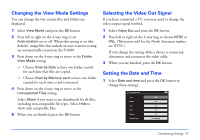
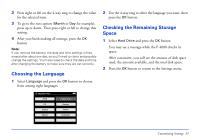
7 Press the OK button when you are ready to start printing. During printing, the LCD is turned off. When you are finished printing, make sure you disconnect the USB cable. Creating Print Orders A print order identifies images that you want to print, and the number of copies of each image. You can create or modify print orders at any time while using the P-4000. Then you can print your images whenever it is convenient. Note: Print orders are saved even after turning turn off the P-4000. 1 Select an image in the thumbnails screen or in full screen view. 2 Press the Menu button to display the pop-up menu, and select Print Order using the 4-way ring. You see the print order screen: Select Photos for print order Total Sheets 08 3 DSC00331. JPG ON 2003.10.25 ON 640+480 Press OK for the Print Settings screen Note: If you select the image in full-screen view, the print order screen looks different from the one above, but the instructions are the same. 3 Press up or down on the 4-way ring to set the number of prints you want for the selected image. 4 If you want to print another image in the folder or album, use the 4-way ring to select it. 5 Repeat steps 3 and 4 until you set the quantities for all the images you want to print. Then press the OK button. You see the icon on the images that have print orders. The print order is saved until the image(s) are printed. To print the selected images you selected, follow the instructions under "Printing Your Photos" on page 45. Direct Printing 47
-
 1
1 -
2
-
3
-
4
-
5
-
6
-
7
-
8
-
9
-
10
-
11
-
12
-
13
-
14
-
15
-
16
-
17
-
18
-
19
-
20
-
21
-
22
-
23
-
24
-
25
-
26
-
27
-
28
-
29
-
30
-
31
-
32
-
33
-
34
-
35
-
36
-
37
-
38
-
39
-
40
-
41
-
 42
42 -
 43
43 -
 44
44 -
 45
45 -
 46
46 -
 47
47 -
 48
48 -
 49
49 -
 50
50 -
 51
51 -
 52
52 -
53
-
54
-
55
-
56
-
57
-
58
-
59
-
60
-
61
-
62
-
63
-
64
-
65
-
66
-
67
-
68
-
69
-
70
-
71
-
72
-
73
-
74
 |
 |
