Epson PowerLite 1264 User Manual - Page 50
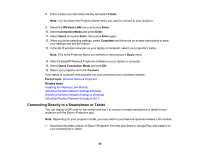
Connecting Directly to a Smartphone or Tablet, Finish, Wireless LAN, Enter, Connection Mode, Quick
 |
View all Epson PowerLite 1264 manuals
Add to My Manuals
Save this manual to your list of manuals |
Page 50 highlights
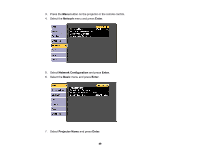
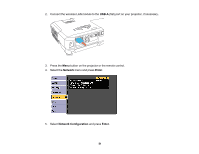
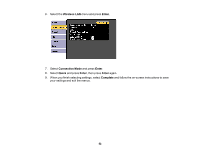
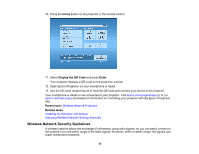
8. Enter a name you can easily identify and select Finish. Note: You will select the Projector Name when you want to connect to your projector. 9. Select the Wireless LAN menu and press Enter. 10. Select Connection Mode and press Enter. 11. Select Quick and press Enter, then press Enter again. 12. When you finish selecting settings, select Complete and follow the on-screen instructions to save your settings and exit the menus. 13. In the list of wireless networks on your laptop or computer, select your projector's name. Note: This is the Projector Name you entered in the projector's Basic menu. 14. Start the EasyMP Network Projection software on your laptop or computer. 15. Select Quick Connection Mode and click OK. 16. Select your projector and click Connect. Your laptop or computer and projector are now connected over a wireless network. Parent topic: Wireless Network Projection Related tasks Installing the Wireless LAN Module Selecting Wireless Network Settings Manually Selecting Wireless Network Settings in Windows Selecting Wireless Network Settings in OS X Connecting Directly to a Smartphone or Tablet You can display a QR code on the screen and use it to connect a single smartphone or tablet to your projector with the Epson iProjection app. Note: Depending on your projector model, you may need to purchase the optional wireless LAN module. 1. Download the latest version of Epson iProjection from the App Store or Google Play and install it on your smartphone or tablet. 50
-
 1
1 -
2
-
3
-
4
-
5
-
6
-
7
-
8
-
9
-
10
-
11
-
12
-
13
-
14
-
15
-
16
-
17
-
18
-
19
-
20
-
21
-
22
-
23
-
24
-
25
-
26
-
27
-
28
-
29
-
30
-
31
-
32
-
33
-
34
-
35
-
36
-
37
-
38
-
39
-
40
-
41
-
42
-
43
-
44
-
 45
45 -
 46
46 -
 47
47 -
 48
48 -
 49
49 -
 50
50 -
 51
51 -
 52
52 -
 53
53 -
 54
54 -
 55
55 -
56
-
57
-
58
-
59
-
60
-
61
-
62
-
63
-
64
-
65
-
66
-
67
-
68
-
69
-
70
-
71
-
72
-
73
-
74
-
75
-
76
-
77
-
78
-
79
-
80
-
81
-
82
-
83
-
84
-
85
-
86
-
87
-
88
-
89
-
90
-
91
-
92
-
93
-
94
-
95
-
96
-
97
-
98
-
99
-
100
-
101
-
102
-
103
-
104
-
105
-
106
-
107
-
108
-
109
-
110
-
111
-
112
-
113
-
114
-
115
-
116
-
117
-
118
-
119
-
120
-
121
-
122
-
123
-
124
-
125
-
126
-
127
-
128
-
129
-
130
-
131
-
132
-
133
-
134
-
135
-
136
-
137
-
138
-
139
-
140
-
141
-
142
-
143
-
144
-
145
-
146
-
147
-
148
-
149
-
150
-
151
-
152
-
153
-
154
-
155
-
156
-
157
-
158
-
159
-
160
-
161
-
162
-
163
-
164
-
165
-
166
-
167
-
168
-
169
-
170
-
171
-
172
-
173
-
174
-
175
-
176
-
177
-
178
-
179
-
180
-
181
-
182
-
183
-
184
-
185
-
186
-
187
-
188
-
189
-
190
-
191
-
192
-
193
-
194
-
195
-
196
-
197
-
198
-
199
-
200
-
201
-
202
-
203
-
204
-
205
-
206
-
207
-
208
-
209
-
210
-
211
-
212
-
213
-
214
-
215
-
216
-
217
-
218
-
219
-
220
-
221
-
222
-
223
-
224
-
225
-
226
-
227
-
228
-
229
-
230
-
231
-
232
-
233
-
234
-
235
-
236
-
237
-
238
-
239
-
240
 |
 |
