Epson PowerLite 71c User Manual - Page 37
Adjusting the Image Quality, Using the Remote Control, Installing the Remote Control Batteries
 |
View all Epson PowerLite 71c manuals
Add to My Manuals
Save this manual to your list of manuals |
Page 37 highlights
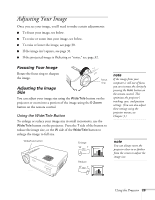
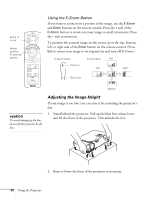
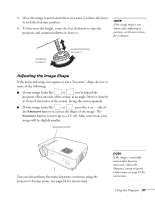
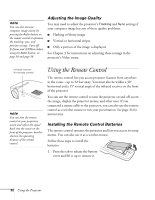
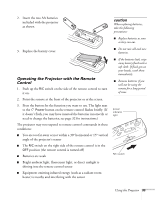
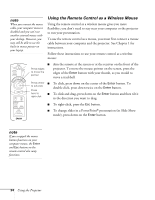
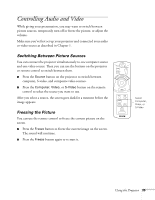
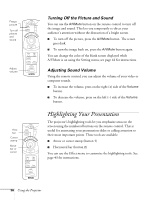
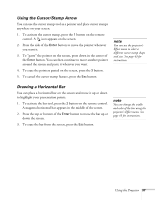
note You can also increase computer image clarity by pressing the Auto button on the remote control to optimize the tracking, sync, and position settings. Turn off E-Zoom and A/VMute before using the Auto button; see page 30 and page 36. Adjusting the Image Quality You may need to adjust the projector's Tracking and Sync settings if your computer image has any of these quality problems: I Flashing or blurry image I Vertical or horizontal stripes I Only a portion of the image is displayed See Chapter 3 for instructions on adjusting these settings in the projector's Video menu. infrared receiver for remote control note You can aim the remote control at your projection screen and reflect the signal back into the sensor on the front of the projector, but this shortens the operating distance of the remote control. Using the Remote Control The remote control lets you access projector features from anywhere in the room-up to 32 feet away. You must also be within a 30° horizontal and a 15° vertical angle of the infrared receiver on the front of the projector. You can use the remote control to turn the projector on and off, zoom the image, display the projector menus, and other uses. If you connected a mouse cable to the projector, you can also use the remote control as a wireless mouse to run your presentation. See page 34 for instructions. Installing the Remote Control Batteries The remote control operates the projector and lets you access its setup menus. You can also use it as a wireless mouse. Follow these steps to install the batteries: 1. Press the tab to release the battery cover and lift it up to remove it. 32 Using the Projector
-
 1
1 -
2
-
3
-
4
-
5
-
6
-
7
-
8
-
9
-
10
-
11
-
12
-
13
-
14
-
15
-
16
-
17
-
18
-
19
-
20
-
21
-
22
-
23
-
24
-
25
-
26
-
27
-
28
-
29
-
30
-
31
-
 32
32 -
 33
33 -
 34
34 -
 35
35 -
 36
36 -
 37
37 -
 38
38 -
 39
39 -
 40
40 -
 41
41 -
 42
42 -
43
-
44
-
45
-
46
-
47
-
48
-
49
-
50
-
51
-
52
-
53
-
54
-
55
-
56
-
57
-
58
-
59
-
60
-
61
-
62
-
63
-
64
-
65
-
66
-
67
-
68
-
69
-
70
-
71
-
72
-
73
-
74
-
75
-
76
-
77
-
78
-
79
-
80
-
81
-
82
-
83
-
84
-
85
-
86
 |
 |
