Epson PowerLite 7800pNL User Manual - Page 25
Connecting to the Computer Port, caution
 |
View all Epson PowerLite 7800pNL manuals
Add to My Manuals
Save this manual to your list of manuals |
Page 25 highlights
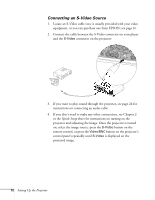
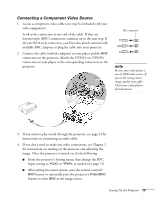
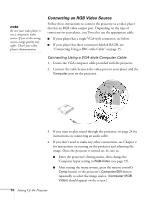
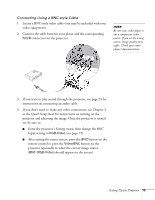
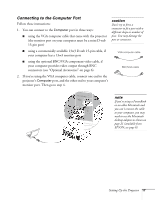
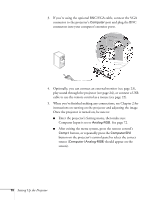
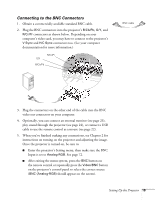
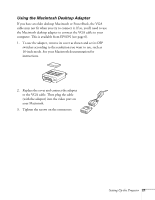
Connecting to the Computer Port Follow these instructions: 1. You can connect to the Computer port in three ways: ■ using the VGA computer cable that came with the projector (the monitor port on your computer must be a mini D-sub 15-pin port) caution Don't try to force a connector to fit a port with a different shape or number of pins. You may damage the port or connector. ■ using a commercially available 13w3 D-sub 15-pin cable, if your computer has a 13w3 monitor port VGA computer cable ■ using the optional BNC/VGA component video cable, if your computer provides video output through BNC connectors (see "Optional Accessories" on page 6). BNC/VGA cable 2. If you're using the VGA computer cable, connect one end to the projector's Computer port, and the other end to your computer's monitor port. Then go to step 4. note If you're using a PowerBook or an older Macintosh and you can't connect the cable to your computer, you may need to use the Macintosh desktop adapter as shown on page 21 (available from EPSON; see page 6). Setting Up the Projector 17
-
 1
1 -
2
-
3
-
4
-
5
-
6
-
7
-
8
-
9
-
10
-
11
-
12
-
13
-
14
-
15
-
16
-
17
-
18
-
19
-
 20
20 -
 21
21 -
 22
22 -
 23
23 -
 24
24 -
 25
25 -
 26
26 -
 27
27 -
 28
28 -
 29
29 -
 30
30 -
31
-
32
-
33
-
34
-
35
-
36
-
37
-
38
-
39
-
40
-
41
-
42
-
43
-
44
-
45
-
46
-
47
-
48
-
49
-
50
-
51
-
52
-
53
-
54
-
55
-
56
-
57
-
58
-
59
-
60
-
61
-
62
-
63
-
64
-
65
-
66
-
67
-
68
-
69
-
70
-
71
-
72
-
73
-
74
-
75
-
76
-
77
-
78
-
79
-
80
-
81
-
82
-
83
-
84
-
85
-
86
-
87
-
88
-
89
-
90
-
91
-
92
-
93
-
94
-
95
-
96
-
97
-
98
-
99
-
100
-
101
-
102
-
103
-
104
-
105
-
106
-
107
-
108
-
109
-
110
-
111
-
112
-
113
-
114
-
115
-
116
-
117
-
118
-
119
-
120
-
121
-
122
-
123
-
124
-
125
-
126
-
127
-
128
-
129
-
130
-
131
-
132
-
133
-
134
-
135
-
136
-
137
-
138
-
139
-
140
-
141
-
142
-
143
-
144
-
145
-
146
 |
 |
