Epson PowerLite 955W Operation Guide - EasyMP Network Updater - Page 13
Editing a Projector List Manually - user manual
 |
View all Epson PowerLite 955W manuals
Add to My Manuals
Save this manual to your list of manuals |
Page 13 highlights
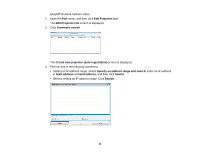
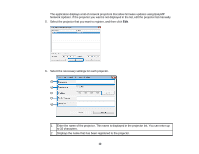
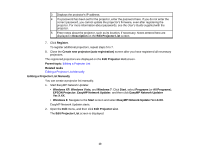
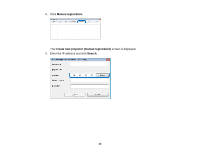
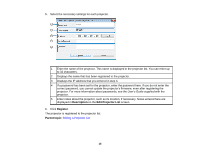
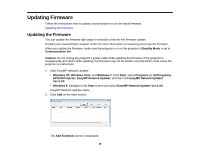
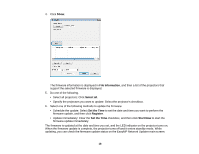
3 Displays the projector's IP address. 4 If a password has been set for the projector, enter the password here. If you do not enter the correct password, you cannot update the projector's firmware, even after registering the projector. For more information about passwords, see the User's Guide supplied with the projector. 5 Enter notes about the projector, such as its location, if necessary. Notes entered here are displayed in Description on the Edit Projector List screen. 7. Click Register. To register additional projectors, repeat steps 5 to 7. 8. Close the Create new projector (auto registration) screen after you have registered all necessary projectors. The registered projectors are displayed on the Edit Projector List screen. Parent topic: Editing a Projector List Related tasks Editing a Projector List Manually Editing a Projector List Manually You can create a projector list manually. 1. Start EasyMP Network Updater. • Windows XP, Windows Vista, and Windows 7: Click Start, select Programs (or All Programs), EPSON Projector, EasyMP Network Updater, and then click EasyMP Network Updater Ver.X.XX. • Windows 8: Navigate to the Start screen and select EasyMP Network Updater Ver.X.XX. EasyMP Network Updater starts. 2. Open the Edit menu, and then click Edit Projector List. The Edit Projector List screen is displayed. 13
-
 1
1 -
2
-
3
-
4
-
5
-
6
-
7
-
 8
8 -
 9
9 -
 10
10 -
 11
11 -
 12
12 -
 13
13 -
 14
14 -
 15
15 -
 16
16 -
 17
17 -
 18
18 -
19
-
20
-
21
-
22
-
23
-
24
-
25
-
26
-
27
-
28
-
29
-
30
-
31
-
32
-
33
-
34
-
35
-
36
-
37
-
38
-
39
-
40
-
41
-
42
-
43
-
44
-
45
-
46
-
47
 |
 |