Epson PowerLite Home Cinema 2040 User Manual - Page 48
Connecting for Screen Mirroring Using Windows 10, Screen Mirroring Settings, Enter, Display Name
 |
View all Epson PowerLite Home Cinema 2040 manuals
Add to My Manuals
Save this manual to your list of manuals |
Page 48 highlights
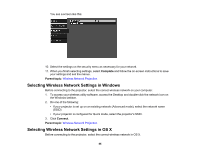
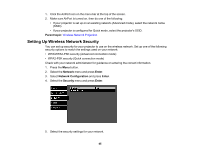
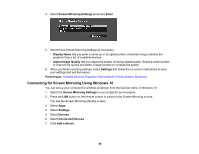
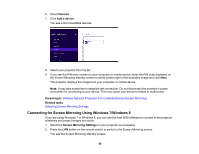
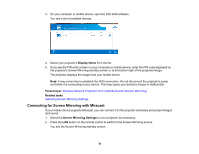
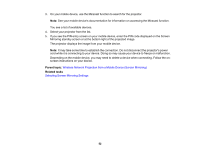
4. Select Screen Mirroring Settings and press Enter. 5. Select these Screen Mirroring settings as necessary: • Display Name lets you enter a name up to 32 alphanumeric characters long to identify the projector from a list of available devices. • Adjust Image Quality lets you adjust the screen mirroring speed/quality. Select a small number to improve the quality and select a large number to increase the speed. 6. When you finish selecting settings, select Settings and follow the on-screen instructions to save your settings and exit the menus. Parent topic: Wireless Network Projection from a Mobile Device (Screen Mirroring) Connecting for Screen Mirroring Using Windows 10 You can set up your computer for wireless projection from the Devices menu in Windows 10. 1. Select the Screen Mirroring Settings on your projector as necessary. 2. Press the LAN button on the remote control to switch to the Screen Mirroring source. You see the Screen Mirroring standby screen. 3. Select Apps. 4. Select Settings. 5. Select Devices. 6. Select Connected Devices. 7. Click Add a device. 48
-
 1
1 -
2
-
3
-
4
-
5
-
6
-
7
-
8
-
9
-
10
-
11
-
12
-
13
-
14
-
15
-
16
-
17
-
18
-
19
-
20
-
21
-
22
-
23
-
24
-
25
-
26
-
27
-
28
-
29
-
30
-
31
-
32
-
33
-
34
-
35
-
36
-
37
-
38
-
39
-
40
-
41
-
42
-
 43
43 -
 44
44 -
 45
45 -
 46
46 -
 47
47 -
 48
48 -
 49
49 -
 50
50 -
 51
51 -
 52
52 -
 53
53 -
54
-
55
-
56
-
57
-
58
-
59
-
60
-
61
-
62
-
63
-
64
-
65
-
66
-
67
-
68
-
69
-
70
-
71
-
72
-
73
-
74
-
75
-
76
-
77
-
78
-
79
-
80
-
81
-
82
-
83
-
84
-
85
-
86
-
87
-
88
-
89
-
90
-
91
-
92
-
93
-
94
-
95
-
96
-
97
-
98
-
99
-
100
-
101
-
102
-
103
-
104
-
105
-
106
-
107
-
108
-
109
-
110
-
111
-
112
-
113
-
114
-
115
-
116
-
117
-
118
-
119
-
120
-
121
-
122
-
123
-
124
-
125
-
126
-
127
-
128
-
129
-
130
-
131
-
132
-
133
-
134
-
135
-
136
-
137
-
138
-
139
-
140
-
141
-
142
-
143
-
144
-
145
-
146
-
147
-
148
-
149
-
150
-
151
-
152
-
153
-
154
-
155
-
156
-
157
-
158
-
159
-
160
-
161
-
162
-
163
-
164
-
165
-
166
-
167
-
168
-
169
-
170
-
171
-
172
-
173
-
174
-
175
-
176
-
177
-
178
-
179
-
180
-
181
-
182
-
183
-
184
-
185
-
186
-
187
-
188
-
189
-
190
-
191
-
192
-
193
-
194
-
195
-
196
-
197
-
198
-
199
-
200
-
201
-
202
-
203
-
204
-
205
-
206
-
207
 |
 |
