Epson Stylus NX200 Quick Guide - Page 10
Copying a Photo - how to scan
 |
View all Epson Stylus NX200 manuals
Add to My Manuals
Save this manual to your list of manuals |
Page 10 highlights
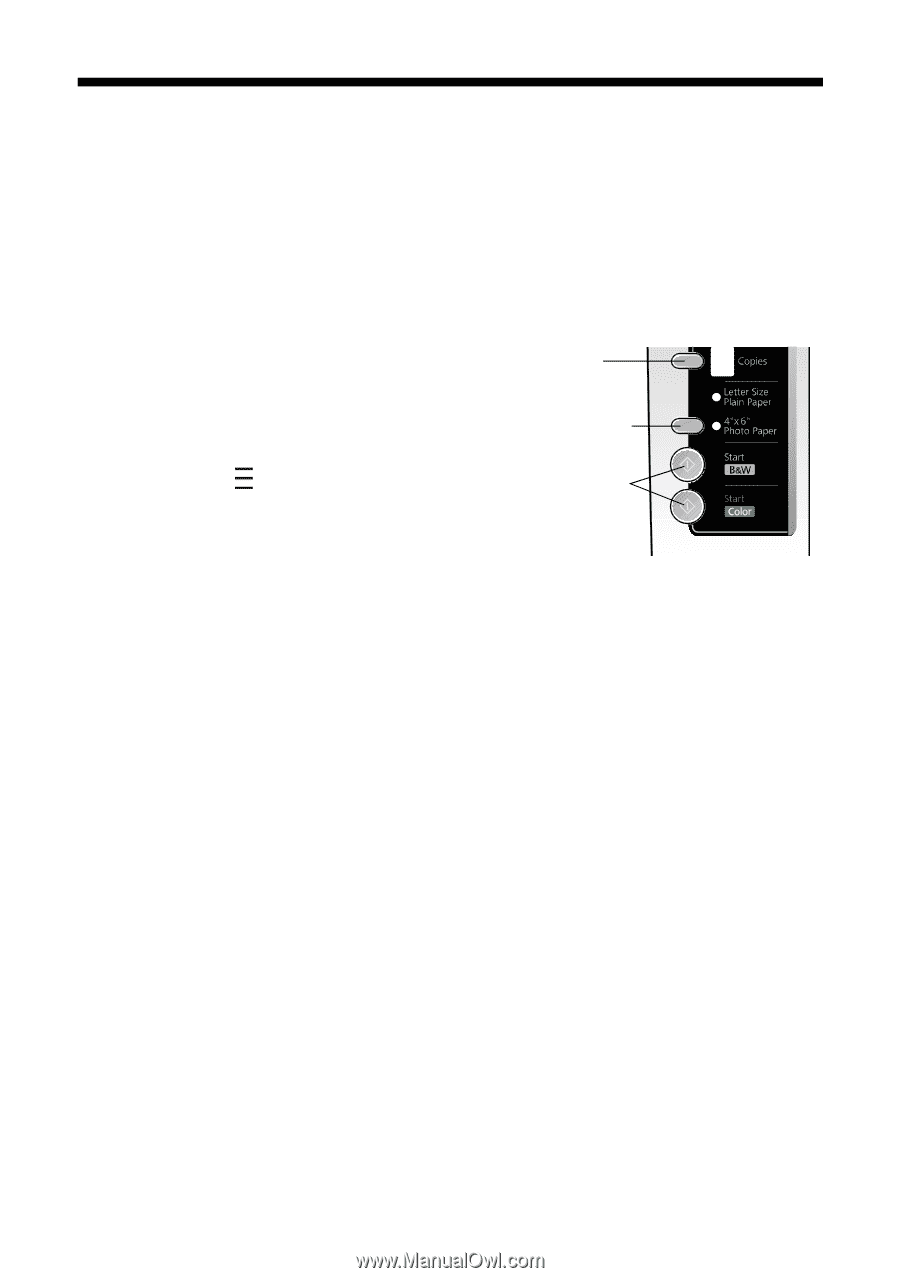
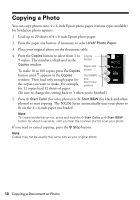
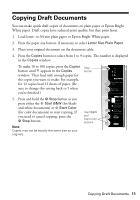
Copying a Photo You can copy photos onto 4 × 6-inch Epson photo paper (various types available) for borderless photo reprints. 1. Load up to 20 sheets of 4 × 6-inch Epson photo paper. 2. Press the paper size button, if necessary, to select 4"x6" Photo Paper. 3. Place your original photo on the document table. 4. Press the Copies button to select from 1 to Copies 9 copies. The number is displayed in the button Copies window. Paper size To make 10 to 100 copies, press the Copies button button until appears in the Copies Start B&W window. Then load only enough paper for the copies you want to make. For example, for 12 copies load 12 sheets of paper. and Start Color buttons (Be sure to change this setting back to 1 when you're finished.) 5. Press x Start Color (for color photos) or x Start B&W (for black-and-white photos) to start copying. The NX200 Series automatically sizes your photo to fit on the 4 × 6-inch paper you loaded. Note: To create borderless prints, press and hold the x Start Color or x Start B&W button for about 5 seconds, until you hear the scanner start to scan your photo. If you need to cancel copying, press the y Stop button. Note: Copies may not be exactly the same size as your original photo. 10 Copying a Document or Photo
-
 1
1 -
2
-
3
-
4
-
 5
5 -
 6
6 -
 7
7 -
 8
8 -
 9
9 -
 10
10 -
 11
11 -
 12
12 -
 13
13 -
 14
14 -
 15
15 -
16
-
17
-
18
-
19
-
20
-
21
-
22
-
23
-
24
-
25
-
26
-
27
-
28
-
29
-
30
-
31
-
32
-
33
-
34
-
35
-
36
-
37
-
38
-
39
-
40
-
41
-
42
-
43
-
44
-
45
-
46
-
47
-
48
 |
 |