Epson Stylus Pro 10000 - Photographic Dye Ink Quick Installation Guide - EFI F - Page 28
Installing Fiery Downloader, Configuring the Fiery Downloader
 |
View all Epson Stylus Pro 10000 - Photographic Dye Ink manuals
Add to My Manuals
Save this manual to your list of manuals |
Page 28 highlights
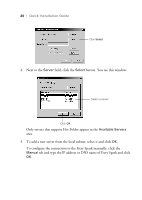
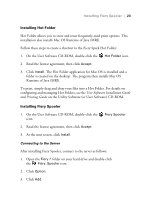
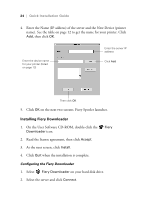
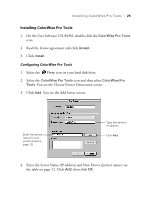
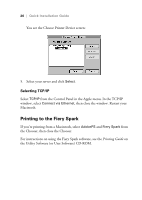
24 | Quick Installation Guide 4. Enter the Name (IP address) of the server and the New Device (printer name). See the table on page 12 to get the name for your printer. Click Add, then click OK. Enter the device name for your printer (listed on page 12) Enter the server IP address Click Add Then click OK 5. Click OK on the next two screens. Fiery Spooler launches. Installing Fiery Downloader 1. On the User Software CD-ROM, double-click the Downloader icon. 2. Read the license agreement, then click Accept. 3. At the next screen, click Install. 4. Click Quit when the installation is complete. Fiery Configuring the Fiery Downloader 1. Select Fiery Downloader on your hard disk drive. 2. Select the server and click Connect.
-
 1
1 -
2
-
3
-
4
-
5
-
6
-
7
-
8
-
9
-
10
-
11
-
12
-
13
-
14
-
15
-
16
-
17
-
18
-
19
-
20
-
21
-
22
-
 23
23 -
 24
24 -
 25
25 -
 26
26 -
 27
27 -
 28
28 -
 29
29 -
 30
30 -
 31
31 -
 32
32 -
 33
33 -
34
 |
 |

24
|
Quick Installation Guide
4.
Enter the Name (IP address) of the server and the New Device (printer
name). See the table on page 12 to get the name for your printer. Click
Add
, then click
OK
.
5.
Click
OK
on the next two screens. Fiery Spooler launches.
Installing Fiery Downloader
1.
On the User Software CD-ROM, double-click the
Fiery
Downloader
icon.
2.
Read the license agreement, then click
Accept
.
3.
At the next screen, click
Install
.
4.
Click
Quit
when the installation is complete.
Configuring the Fiery Downloader
1.
Select
Fiery Downloader
on your hard disk drive.
2.
Select the server and click
Connect
.
Enter the server IP
address
Enter the device name
for your printer (listed
on page 12)
Click
Add
Then click
OK