Epson Stylus Pro 3800 Professional Edition Product Information Guide - Page 11
Checking Printer Status and Part Life, Printing Status Information
 |
View all Epson Stylus Pro 3800 Professional Edition manuals
Add to My Manuals
Save this manual to your list of manuals |
Page 11 highlights
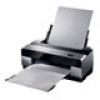
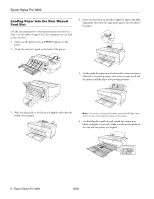
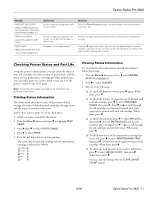
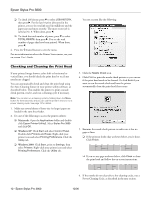
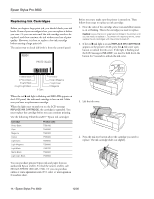
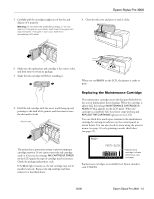
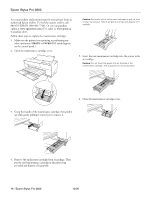
Epson Stylus Pro 3800 Message PAPER SETTING ERROR CHECK PAPER SOURCE IN THE DRIVER SETTINGS AND LOAD PAPER CORRECTLY PAPER SIZE ERROR LOAD THE CORRECT SIZE PAPER PAPER SKEW PRESS THE DOWN BUTTON. LOAD PAPER CORRECTLY Explanation You are using the wrong paper path for your media. The size of paper you loaded is not correct for the document/image you are printing. The paper is not loaded straight. Response Check the Paper Source setting in the printer driver, and load the paper in the correct slot. Remove the paper and load media that is the correct size for what you are printing. Press the d Paper feed button, and then load the paper straight. If you are using the auto sheet feeder, you can use the top edge guide to help feed the paper straight. See page 5 for details. Checking Printer Status and Part Life Using the printer's menu system, you can check the status of your ink cartridges, the total number of prints made, and the status of your maintenance cartridge and other printer parts. You can either print out a status check or you can view the printer's status on the LCD panel. Note: To test the print quality, see page 12 for instructions on printing a nozzle check. Printing Status Information The status check sheet shows some of the current default settings, the status of the ink in each cartridge, the page count, and the status of various printer parts. Follow these steps to print the status check sheet: 1. Make sure paper is loaded in the printer. 2. Press the Menu r button and then d to highlight TEST PRINT. 3. Press r then d to select STATUS SHEET. 4. Press r to select PRINT. 5. Press the Enter button to start printing. The service life for each ink cartridge and the maintenance cartridge is indicated as follows: E[*****]F E[**** ]F E[*** ]F E[** ]F E[* ]F Viewing Status Information To view printer status information instead of printing it, follow these steps: 1. Press the Menu r button and then d until PRINTER STATUS is highlighted. 2. Press r to select VERSION. 3. Do one of the following: ❏ To check the firmware version, press r again. When done, press l. ❏ To check the number of pages that can be printed with each ink cartridge, press d to select PRINTABLE PAGES, then press r. Press d or u to scroll through the ink cartridges and see approximately how many pages can be printed with each ink cartridge. When done, press l. ❏ To check the ink status, press d to select INK LEVEL, then press r. You see MATTE BLACK and the ink status for that cartridge. Press d or u to scroll through the ink cartridges and see their status. When done, press l. ❏ To check how much of the maintenance cartridge has been used, press d to select MAINTENANCE CART, then press r. You see how much capacity remains in the cartridge. When done, press l. ❏ To check the total amount of ink used (in milliliters), press d to select USAGE COUNT, then press r. When done, press l. You can clear this setting with the CLEAR USAGE COUNT option. 12/06 Epson Stylus Pro 3800 - 11
-
 1
1 -
2
-
3
-
4
-
5
-
 6
6 -
 7
7 -
 8
8 -
 9
9 -
 10
10 -
 11
11 -
 12
12 -
 13
13 -
 14
14 -
 15
15 -
 16
16 -
17
-
18
 |
 |