Epson Stylus Pro 3800 Professional Edition Product Information Guide - Page 17
Cleaning the Printer, Transporting or Storing the Printer, Preparing the Printer for Shipment
 |
View all Epson Stylus Pro 3800 Professional Edition manuals
Add to My Manuals
Save this manual to your list of manuals |
Page 17 highlights
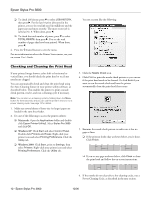
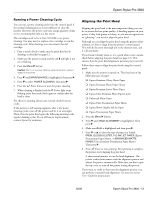
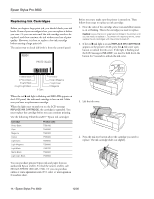
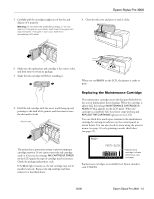
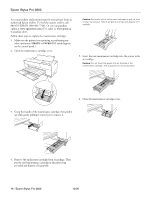
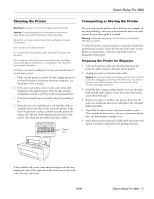
Epson Stylus Pro 3800 Cleaning the Printer Warning: Be careful not to touch the gears inside the printer. Caution: To avoid damaging the components as well as the case, never use alcohol or thinners to clean the printer. Be careful not to get water on the printer mechanism or screen components. Don't use a hard or abrasive brush. Do not touch the ink absorption pads; otherwise, printouts may be soiled. Don't spray the inside of the printer with lubricants; unsuitable oils can damage the mechanism. Contact Epson if you think the printer needs lubrication. To keep your printer working at its best, you should clean it several times a year. 1. Make sure the printer is turned off, then unplug the power cord and disconnect the printer from your computer. Let the printer sit for a minute. 2. If the outer case is dirty, clean it with a soft, clean cloth dampened with mild detergent. Keep the ink cartridge compartment closed to prevent water from getting inside. 3. If the front manual tray is extended, close it by pushing it in. 4. Open the top cover and then use a soft, lint-free cloth to carefully remove any dust or dirt inside the printer. If the back of a printout is soiled, carefully clean the plastic ribs using a soft, lint-free cloth wiping in the direction of the arrows. Also clean any area with excess ink or debris. Plastic ribs Transporting or Storing the Printer If you are moving the printer a short distance (for example, in the same building), close any open extensions and covers and remove the rear sheet guide if installed. Warning: The printer weighs about 43 lb (20 kg), and should be lifted by two people. To ship the printer, you must repack it using the original box and packing materials. If you do not have these items, contact Epson to request them. Otherwise, the printer may be damaged beyond repair. Preparing the Printer for Shipment 1. Turn on the printer, make sure the print head is in the home (far right) position, then turn off the printer. 2. Unplug the power cord and interface cable. Caution: Do not remove the ink cartridges and do not turn off the printer by unplugging it or turning off a power strip. You will not be able to lock the print head, and ink may leak out of the reservoir, damaging the printer. 3. Install the blue carriage retainer bracket to secure the print head and ink tubes in place. If you don't have the bracket, secure them with tape. 4. Remove any paper or media in the printer, then close the paper tray extensions and covers, and remove the rear sheet guide if installed. 5. Tape all of the doors, covers, and trays securely in place. These include the front cover, ink cover, front manual feed tray, and maintenance cartridge cover. 6. Insert the protective materials included with the printer and repack it using the original box and packing materials. If the problem still occurs, clean the area using a soft, lint-free, dampened cloth. Then wipe the inside of the printer dry with a dry, lint-free, soft cloth. 12/06 Epson Stylus Pro 3800 - 17
-
 1
1 -
2
-
3
-
4
-
5
-
6
-
7
-
8
-
9
-
10
-
11
-
 12
12 -
 13
13 -
 14
14 -
 15
15 -
 16
16 -
 17
17 -
 18
18
 |
 |
