Epson Stylus Pro 3800 Professional Edition Product Information Guide - Page 5
Loading Paper in the Auto Sheet Feeder, Epson Stylus Pro 3800 - 5
 |
View all Epson Stylus Pro 3800 Professional Edition manuals
Add to My Manuals
Save this manual to your list of manuals |
Page 5 highlights
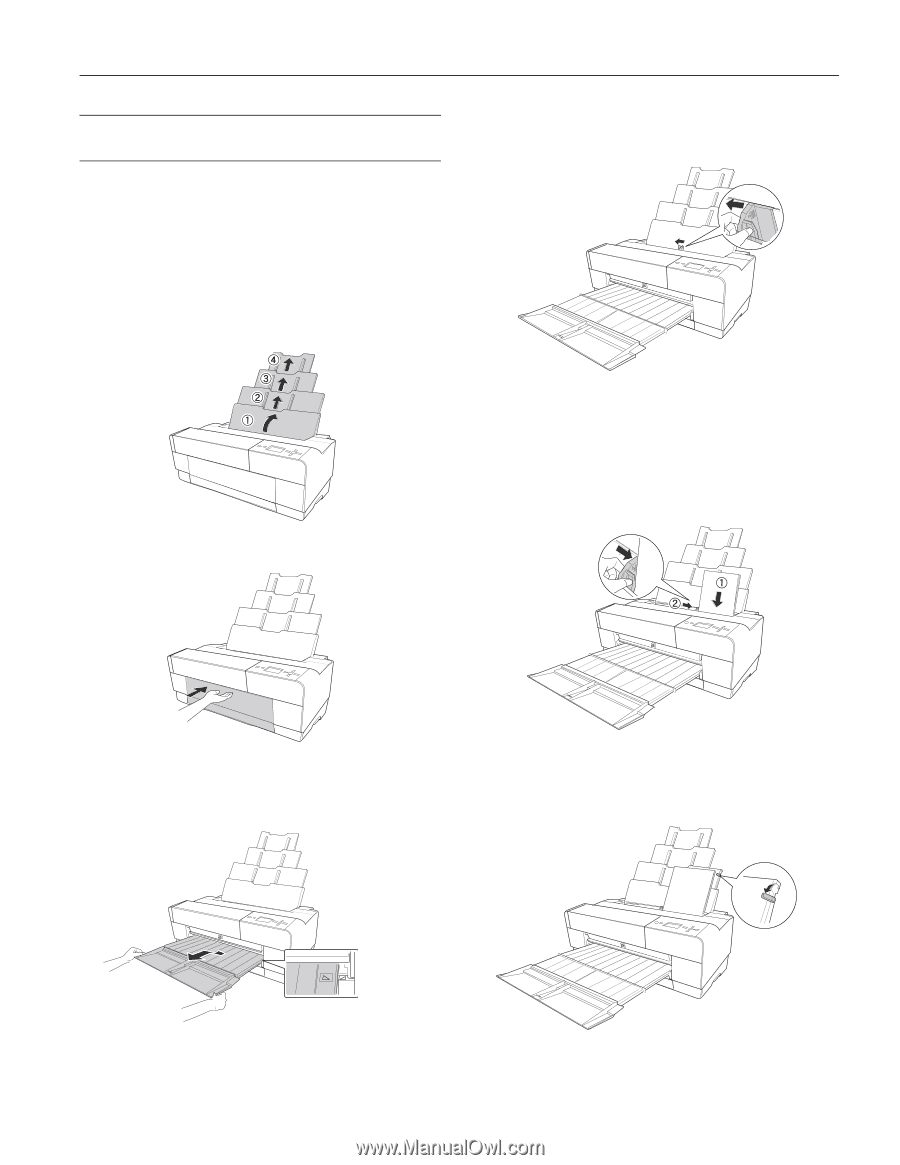
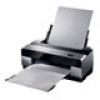
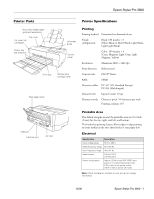
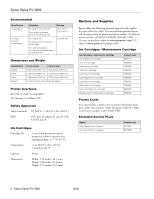
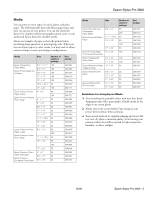
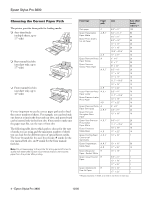
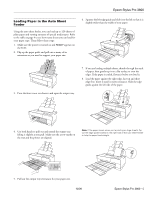
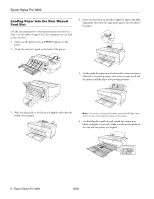
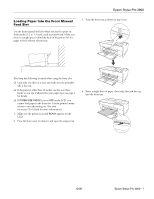
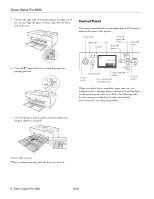
Epson Stylus Pro 3800 Loading Paper in the Auto Sheet Feeder Using the auto sheet feeder, you can load up to 120 sheets of plain paper and varying amounts of special media types. Refer to the table on page 4 to see how many sheets you can load for your paper type. Then follow these steps: 1. Make sure the printer is turned on and READY appears on the LCD. 2. Flip up the paper guide and pull out as many of its extensions as you need to support your paper size. 6. Squeeze the left edge guide and slide it to the left so that it is slightly wider than the width of your paper. 3. Press the front cover to release it and open the output tray. 7. If you are loading multiple sheets, thumb through the stack of paper, then gently tap it on a flat surface to even the edges. If the paper is curled, flatten it before you load it. 8. Load the paper against the right edge, face-up and short edge first. Insert it until it meets resistance. Slide the edge guide against the left side of the paper. 4. Use both hands to pull out and extend the output tray, lifting it slightly as you pull. Make sure the arrow marks on the tray and the printer are aligned. Note: If the paper skews when you're printing on large sheets, flip out the edge guide located on the right side of the auto sheet feeder to help the paper feed straight. 5. Pull out the output tray extensions for your paper size. 12/06 Epson Stylus Pro 3800 - 5
-
 1
1 -
 2
2 -
 3
3 -
 4
4 -
 5
5 -
 6
6 -
 7
7 -
 8
8 -
 9
9 -
 10
10 -
 11
11 -
12
-
13
-
14
-
15
-
16
-
17
-
18
 |
 |