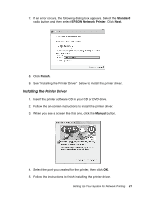
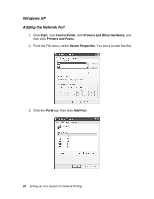
Epson Stylus Pro 7900 Proofing Edition Network Guide - Page 24
Standard, Generic Network Card, network status sheet, in the Printer Name or IP Address text box. Then
 |
View all Epson Stylus Pro 7900 Proofing Edition manuals
Add to My Manuals
Save this manual to your list of manuals |
Page 24 highlights
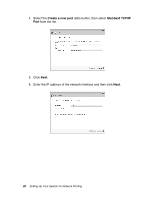
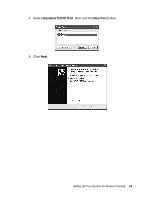
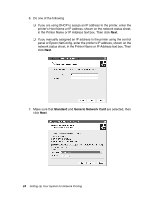
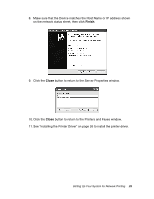
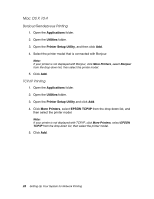
6. Do one of the following ❏ If you are using DHCP to assign an IP address to the printer, enter the printer's Host Name or IP address, shown on the network status sheet, in the Printer Name or IP Address text box. Then click Next. ❏ If you manually assigned an IP address to the printer using the control panel or Epson NetConfig, enter the printer's IP address, shown on the network status sheet, in the Printer Name or IP Address text box. Then click Next. 7. Make sure that Standard and Generic Network Card are selected, then click Next. 24 Setting Up Your System for Network Printing
-
 1
1 -
2
-
3
-
4
-
5
-
6
-
7
-
8
-
9
-
10
-
11
-
12
-
13
-
14
-
15
-
16
-
17
-
18
-
 19
19 -
 20
20 -
 21
21 -
 22
22 -
 23
23 -
 24
24 -
 25
25 -
 26
26 -
 27
27 -
 28
28 -
 29
29 -
30
-
31
-
32
-
33
-
34
-
35
-
36
-
37
-
38
-
39
-
40
-
41
-
42
-
43
 |
 |

24
Setting Up Your System for Network Printing
6.
Do one of the following
❏
If you are using DHCP to assign an IP address to the printer, enter the
printer’s Host Name or IP address, shown on the network status sheet,
in the Printer Name or IP Address text box. Then click
Next
.
❏
If you manually assigned an IP address to the printer using the control
panel or Epson NetConfig, enter the printer’s IP address, shown on the
network status sheet, in the Printer Name or IP Address text box. Then
click
Next
.
7.
Make sure that
Standard
and
Generic Network Card
are selected, then
click
Next
.