Epson Stylus Pro 9000 User Manual - Color Calibration - Page 19
properly connected to your computer., You are now ready to install the utility software. See the next
 |
View all Epson Stylus Pro 9000 manuals
Add to My Manuals
Save this manual to your list of manuals |
Page 19 highlights
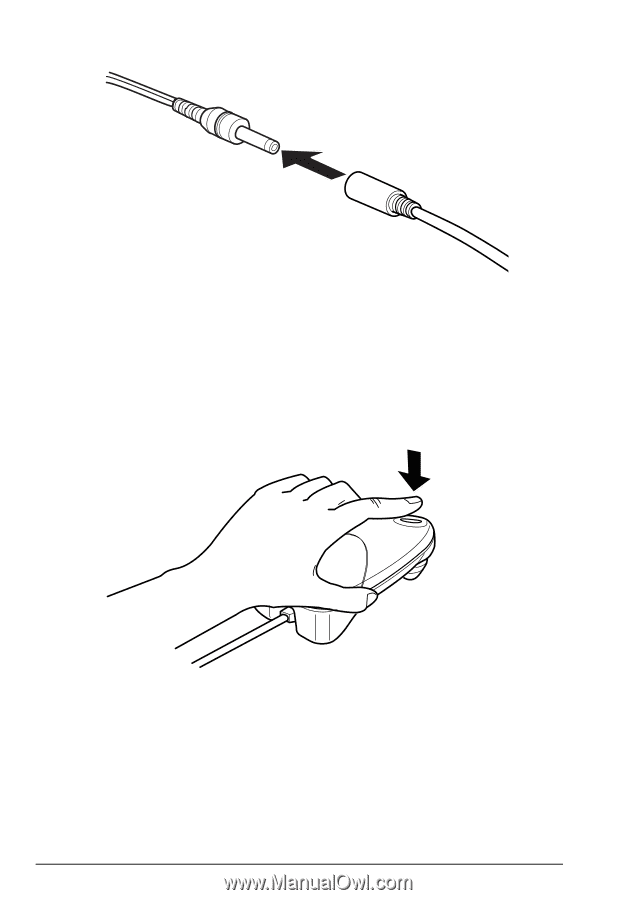
4. Connect the DC connector to the AC adapter. 5. Insert the AC adapter into a properly grounded outlet. 6. Press the measure button at the top of the calibrator. The sensor tip of the calibrator flashes light if the calibrator is properly connected to your computer. Note: If the sensor tip does not flash light, make sure the outlet you are using is working properly. You are now ready to install the utility software. See the next section for instructions. 2-4 Setting up Your Color Calibrator
-
 1
1 -
2
-
3
-
4
-
5
-
6
-
7
-
8
-
9
-
10
-
11
-
12
-
13
-
 14
14 -
 15
15 -
 16
16 -
 17
17 -
 18
18 -
 19
19 -
 20
20 -
 21
21 -
 22
22 -
 23
23 -
 24
24 -
25
-
26
-
27
-
28
-
29
-
30
-
31
-
32
-
33
-
34
-
35
-
36
-
37
-
38
-
39
-
40
-
41
-
42
-
43
-
44
 |
 |
2-4
Setting up Your Color Calibrator
4.
Connect the DC connector to the AC adapter.
5.
Insert the AC adapter into a properly grounded outlet.
6.
Press the measure button at the top of the calibrator. The
sensor tip of the calibrator flashes light if the calibrator is
properly connected to your computer.
Note:
If the sensor tip does not flash light, make sure the outlet you are
using is working properly.
You are now ready to install the utility software. See the next
section for instructions.