Epson Stylus Pro 9000 User Manual - Color Calibration - Page 35
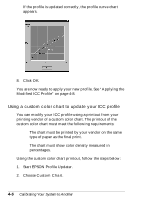
Place the sensor tip on the color pad's white circle. Repeat step, window changes
 |
View all Epson Stylus Pro 9000 manuals
Add to My Manuals
Save this manual to your list of manuals |
Page 35 highlights
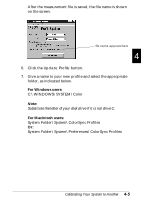
5. Click the Calibration button. 6. Place the color pad packed with your calibrator on a flat surface. Place the sensor tip of the calibrator on the color pad's black circle. Note: Make sure the sensor tip is placed flat and firmly on the pad. 7. Click the Calibration button, or press the measure button at the top of the calibrator to measure the color. 4 Note: Do not measure the pad under strong light or direct daylight as this may render the measurement inaccurate. After you finish measuring the black circle, the message in the window changes to Please calibrate white point. 8. Place the sensor tip on the color pad's white circle. Repeat step 7 to measure the color. 9. After you finish measuring the white circle, click the Done button. You're now ready to measure the color chart. See the next section for instructions. Calibrating Your System to Another 4-3
-
 1
1 -
2
-
3
-
4
-
5
-
6
-
7
-
8
-
9
-
10
-
11
-
12
-
13
-
14
-
15
-
16
-
17
-
18
-
19
-
20
-
21
-
22
-
23
-
24
-
25
-
26
-
27
-
28
-
29
-
 30
30 -
 31
31 -
 32
32 -
 33
33 -
 34
34 -
 35
35 -
 36
36 -
 37
37 -
 38
38 -
 39
39 -
 40
40 -
41
-
42
-
43
-
44
 |
 |