Epson Stylus Scan 2500 User Manual - Page 80
Color Adjustment button., Tone Correction
 |
View all Epson Stylus Scan 2500 manuals
Add to My Manuals
Save this manual to your list of manuals |
Page 80 highlights
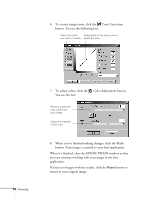
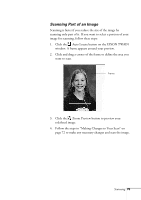
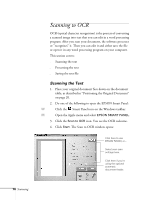
6. To correct image tones, click the Tone Correction button. You see the following box: Select the colors Drag points on the tone curve to you want to modify. adjust the tone. 74 Scanning 7. To adjust colors, click the Color Adjustment button. You see this box: Remove unwanted color casts from your image. Adjust the intensity of the color. 8. When you've finished making changes, click the Scan button. Your image is scanned to your host application. When it's finished, close the EPSON TWAIN window so that you can continue working with your image in the host application. If you're not happy with the results, click the Reset button to return to your original image.
-
 1
1 -
2
-
3
-
4
-
5
-
6
-
7
-
8
-
9
-
10
-
11
-
12
-
13
-
14
-
15
-
16
-
17
-
18
-
19
-
20
-
21
-
22
-
23
-
24
-
25
-
26
-
27
-
28
-
29
-
30
-
31
-
32
-
33
-
34
-
35
-
36
-
37
-
38
-
39
-
40
-
41
-
42
-
43
-
44
-
45
-
46
-
47
-
48
-
49
-
50
-
51
-
52
-
53
-
54
-
55
-
56
-
57
-
58
-
59
-
60
-
61
-
62
-
63
-
64
-
65
-
66
-
67
-
68
-
69
-
70
-
71
-
72
-
73
-
74
-
 75
75 -
 76
76 -
 77
77 -
 78
78 -
 79
79 -
 80
80 -
 81
81 -
 82
82 -
 83
83 -
 84
84 -
 85
85 -
86
-
87
-
88
-
89
-
90
-
91
-
92
-
93
-
94
-
95
-
96
-
97
-
98
-
99
-
100
-
101
-
102
-
103
-
104
-
105
-
106
-
107
-
108
-
109
-
110
-
111
-
112
-
113
-
114
-
115
-
116
-
117
-
118
-
119
-
120
-
121
-
122
-
123
-
124
-
125
-
126
-
127
-
128
-
129
-
130
-
131
-
132
-
133
-
134
-
135
-
136
-
137
-
138
-
139
-
140
-
141
-
142
-
143
-
144
-
145
-
146
-
147
-
148
-
149
-
150
-
151
-
152
-
153
-
154
-
155
-
156
-
157
-
158
-
159
-
160
-
161
-
162
-
163
-
164
-
165
-
166
-
167
-
168
-
169
-
170
-
171
-
172
-
173
-
174
-
175
-
176
-
177
-
178
-
179
-
180
 |
 |
74
Scanning
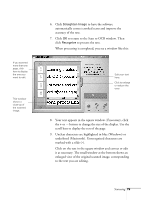
6.
To correct image tones, click the
Tone Correction
button. You see the following box:
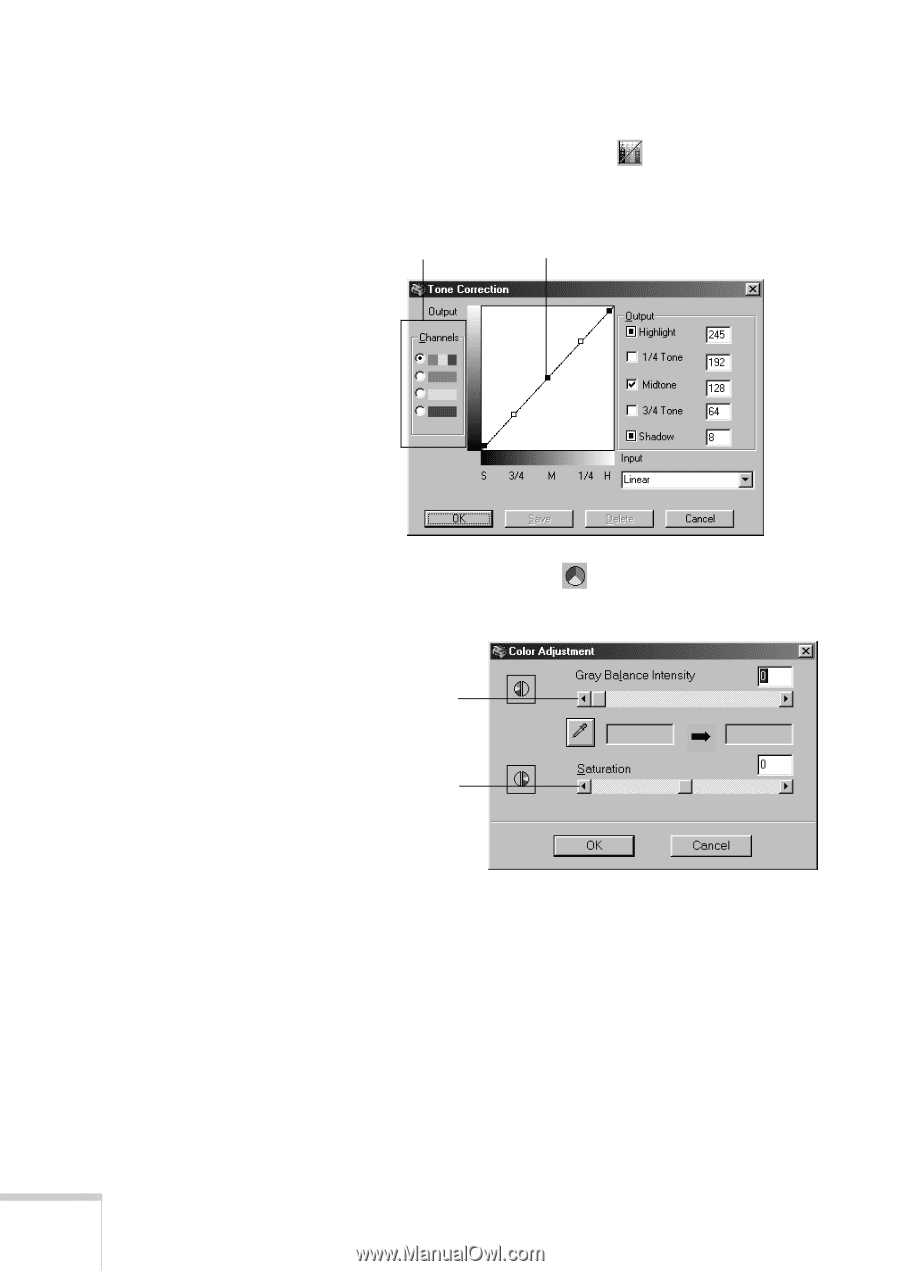
7.
To adjust colors, click the
Color Adjustment button.
You see this box:
8.
When you’ve finished making changes, click the
Scan
button. Your image is scanned to your host application.
When it’s finished, close the EPSON TWAIN window so that
you can continue working with your image in the host
application.
If you’re not happy with the results, click the
Reset
button to
return to your original image.
Select the colors
you want to modify.
Drag points on the tone curve to
adjust the tone.
Remove unwanted
color casts from
your image.
Adjust the intensity
of the color.