Epson SureColor S80600 Quick Reference Guide - Page 30
Auto Head Maintenance, User's Guide
 |
View all Epson SureColor S80600 manuals
Add to My Manuals
Save this manual to your list of manuals |
Page 30 highlights
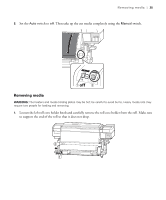
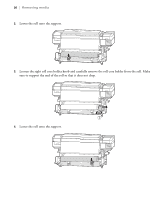
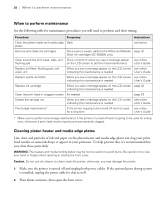
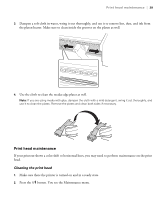
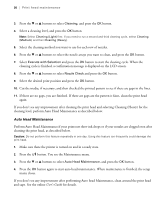
30 | Print head maintenance 3. Press the d or u buttons to select Cleaning, and press the OK button. 4. Select a cleaning level, and press the OK button. Note: Select Cleaning (Light) first. If you need to run a second and third cleaning cycle, select Cleaning (Medium) and then Cleaning (Heavy). 5. Select the cleaning method you want to use for each row of nozzles. 6. Press the d or u buttons to select the nozzle arrays you want to clean, and press the OK button. 7. Select Execute with Selection and press the OK button to start the cleaning cycle. When the cleaning cycle is finished, a confirmation message is displayed on the LCD screen. 8. Press the d or u buttons to select Nozzle Check and press the OK button. 9. Select the desired print position and press the OK button. 10. Cut the media, if necessary, and then checked the printed pattern to see if there are gaps in the lines. 11. If there are no gaps, you are finished. If there are gaps are the pattern is faint, clean the print head again. If you don't see any improvement after cleaning the print head and selecting Cleaning (Heavy) for the cleaning level, perform Auto Head Maintenance as described below. Auto Head Maintenance Perform Auto Head Maintenance if your printouts show ink drops or if your nozzles are clogged even after cleaning the print head, as described below. Caution: Do not perform this feature repeatedly in one day. Using this feature too frequently could damage the print head. 1. Make sure there the printer is turned on and in a ready state. 2. Press the # button. You see the Maintenance menu. 3. Press the d or u buttons to select Auto Head Maintenance, and press the OK button. 4. Press the OK button again to start auto head maintenance. When maintenance is finished, the setup menu closes. If you don't see any improvement after performing Auto head Maintenance, clean around the print head and caps. See the online User's Guide for details.
-
 1
1 -
2
-
3
-
4
-
5
-
6
-
7
-
8
-
9
-
10
-
11
-
12
-
13
-
14
-
15
-
16
-
17
-
18
-
19
-
20
-
21
-
22
-
23
-
24
-
 25
25 -
 26
26 -
 27
27 -
 28
28 -
 29
29 -
 30
30 -
 31
31 -
 32
32 -
 33
33 -
 34
34 -
 35
35 -
36
-
37
-
38
-
39
-
40
 |
 |
