Epson WorkForce 315 Quick Guide - Page 42
Maintaining Your WorkForce 310 Series, Checking the Print Head Nozzles - ink for
 |
View all Epson WorkForce 315 manuals
Add to My Manuals
Save this manual to your list of manuals |
Page 42 highlights
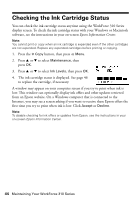
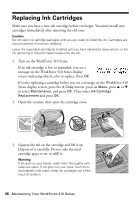
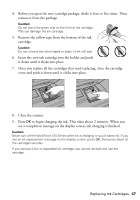
Maintaining Your WorkForce 310 Series Follow the instructions in this chapter for checking and cleaning the print head nozzles and replacing ink cartridges. To align the print head, if necessary, see your on-screen Epson Information Center. Checking the Print Head Nozzles If your printouts are faint or have gaps in them, some of the nozzles in the print head may be clogged or ink may be running low in one or more of the ink cartridges. Follow the steps below to check the print head nozzles. 1. Load letter-size plain paper in the sheet feeder. 2. Press the r Copy button, then press x Menu. 3. Press u or d to select Maintenance, then press OK. 4. Press u or d to select Nozzle Check, then press the x Color button. 5. Check the nozzle check pattern that prints to see if there are gaps in the lines. Nozzles are clean Nozzles need cleaning Note: If Auto Answer is turned on, press OK to continue. 6. If there are no gaps, the print head is clean and you can continue printing. If there are gaps or the pattern is faint, clean the print head. See page 43 for details. 42 Maintaining Your WorkForce 310 Series
-
 1
1 -
2
-
3
-
4
-
5
-
6
-
7
-
8
-
9
-
10
-
11
-
12
-
13
-
14
-
15
-
16
-
17
-
18
-
19
-
20
-
21
-
22
-
23
-
24
-
25
-
26
-
27
-
28
-
29
-
30
-
31
-
32
-
33
-
34
-
35
-
36
-
 37
37 -
 38
38 -
 39
39 -
 40
40 -
 41
41 -
 42
42 -
 43
43 -
 44
44 -
 45
45 -
 46
46 -
 47
47 -
48
-
49
-
50
-
51
-
52
-
53
-
54
-
55
-
56
-
57
-
58
-
59
-
60
-
61
-
62
-
63
-
64
 |
 |
